

Watch the video or scroll down for step-by-step instructions
Tiers: All
Step-by-step instructions
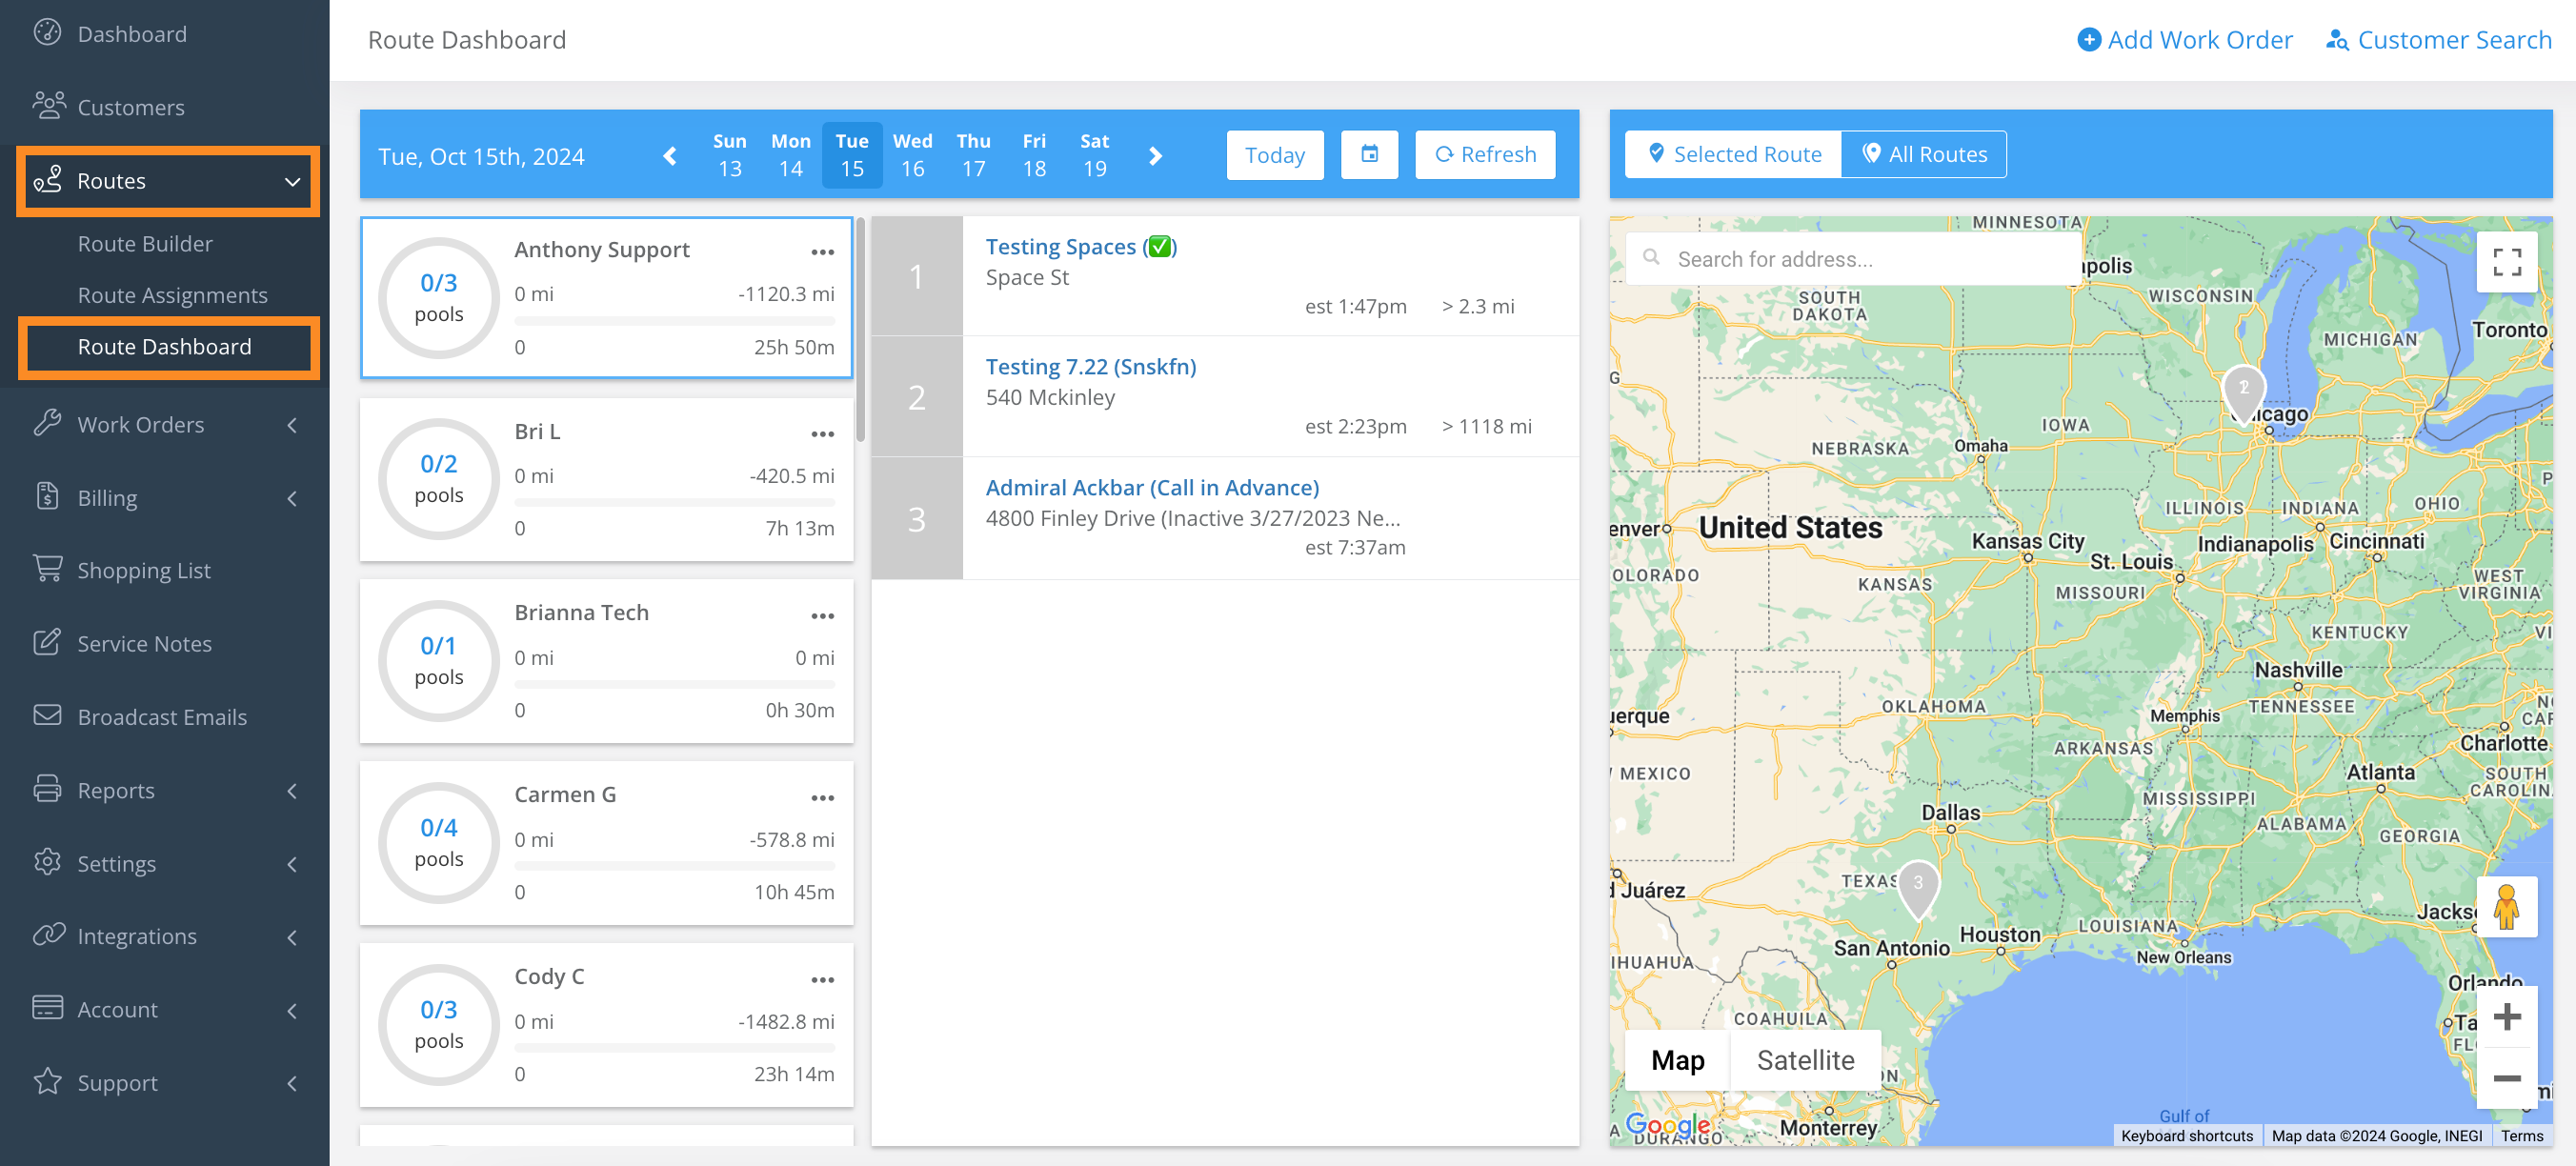
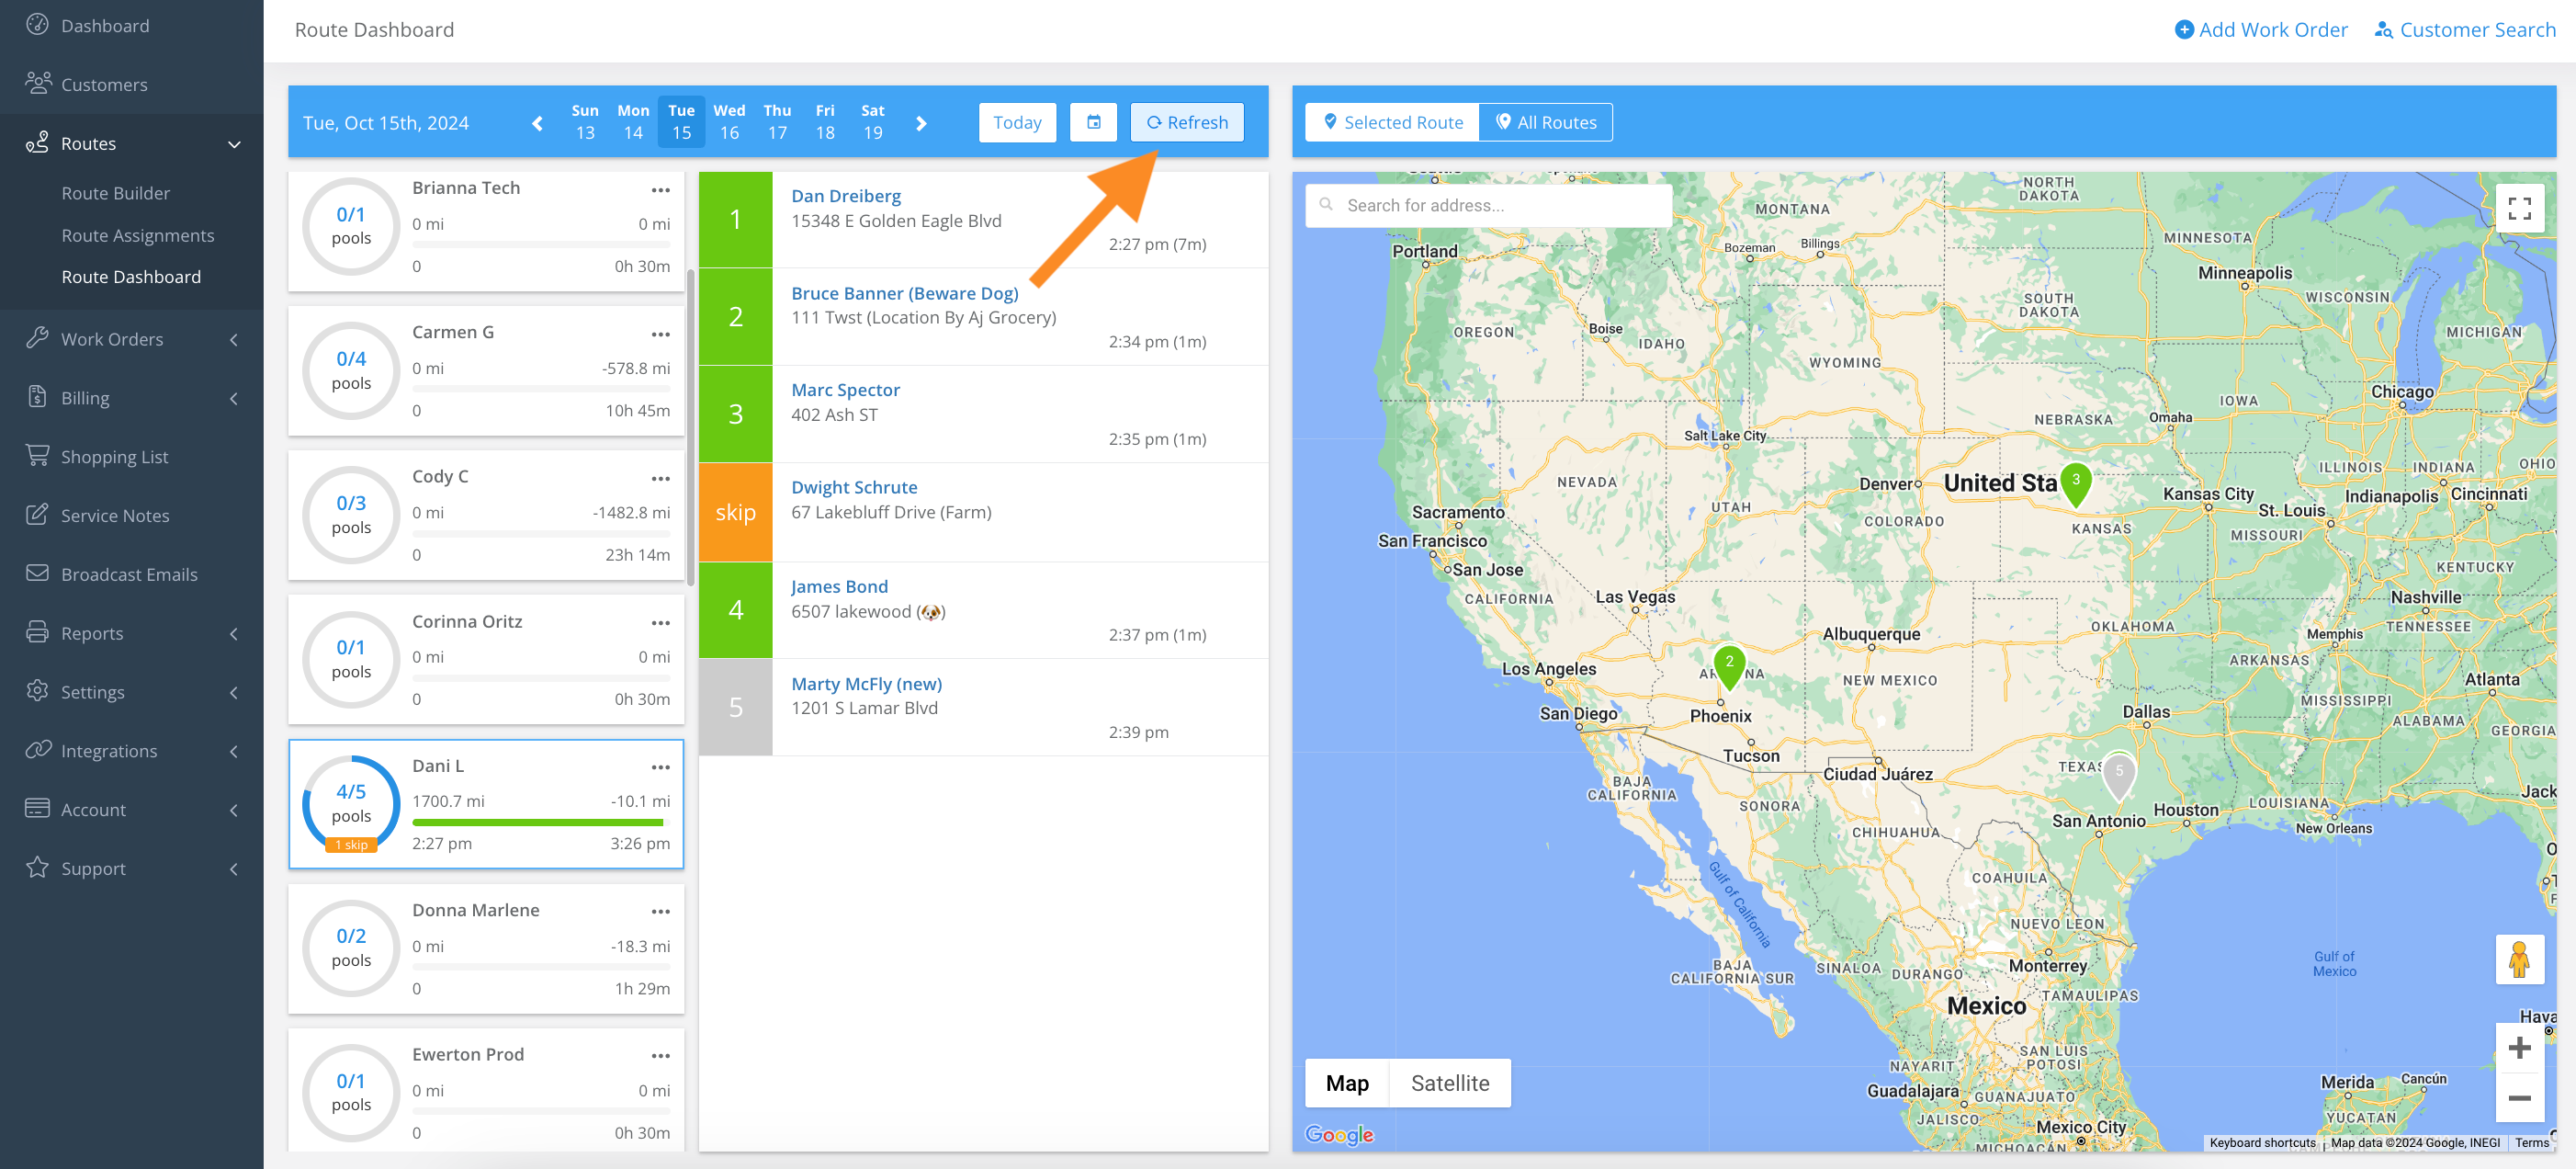
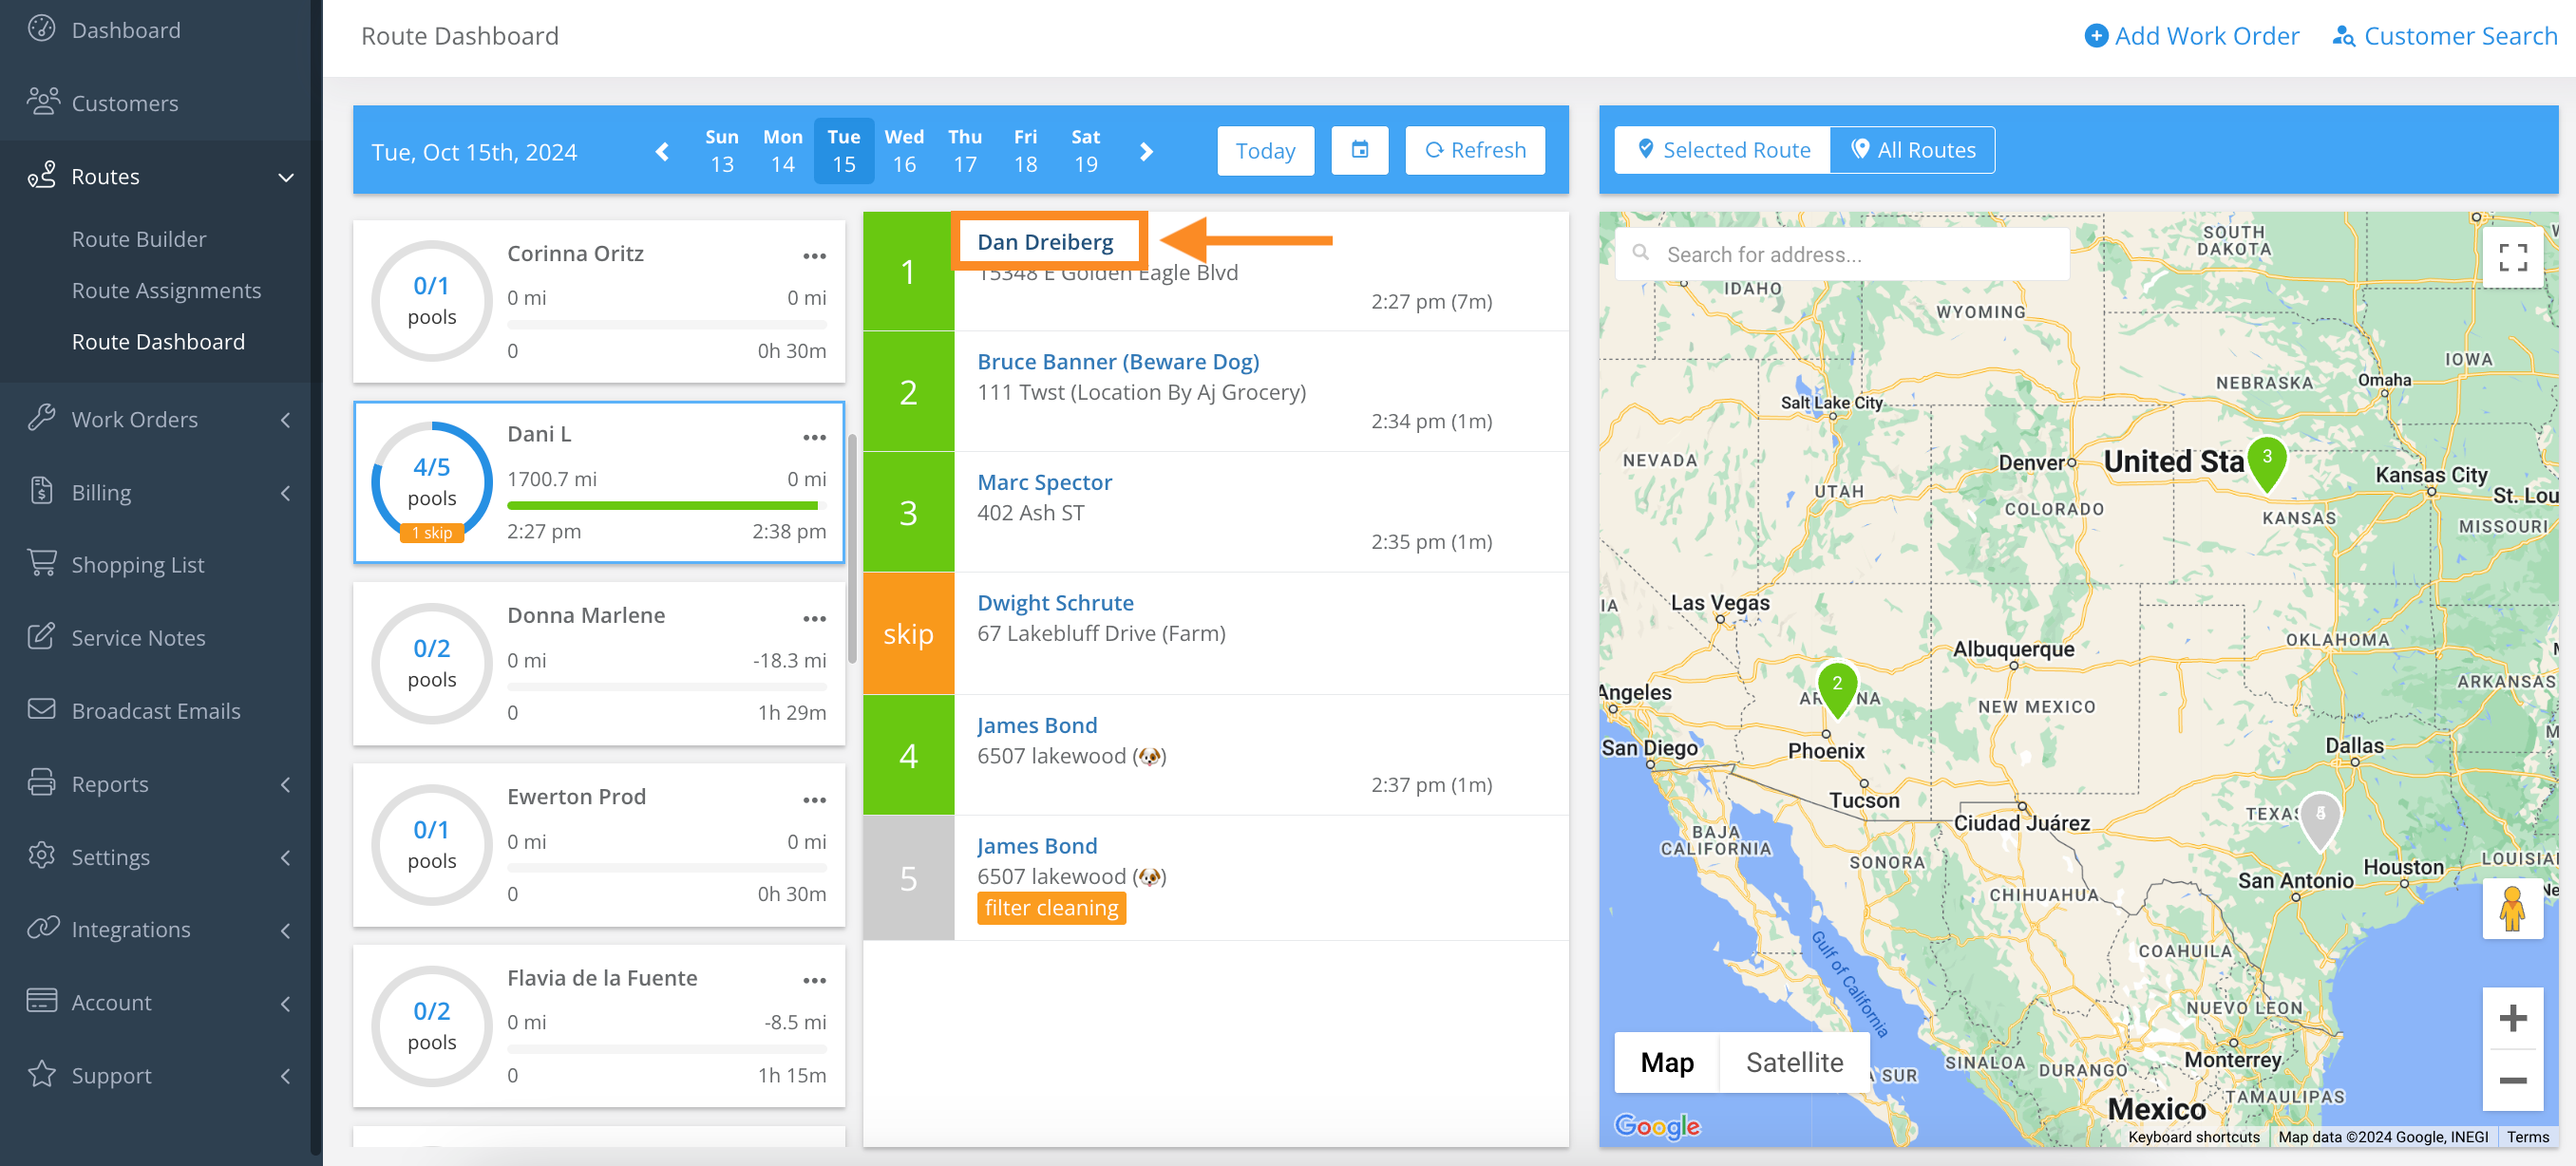
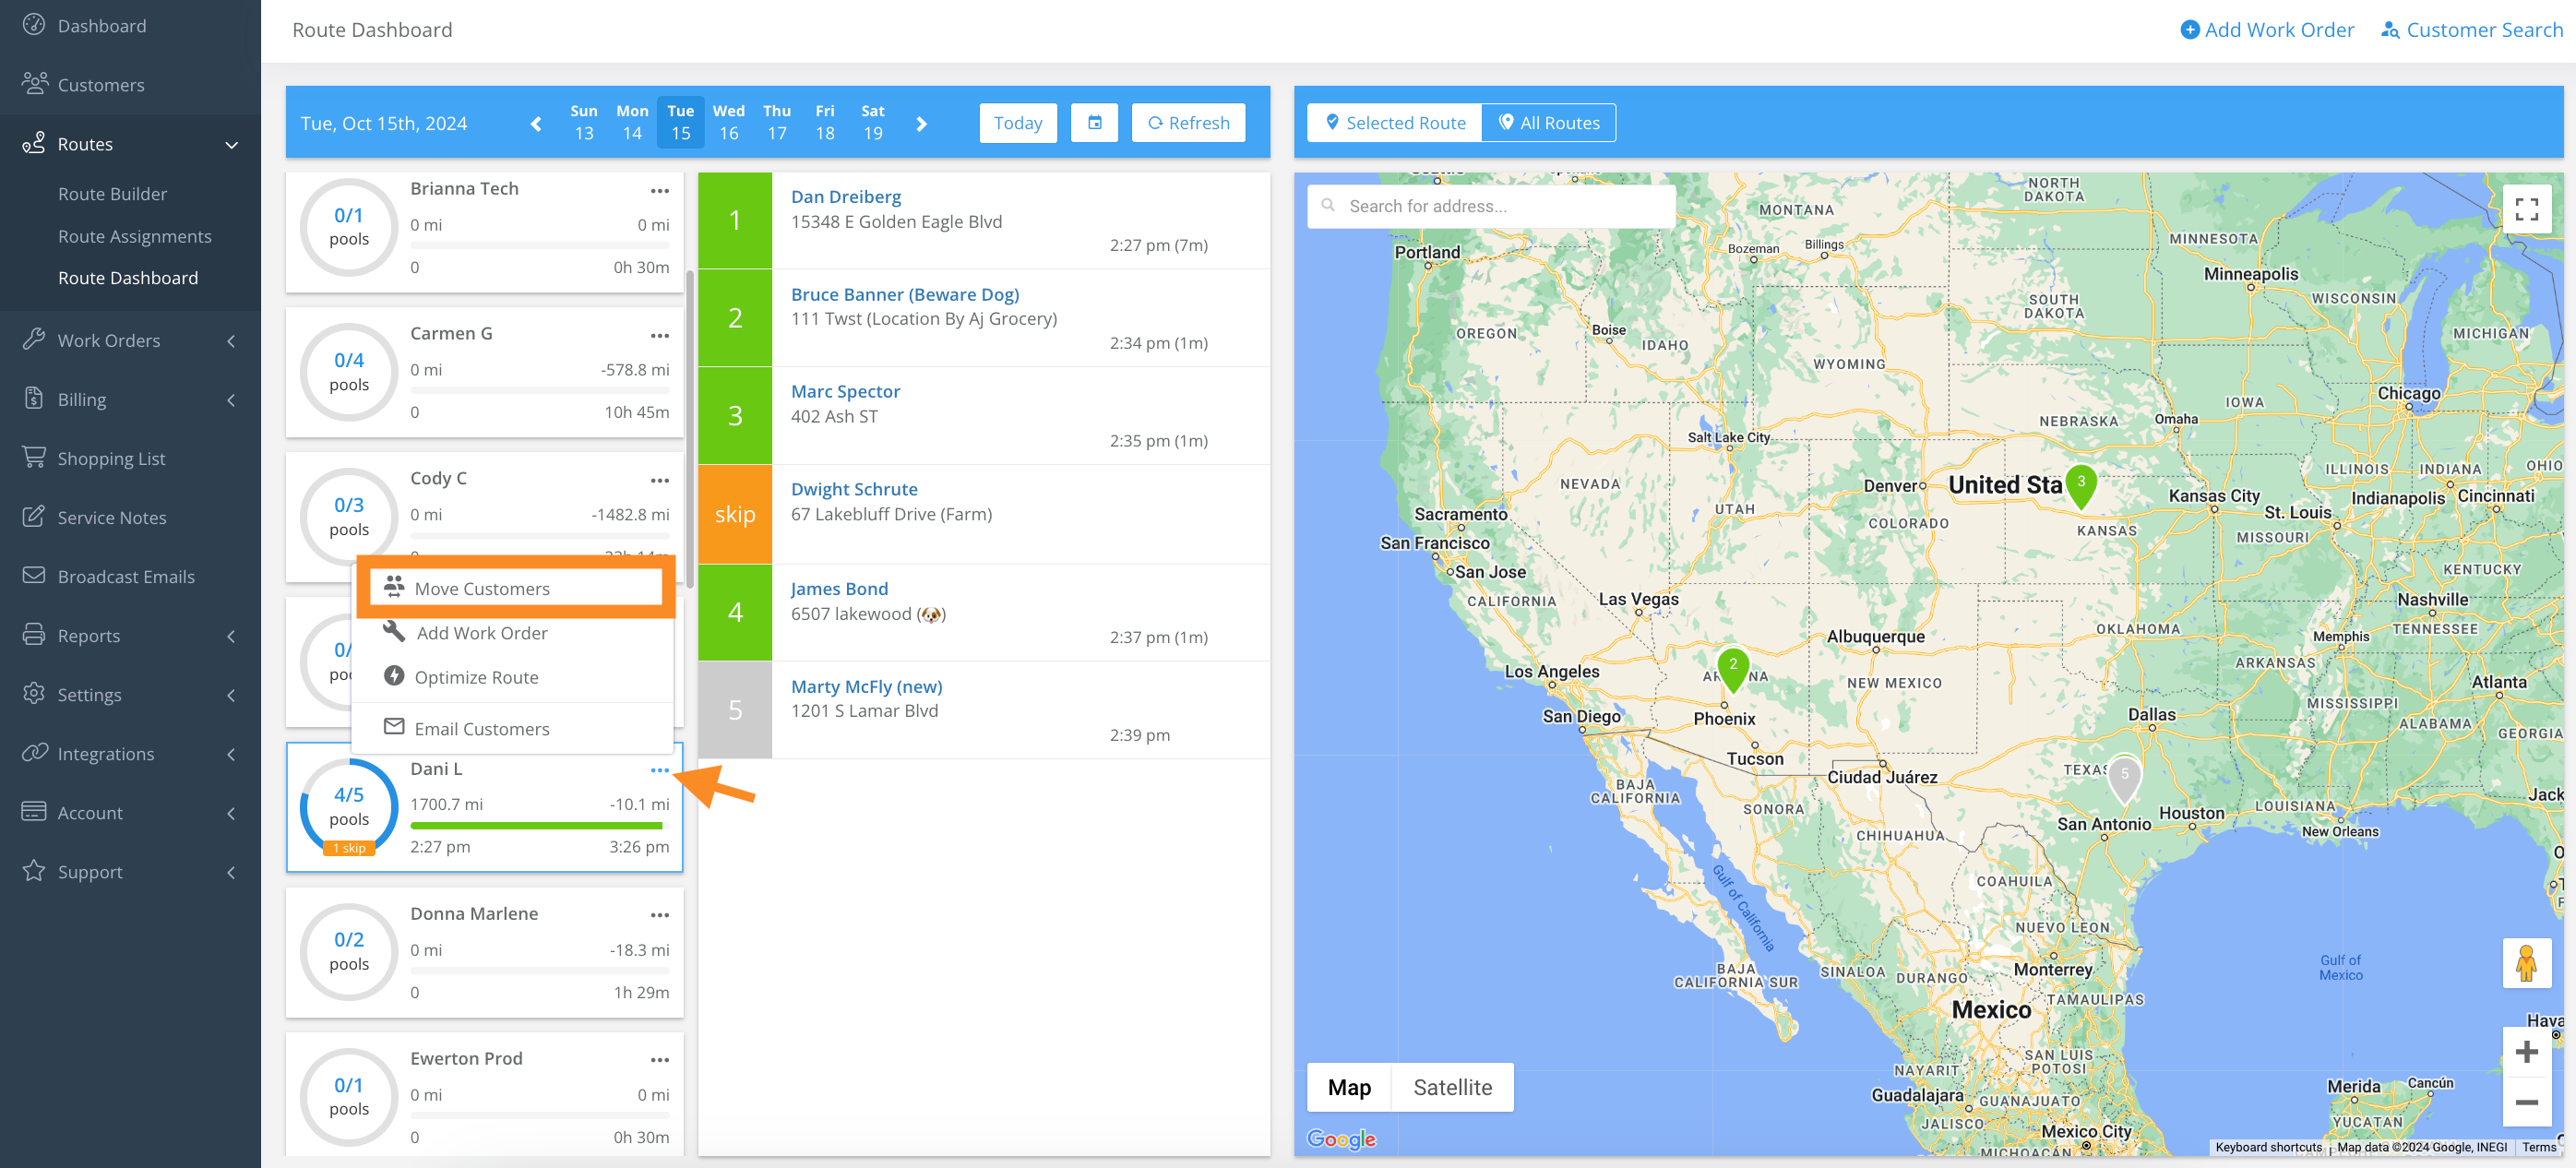
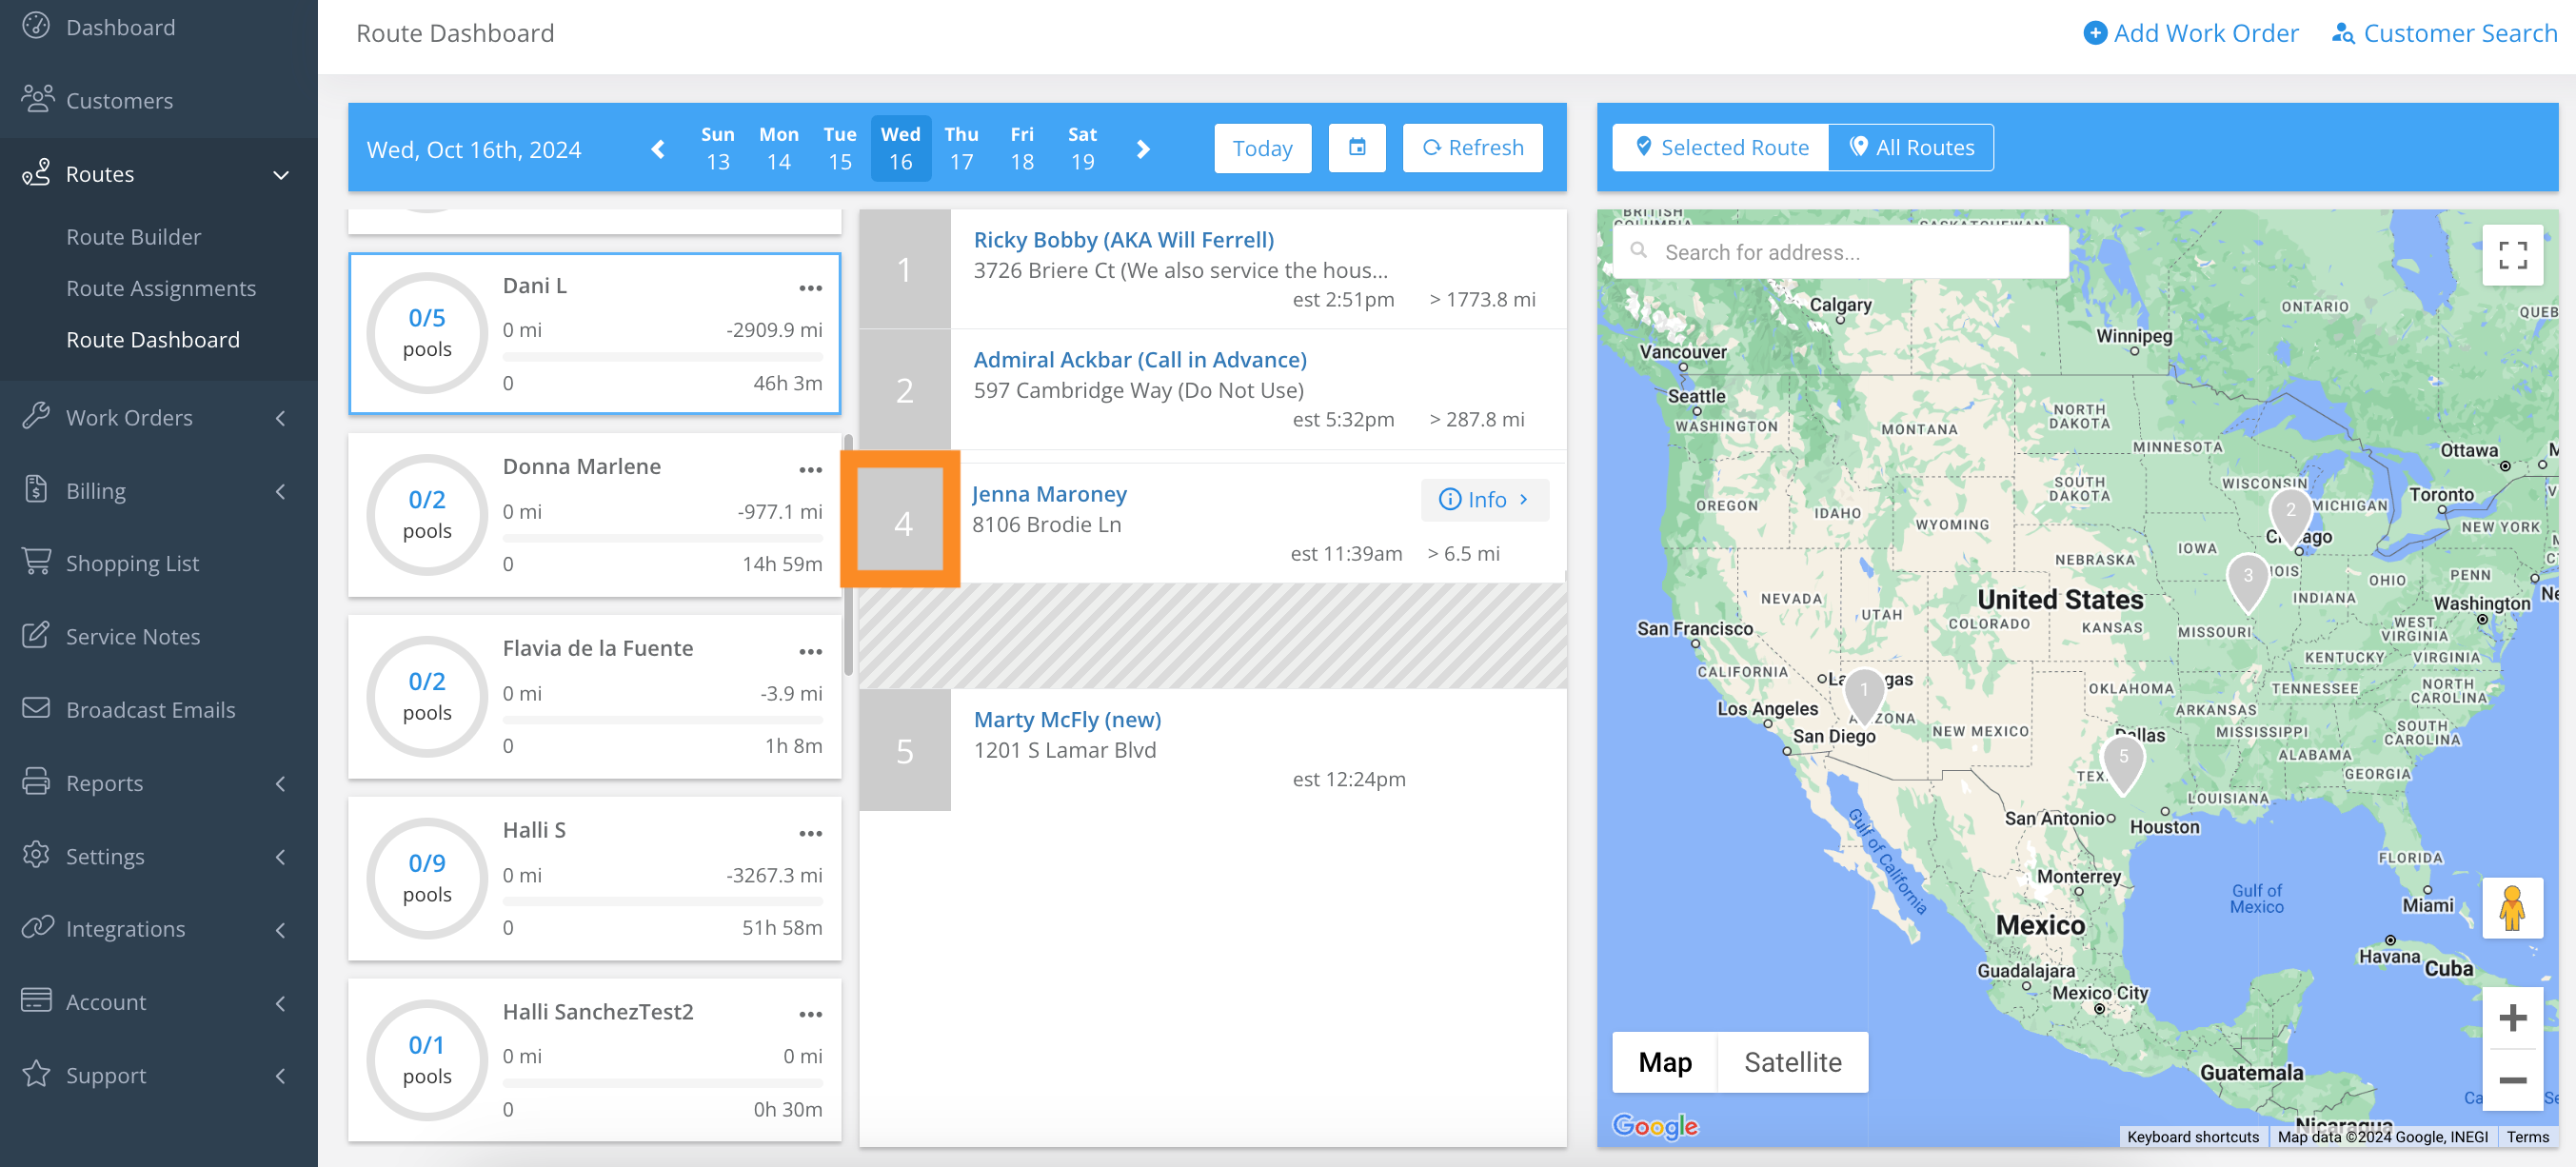
1. Select Routes > Route Dashboard.
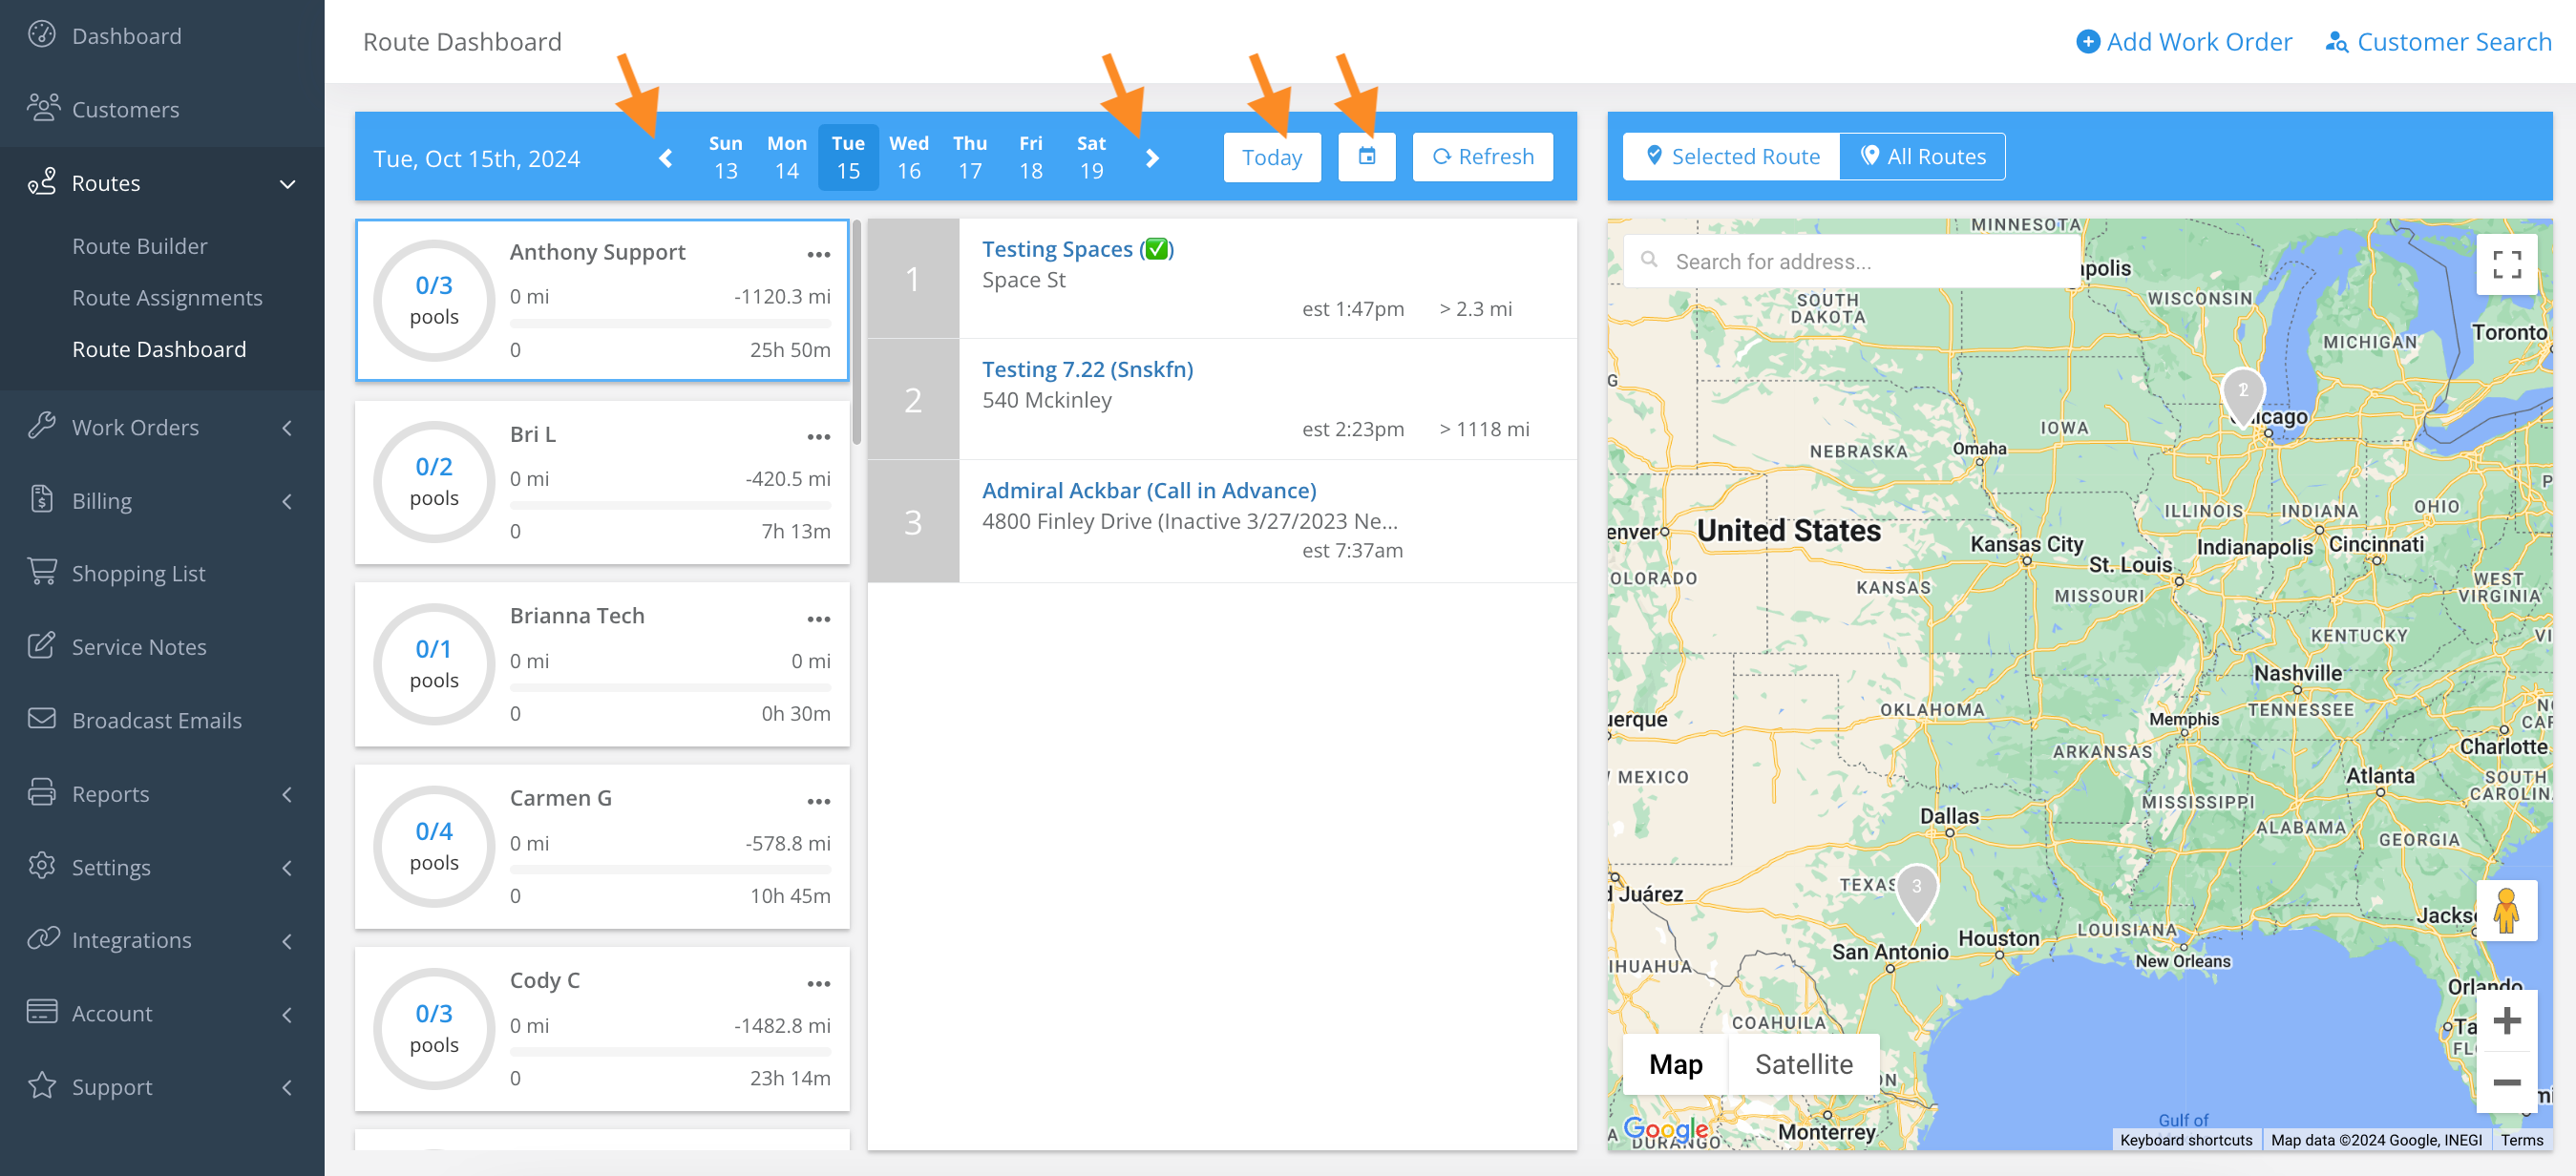
2. Click the arrows, or calendar icon, to navigate and view service for the day/week.
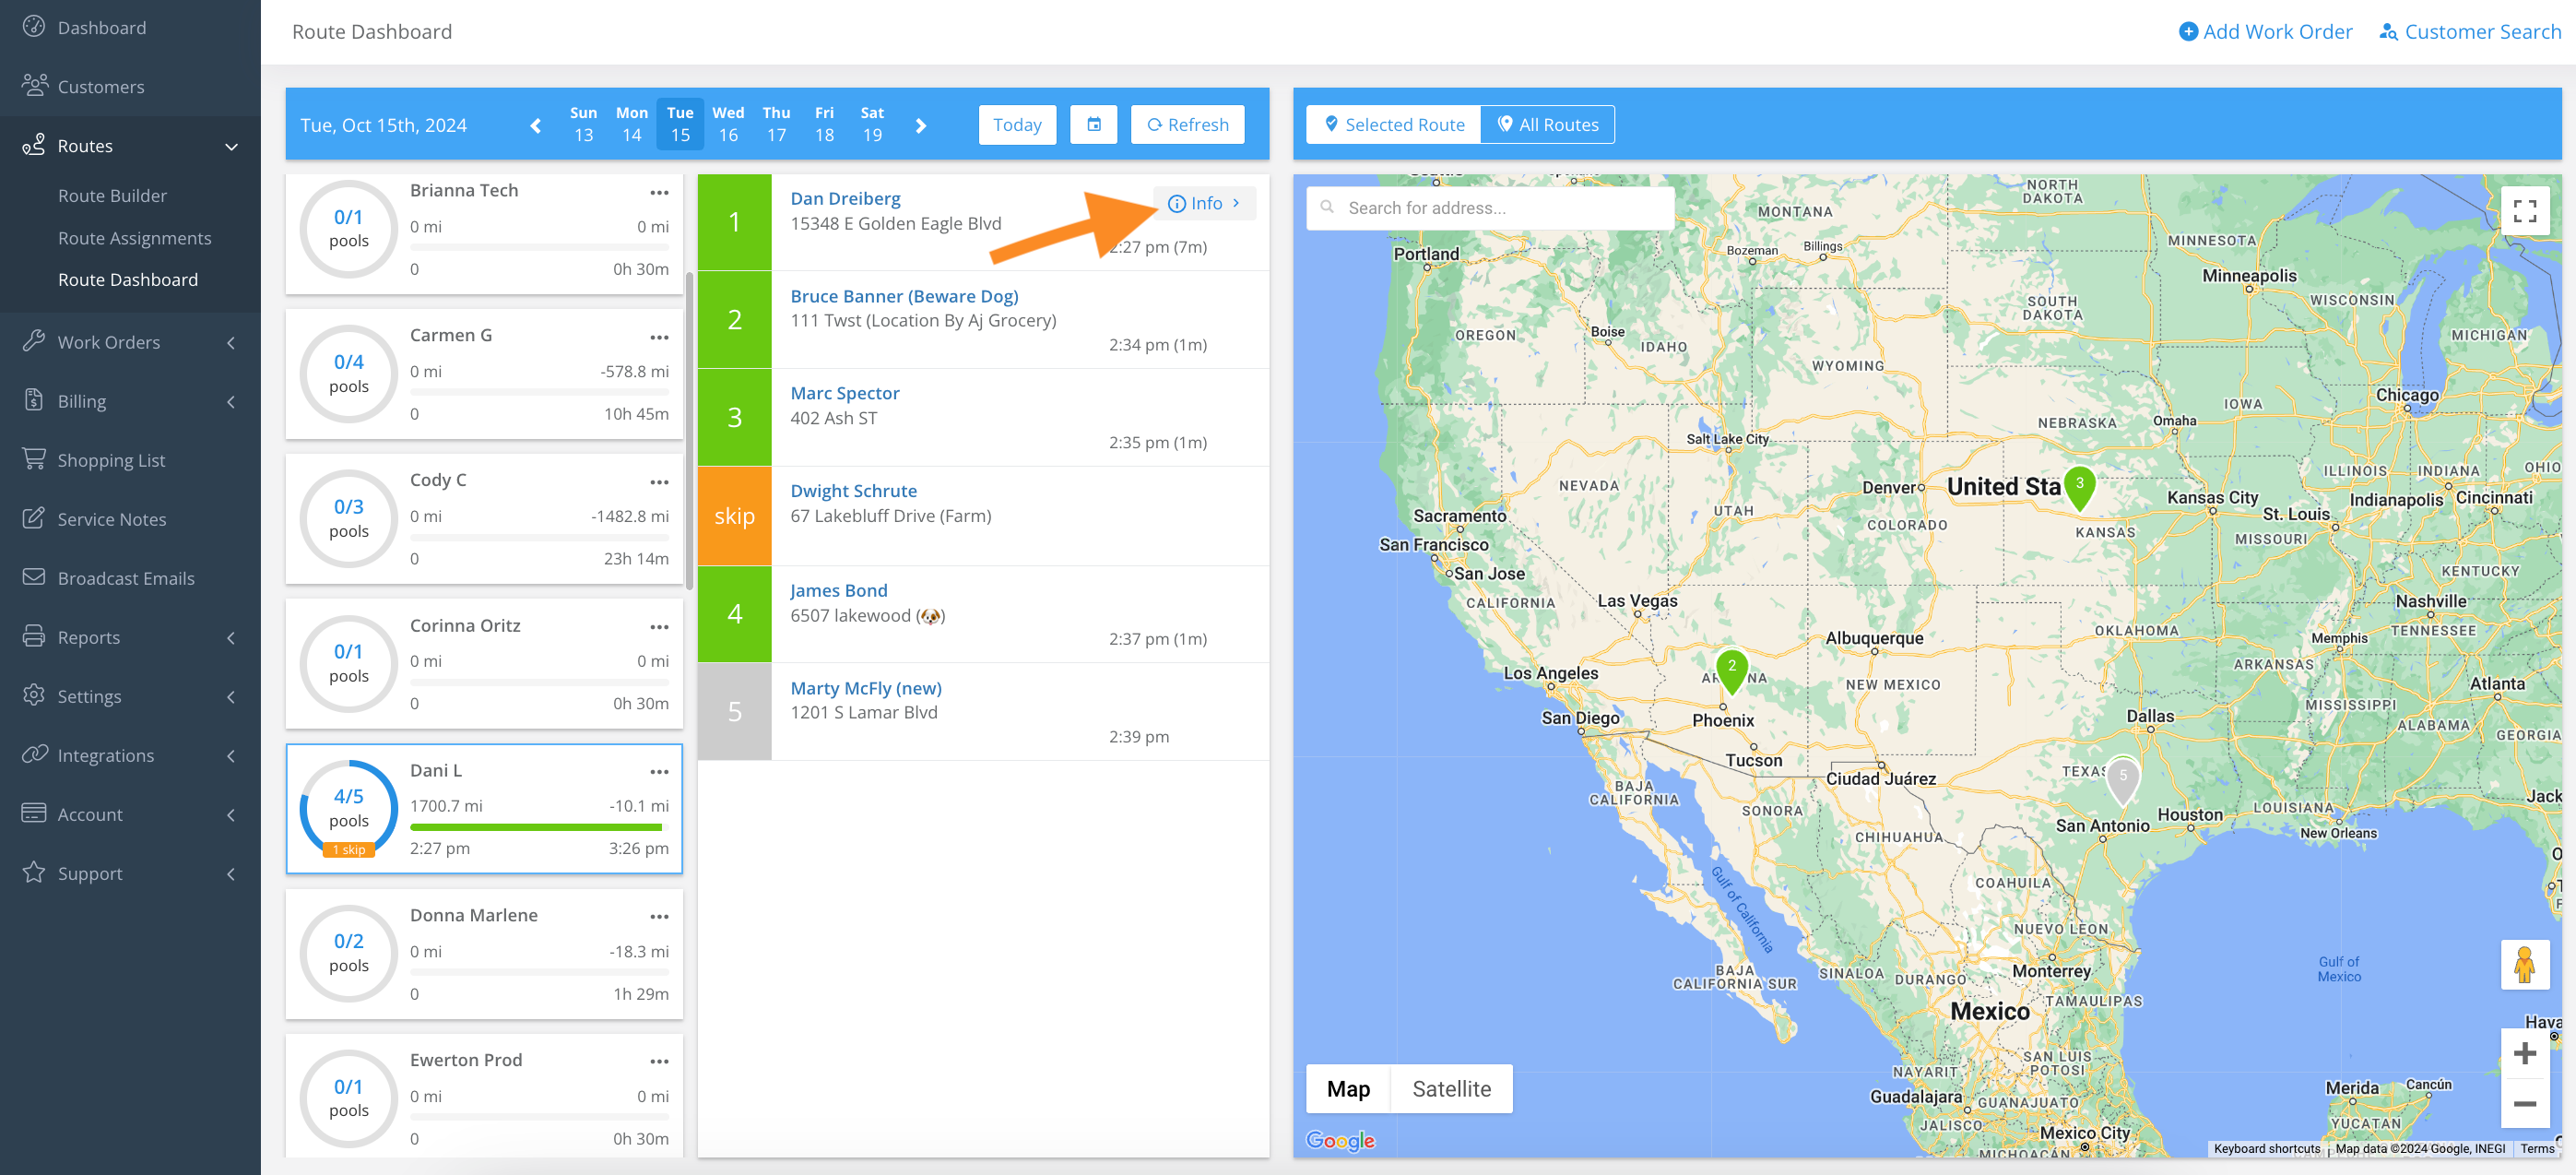
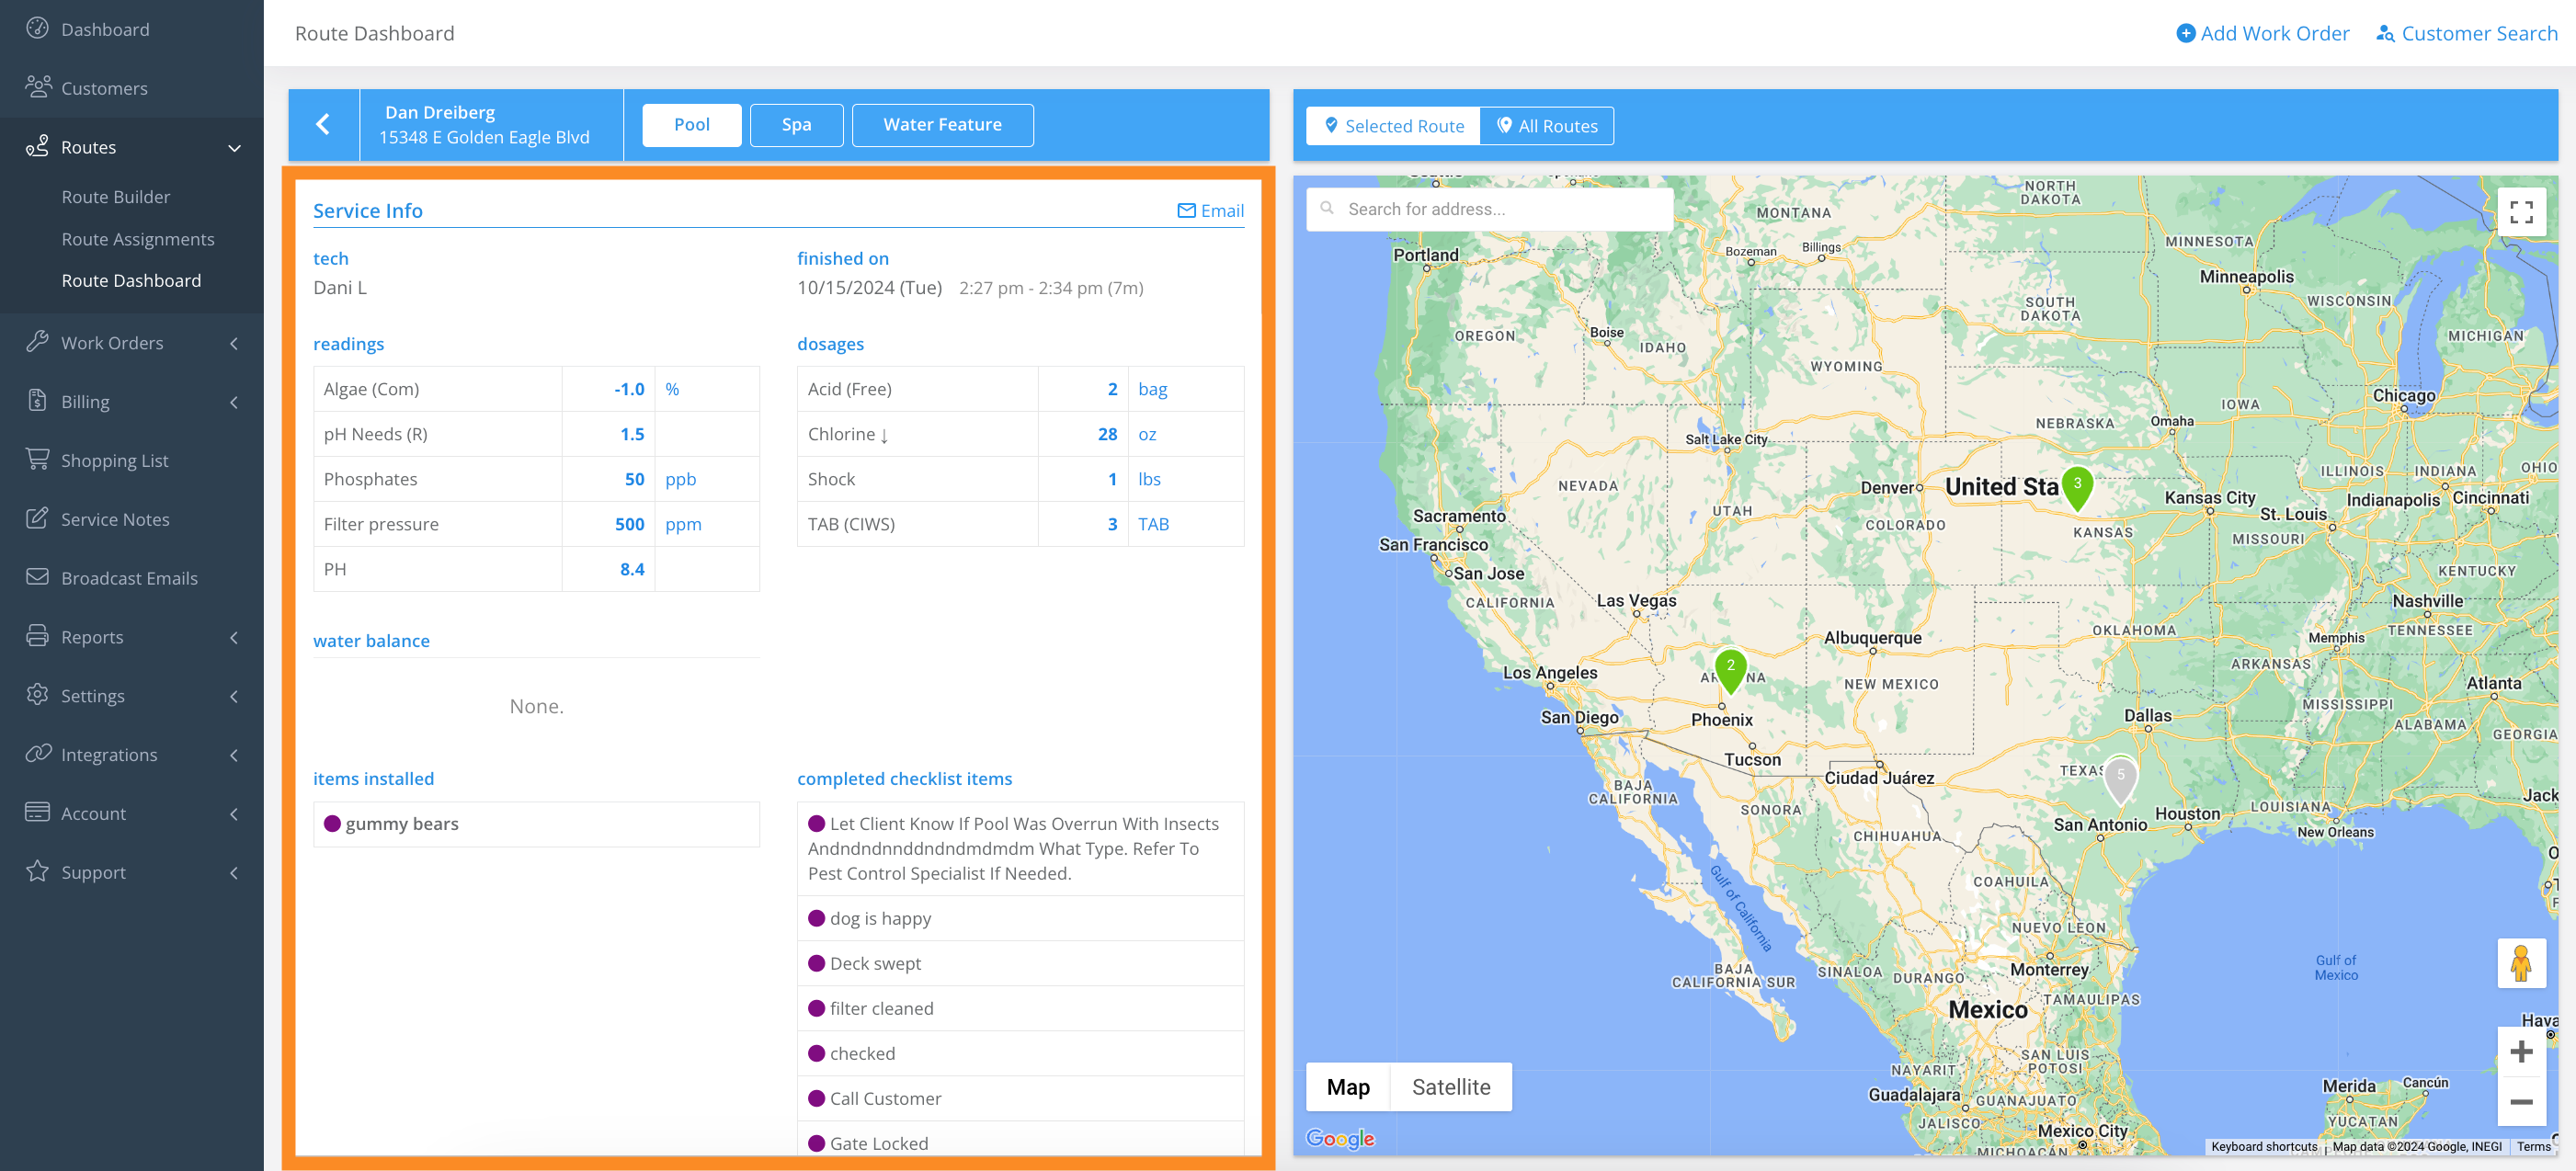
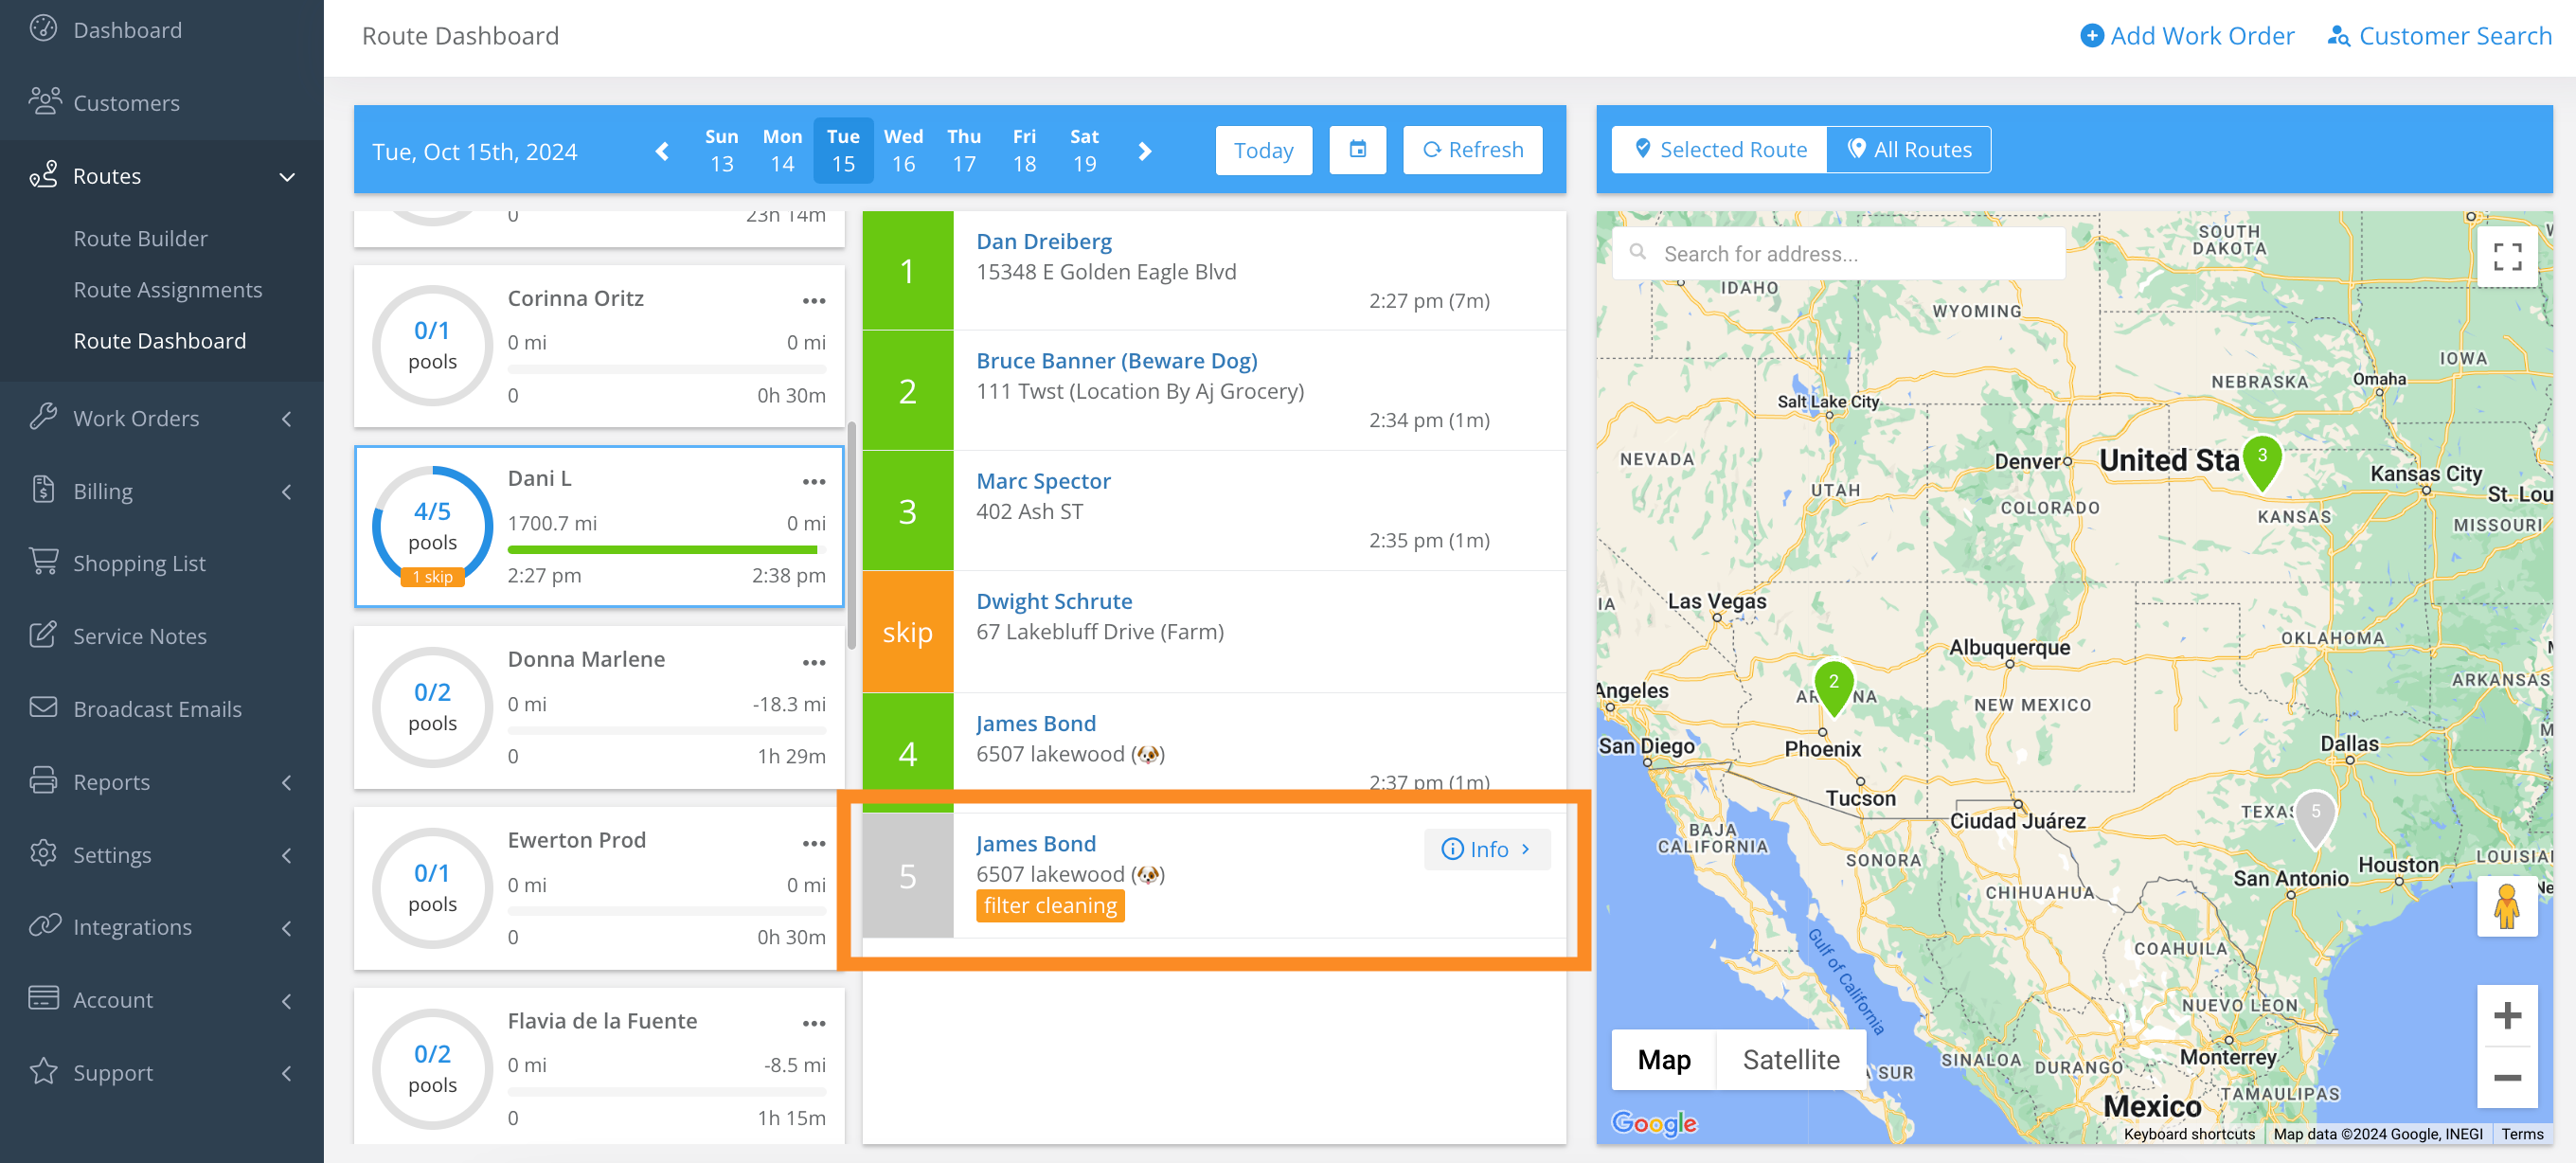
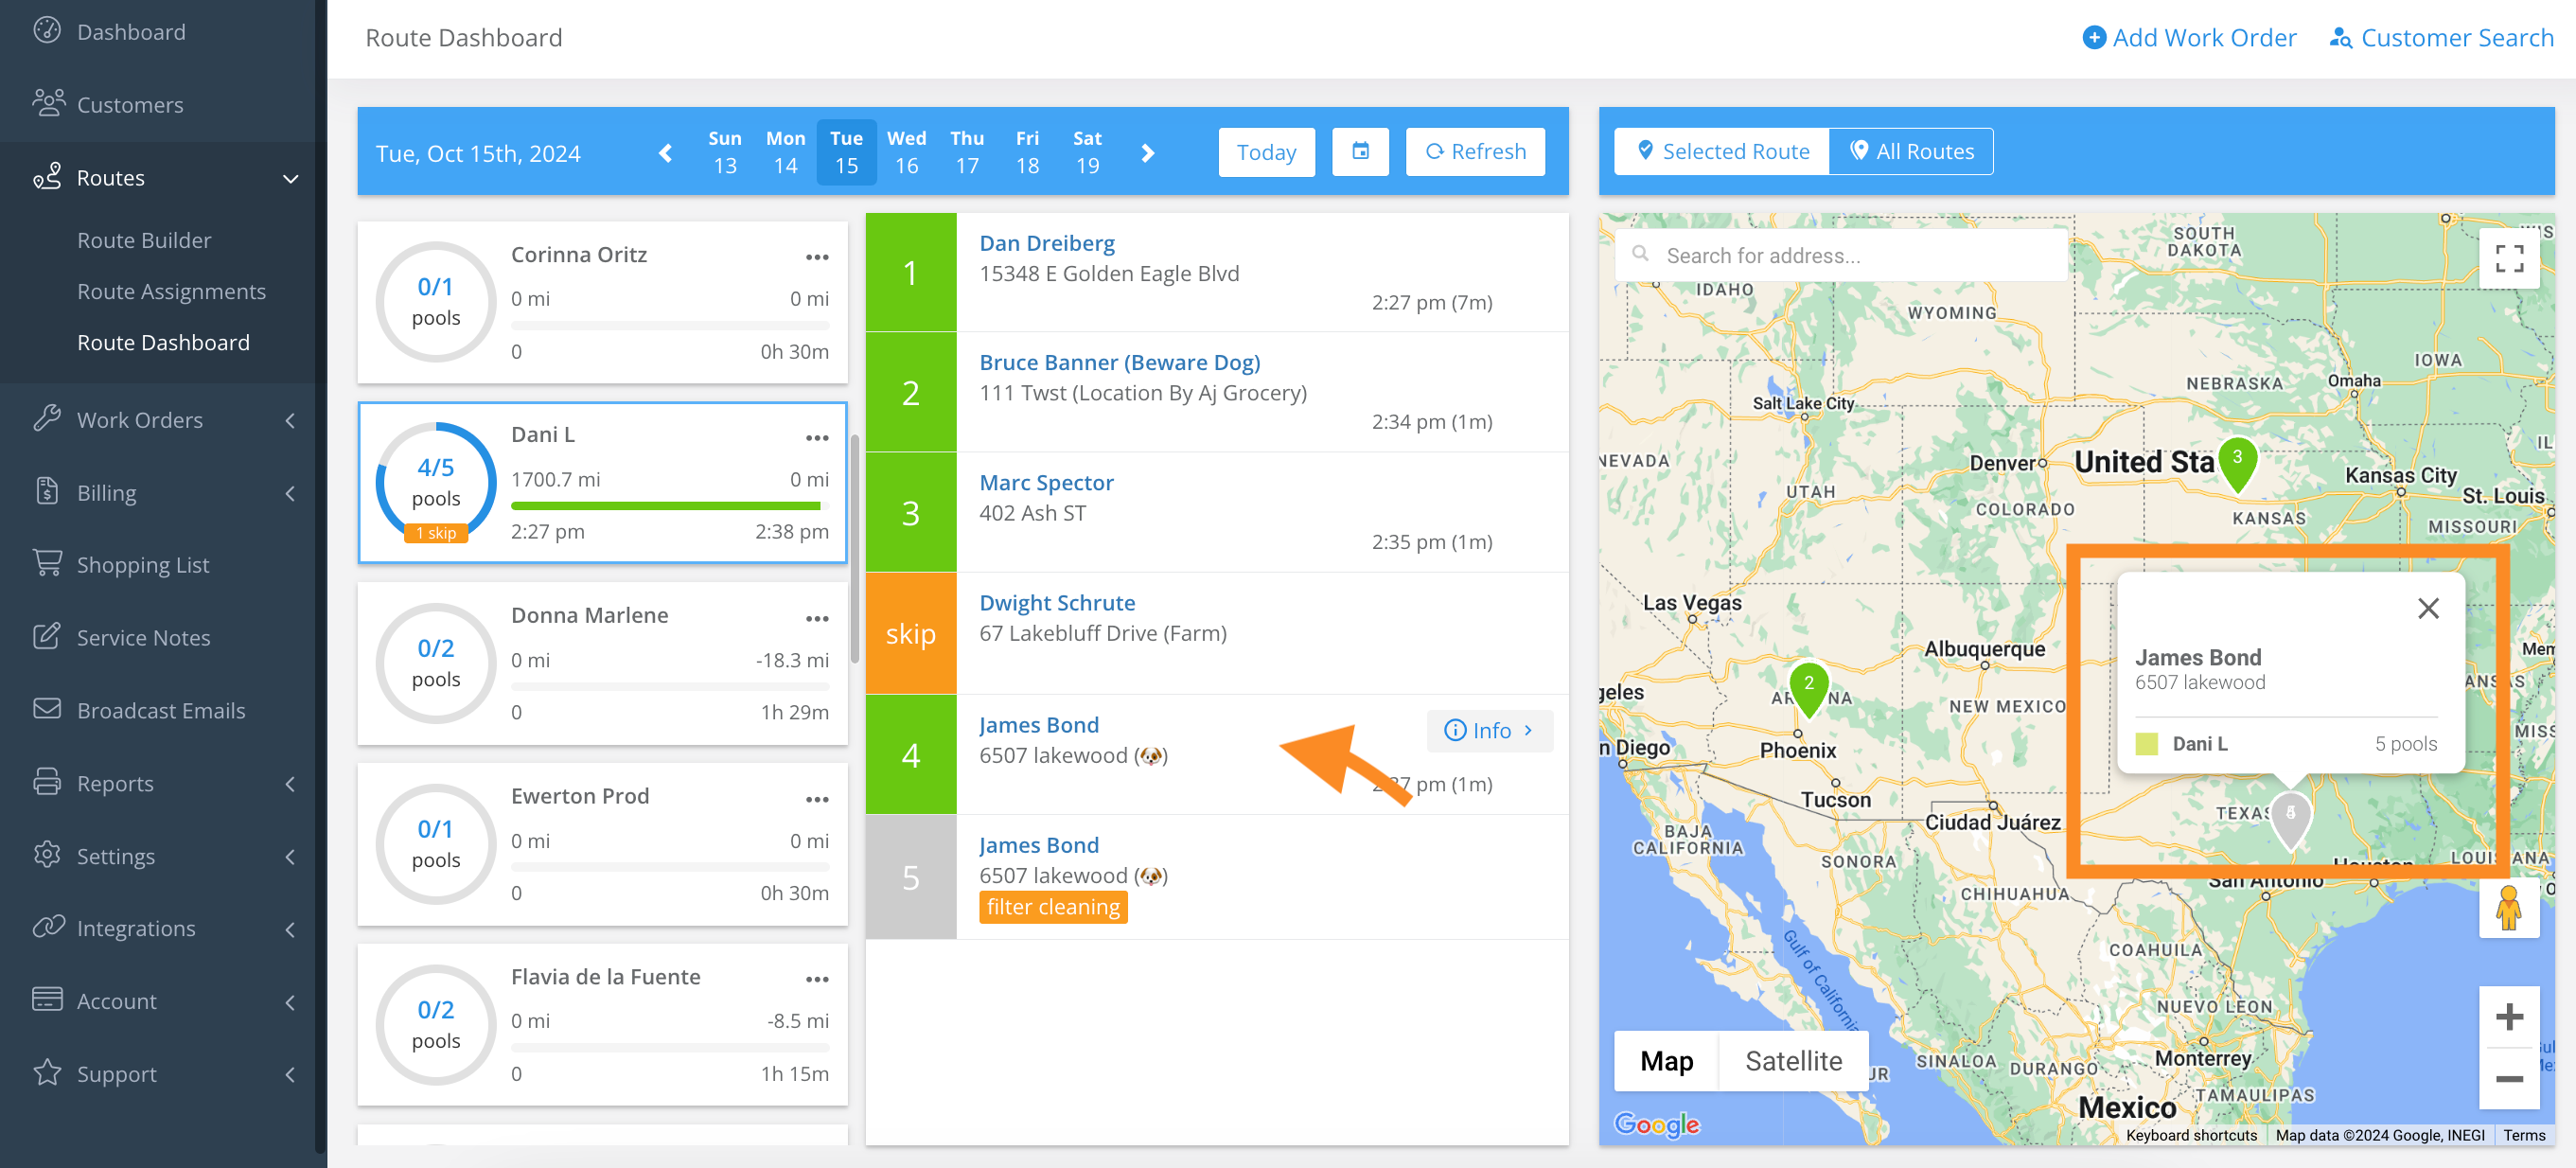
3. Click the Tech’s name to view their current route.
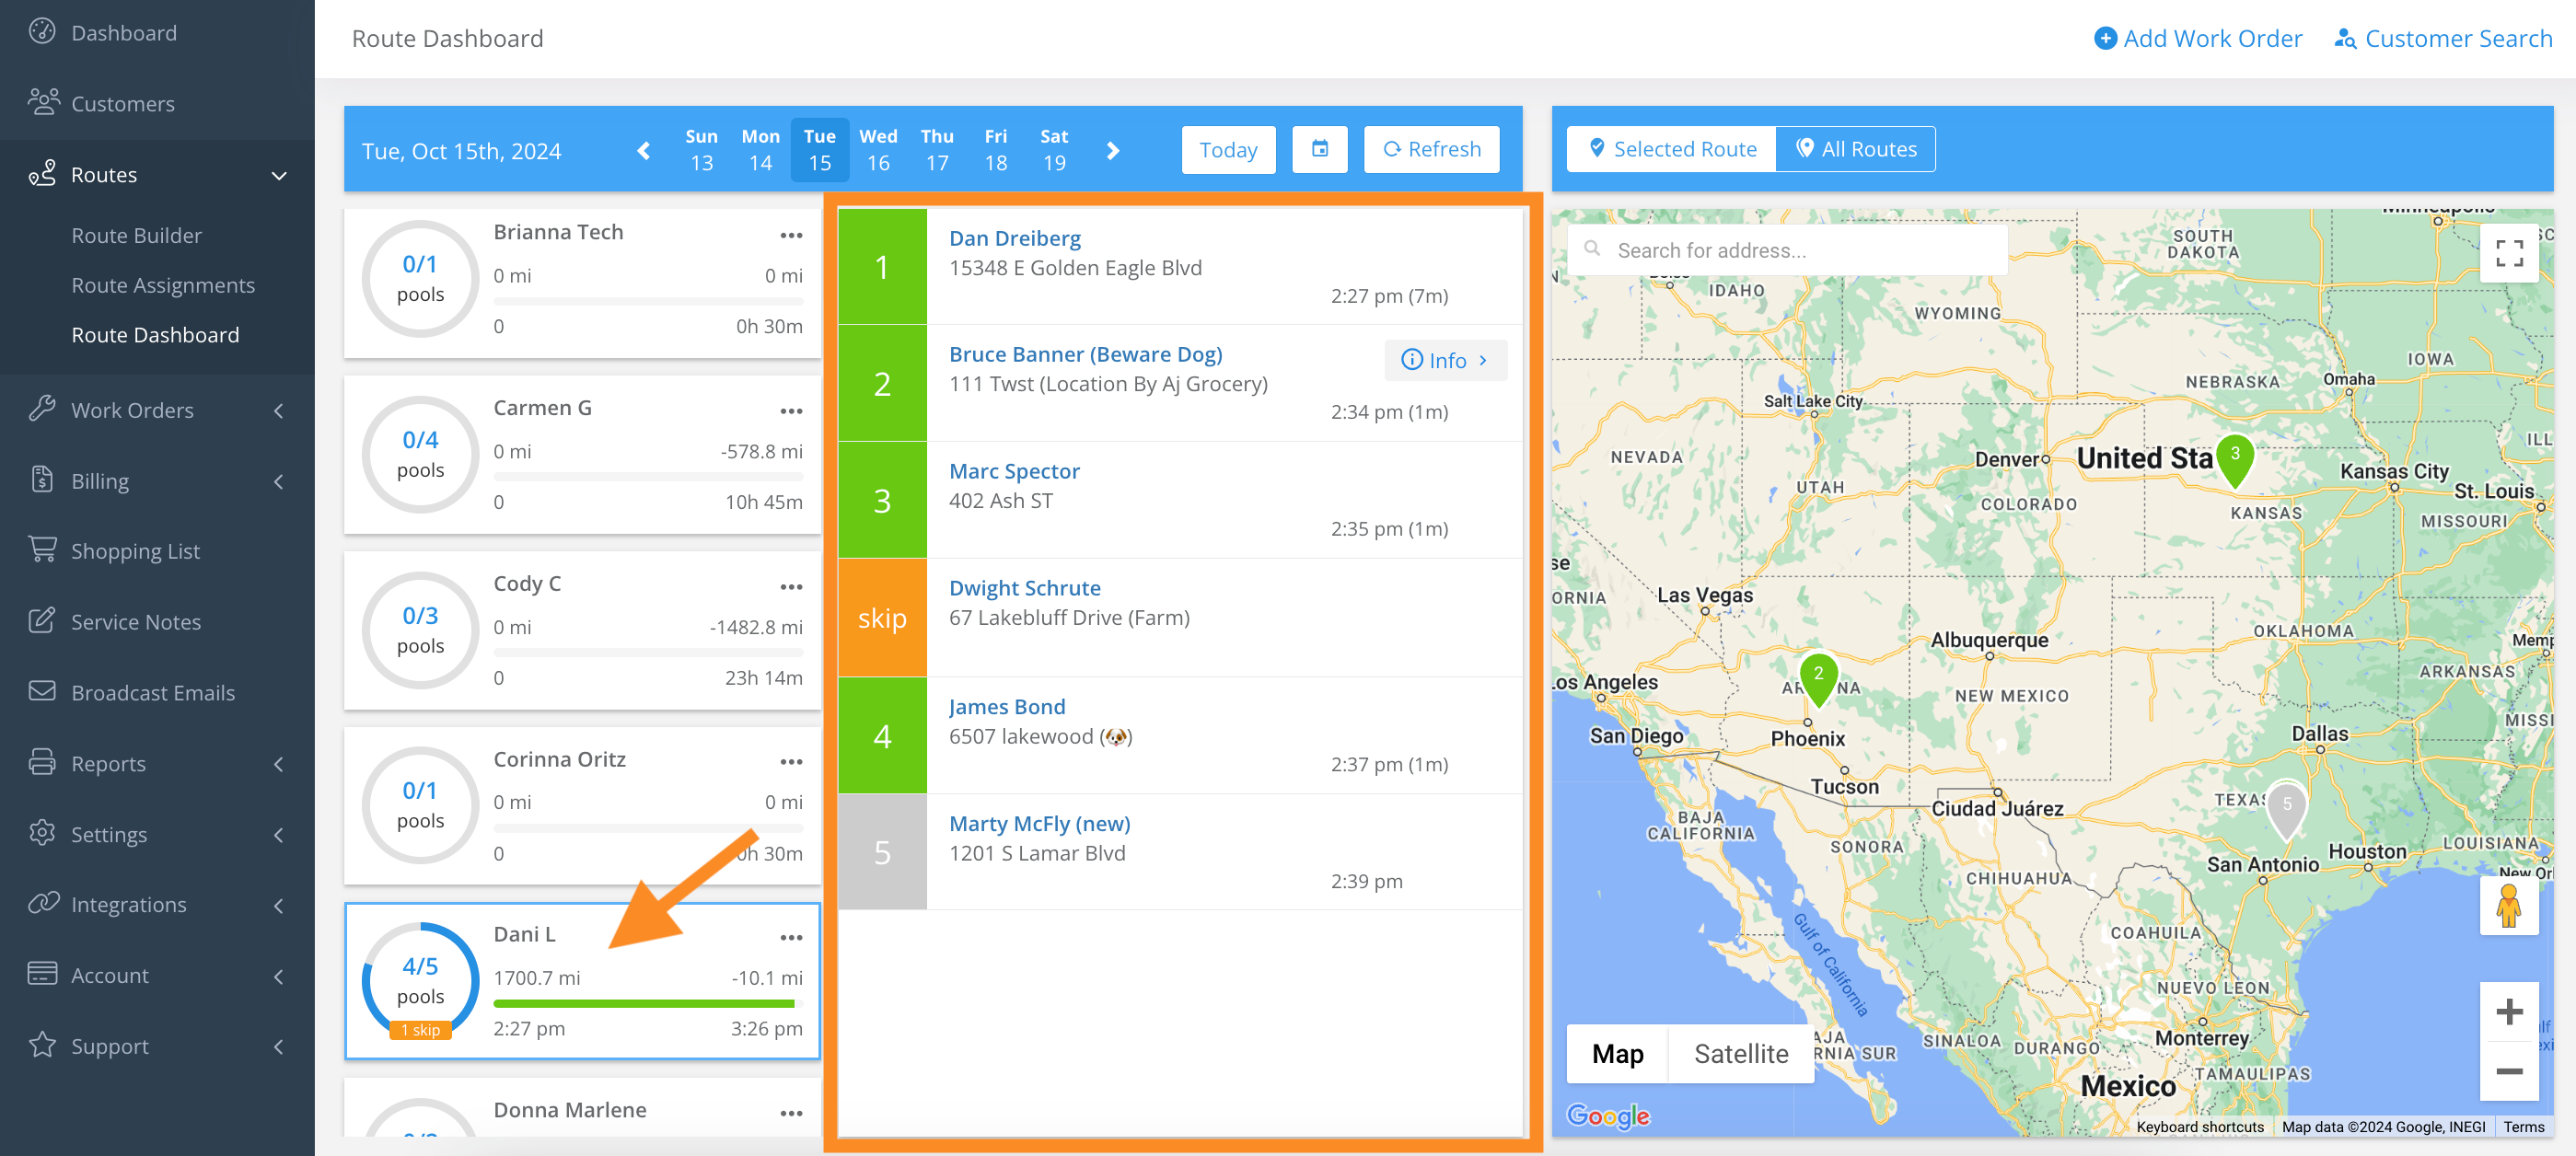
- Click the info button to view service history and photos of completed stops.
- No info means service has not been recorded or completed.
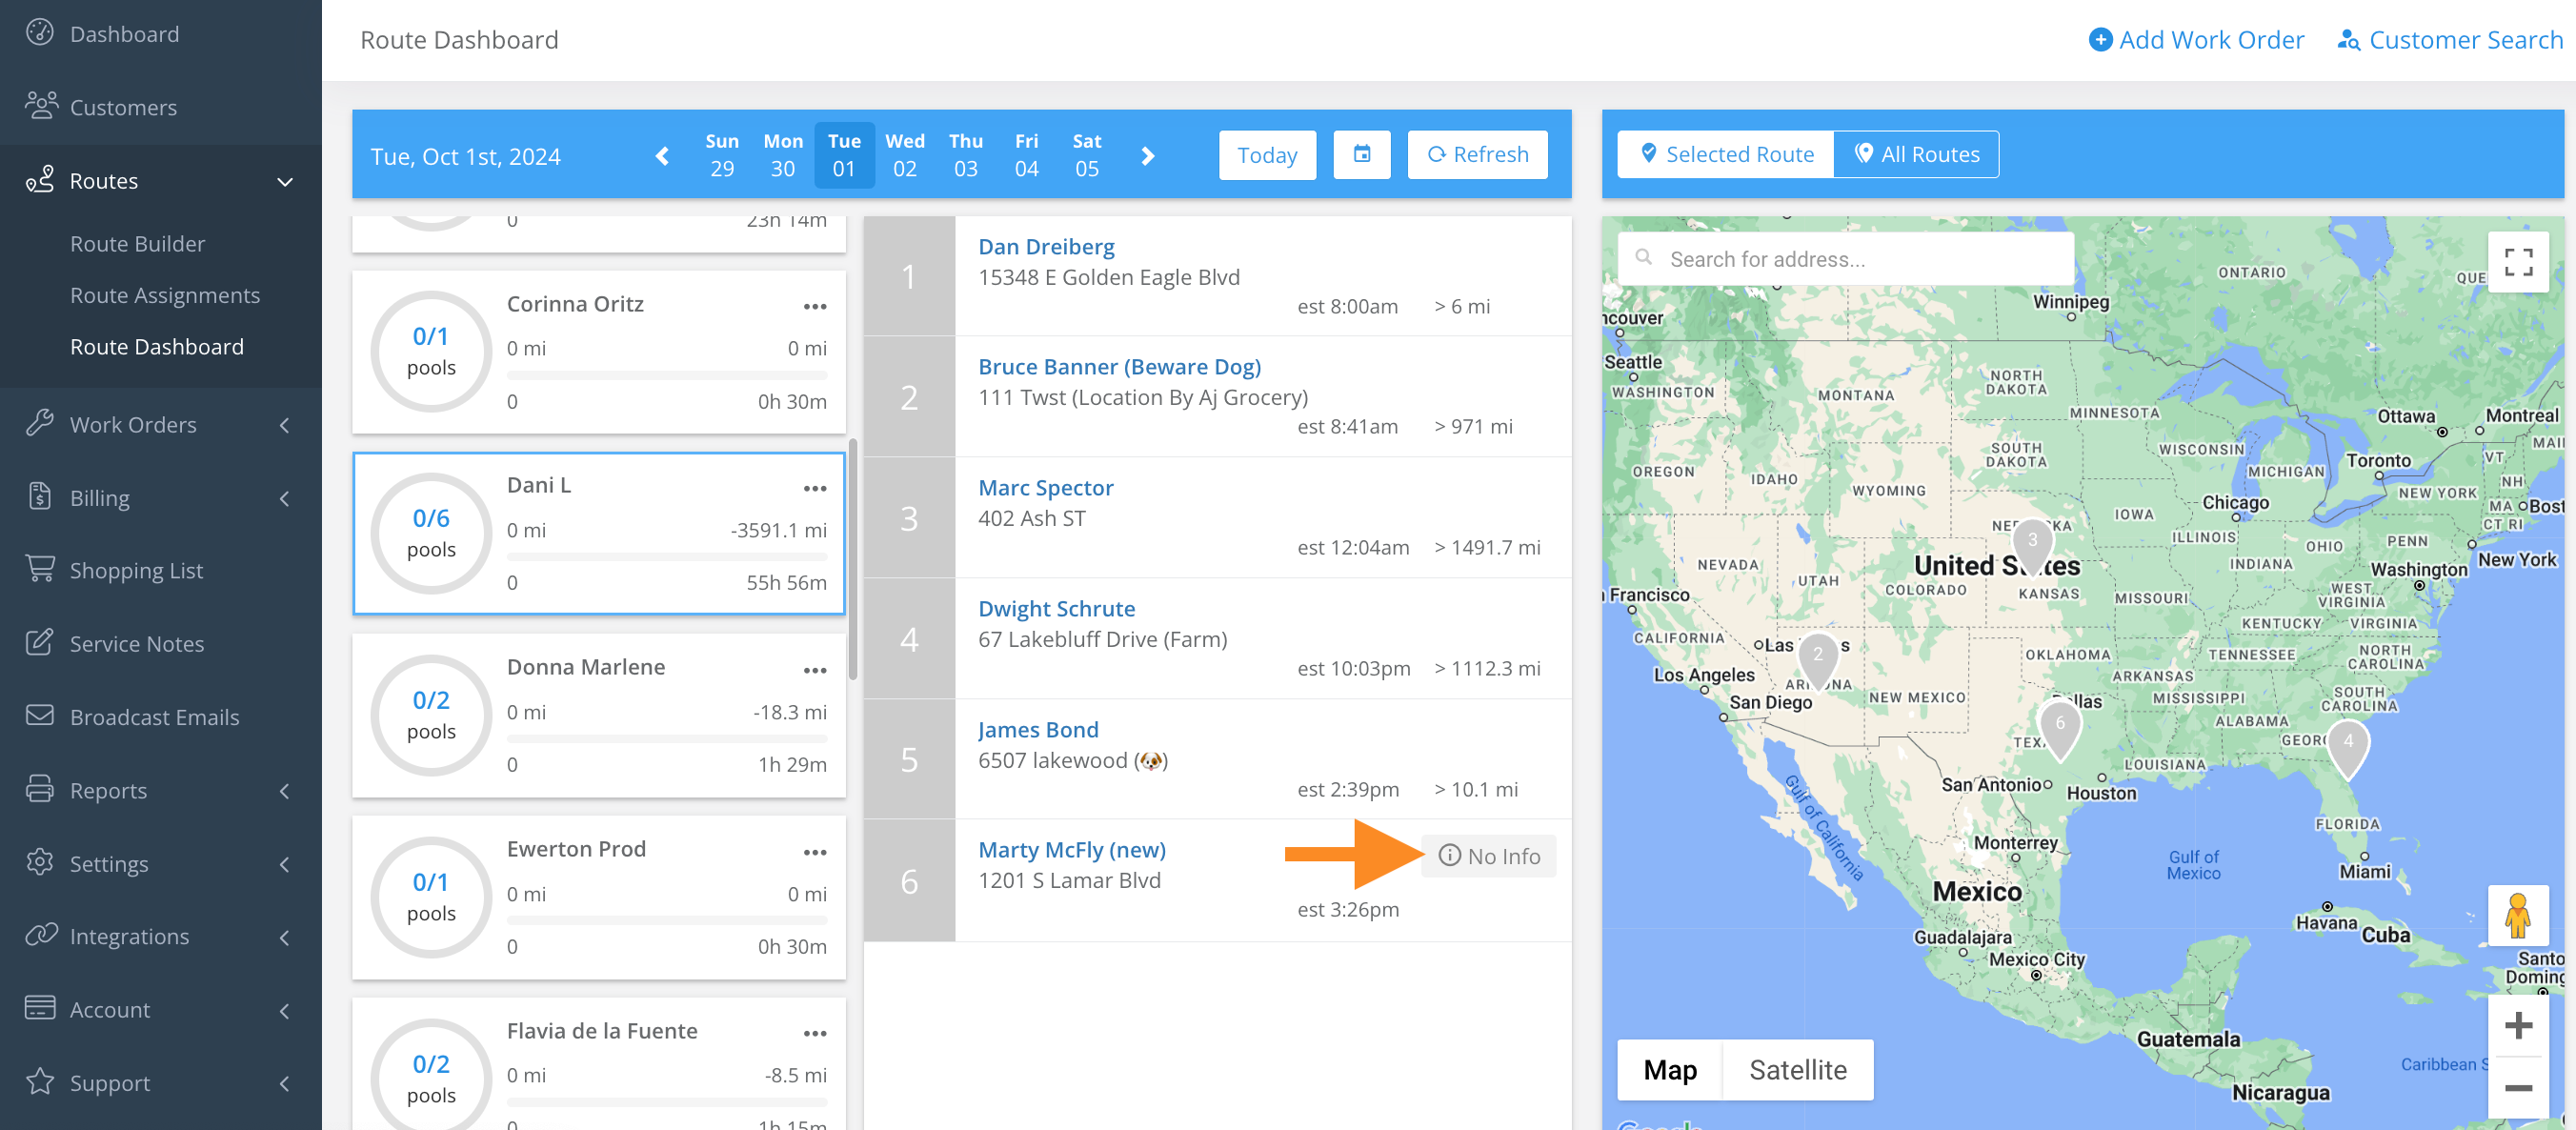
- The Refresh button will update the screen to show any recently added service detail.
- Click the customer name for a new tab to open on your browser, directing you to the customer profile.
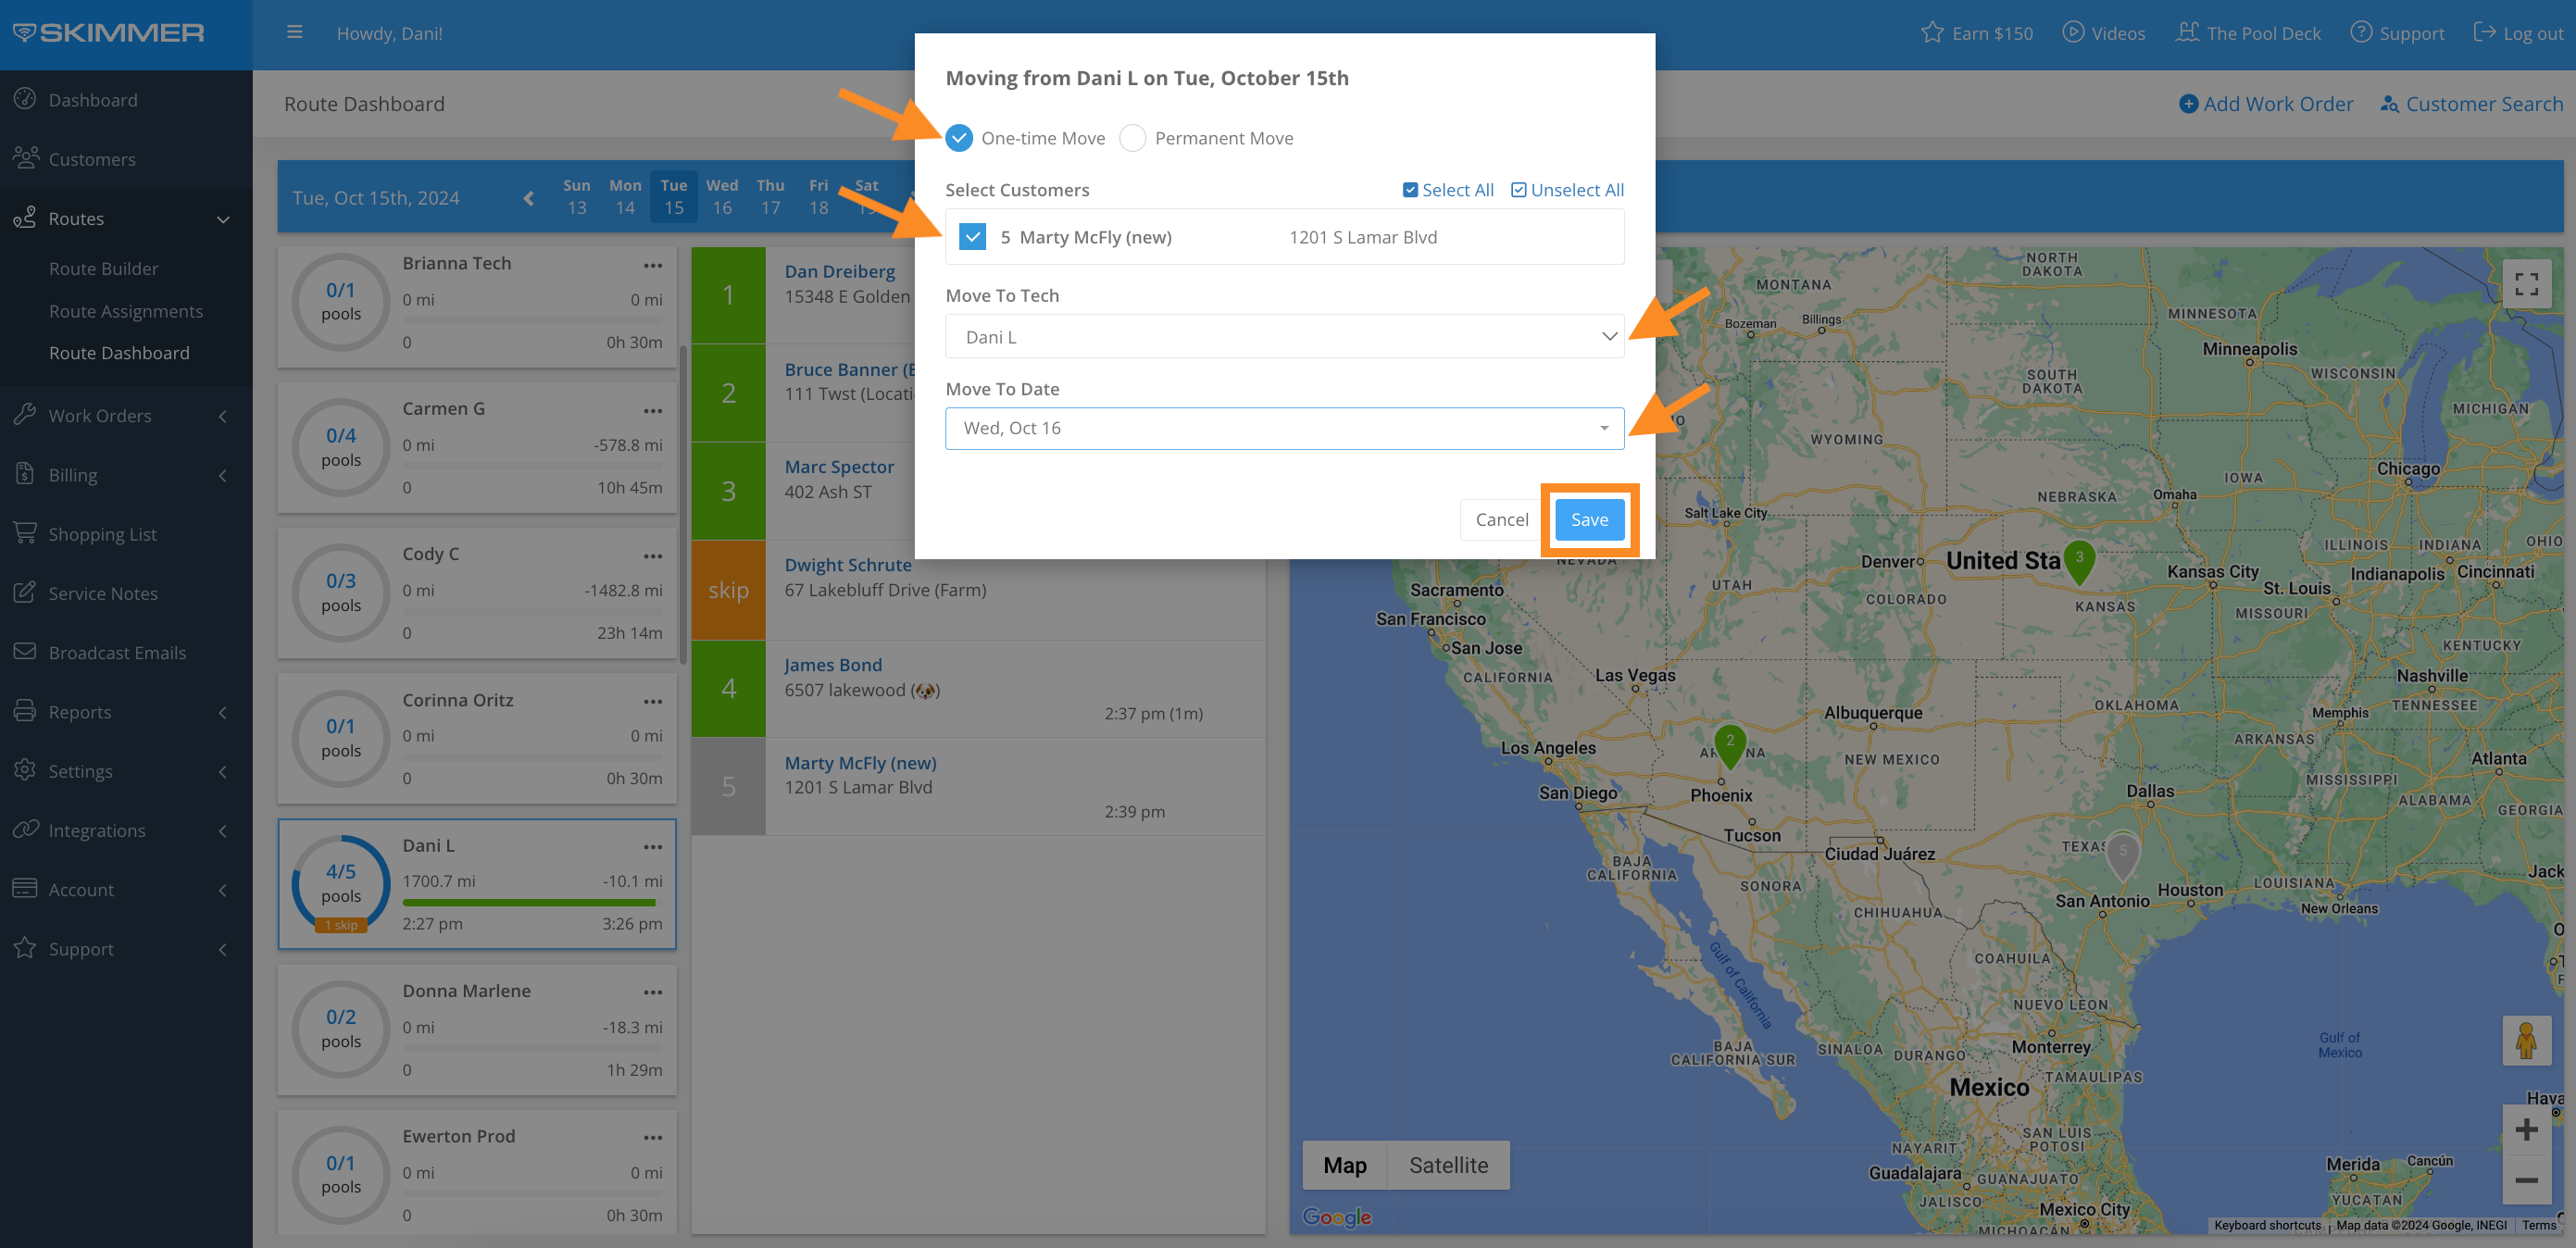
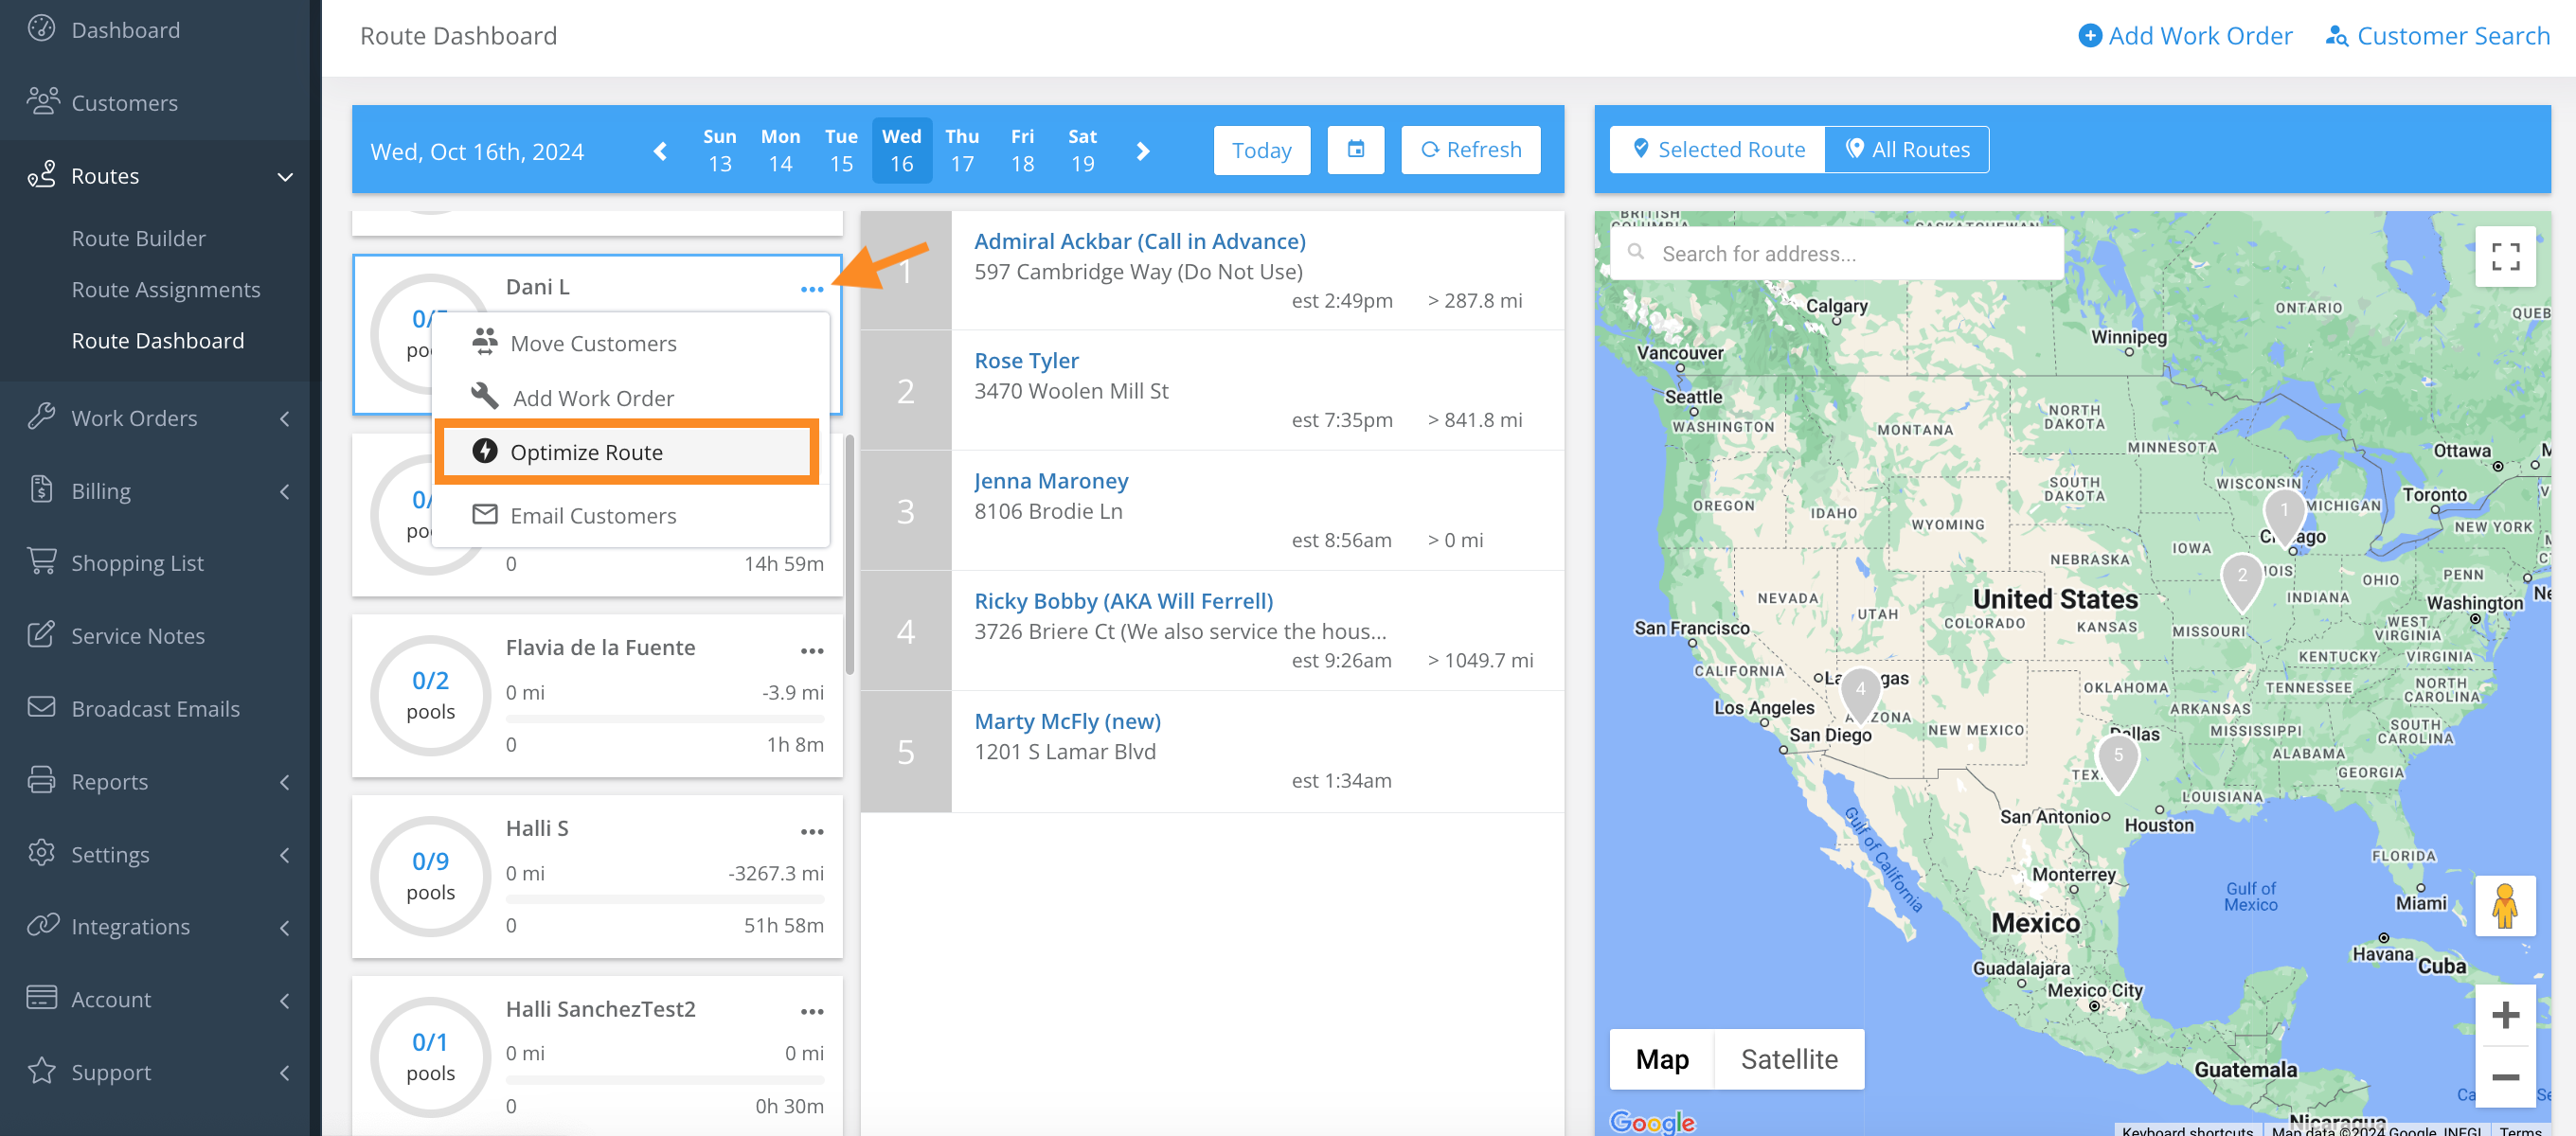
4. To move customers, click the three dots > Move Customers > One-time Move or Permanent Move > Tech > Date > Save.
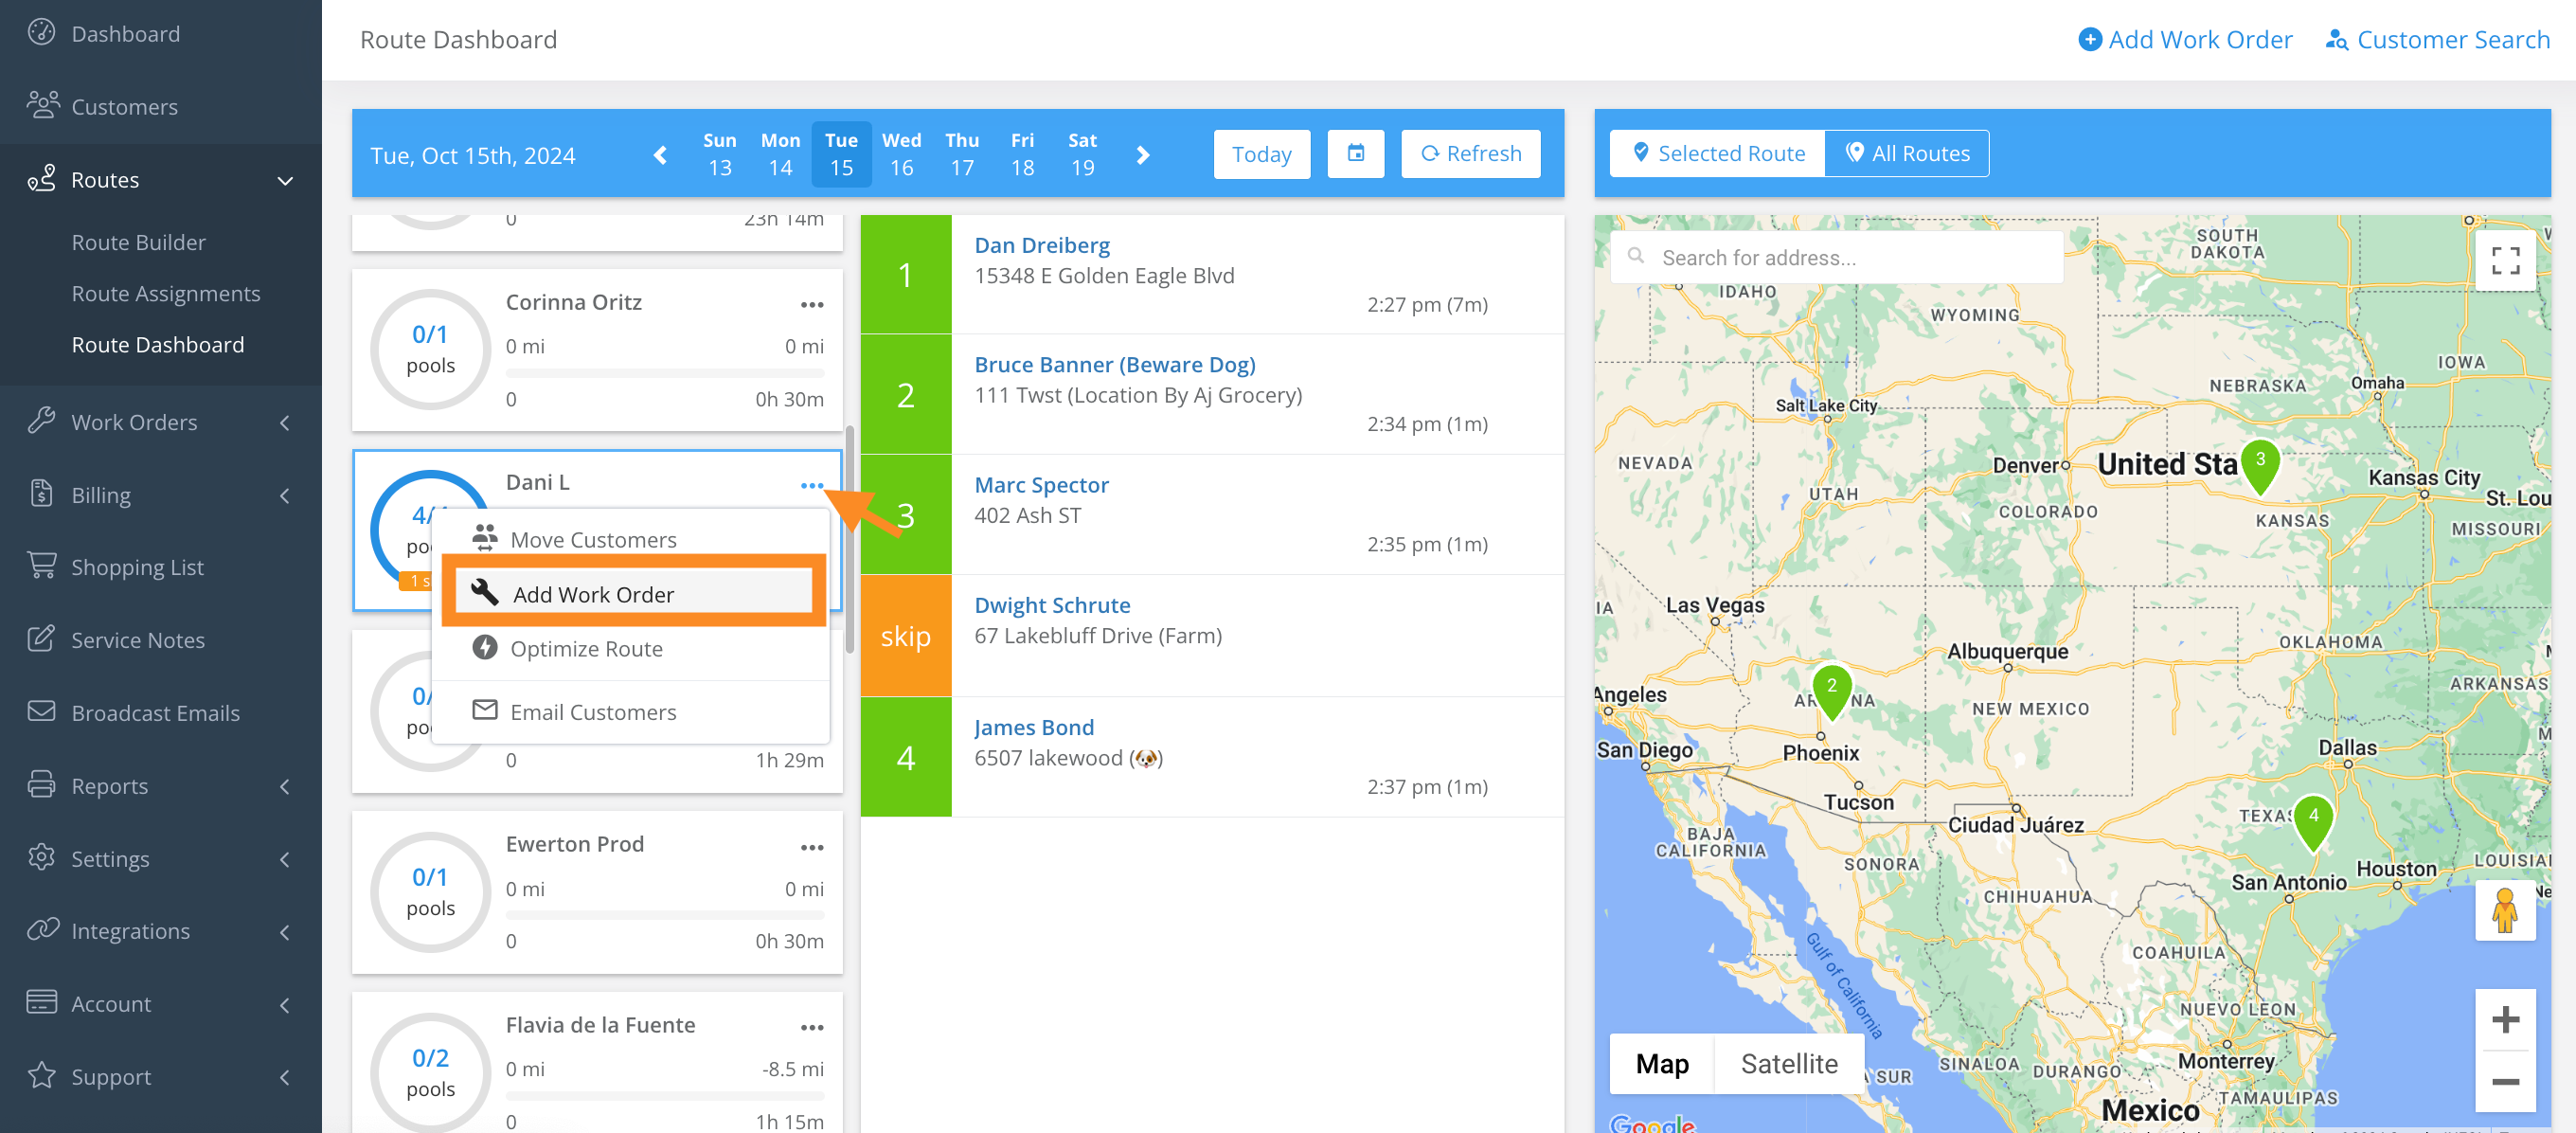
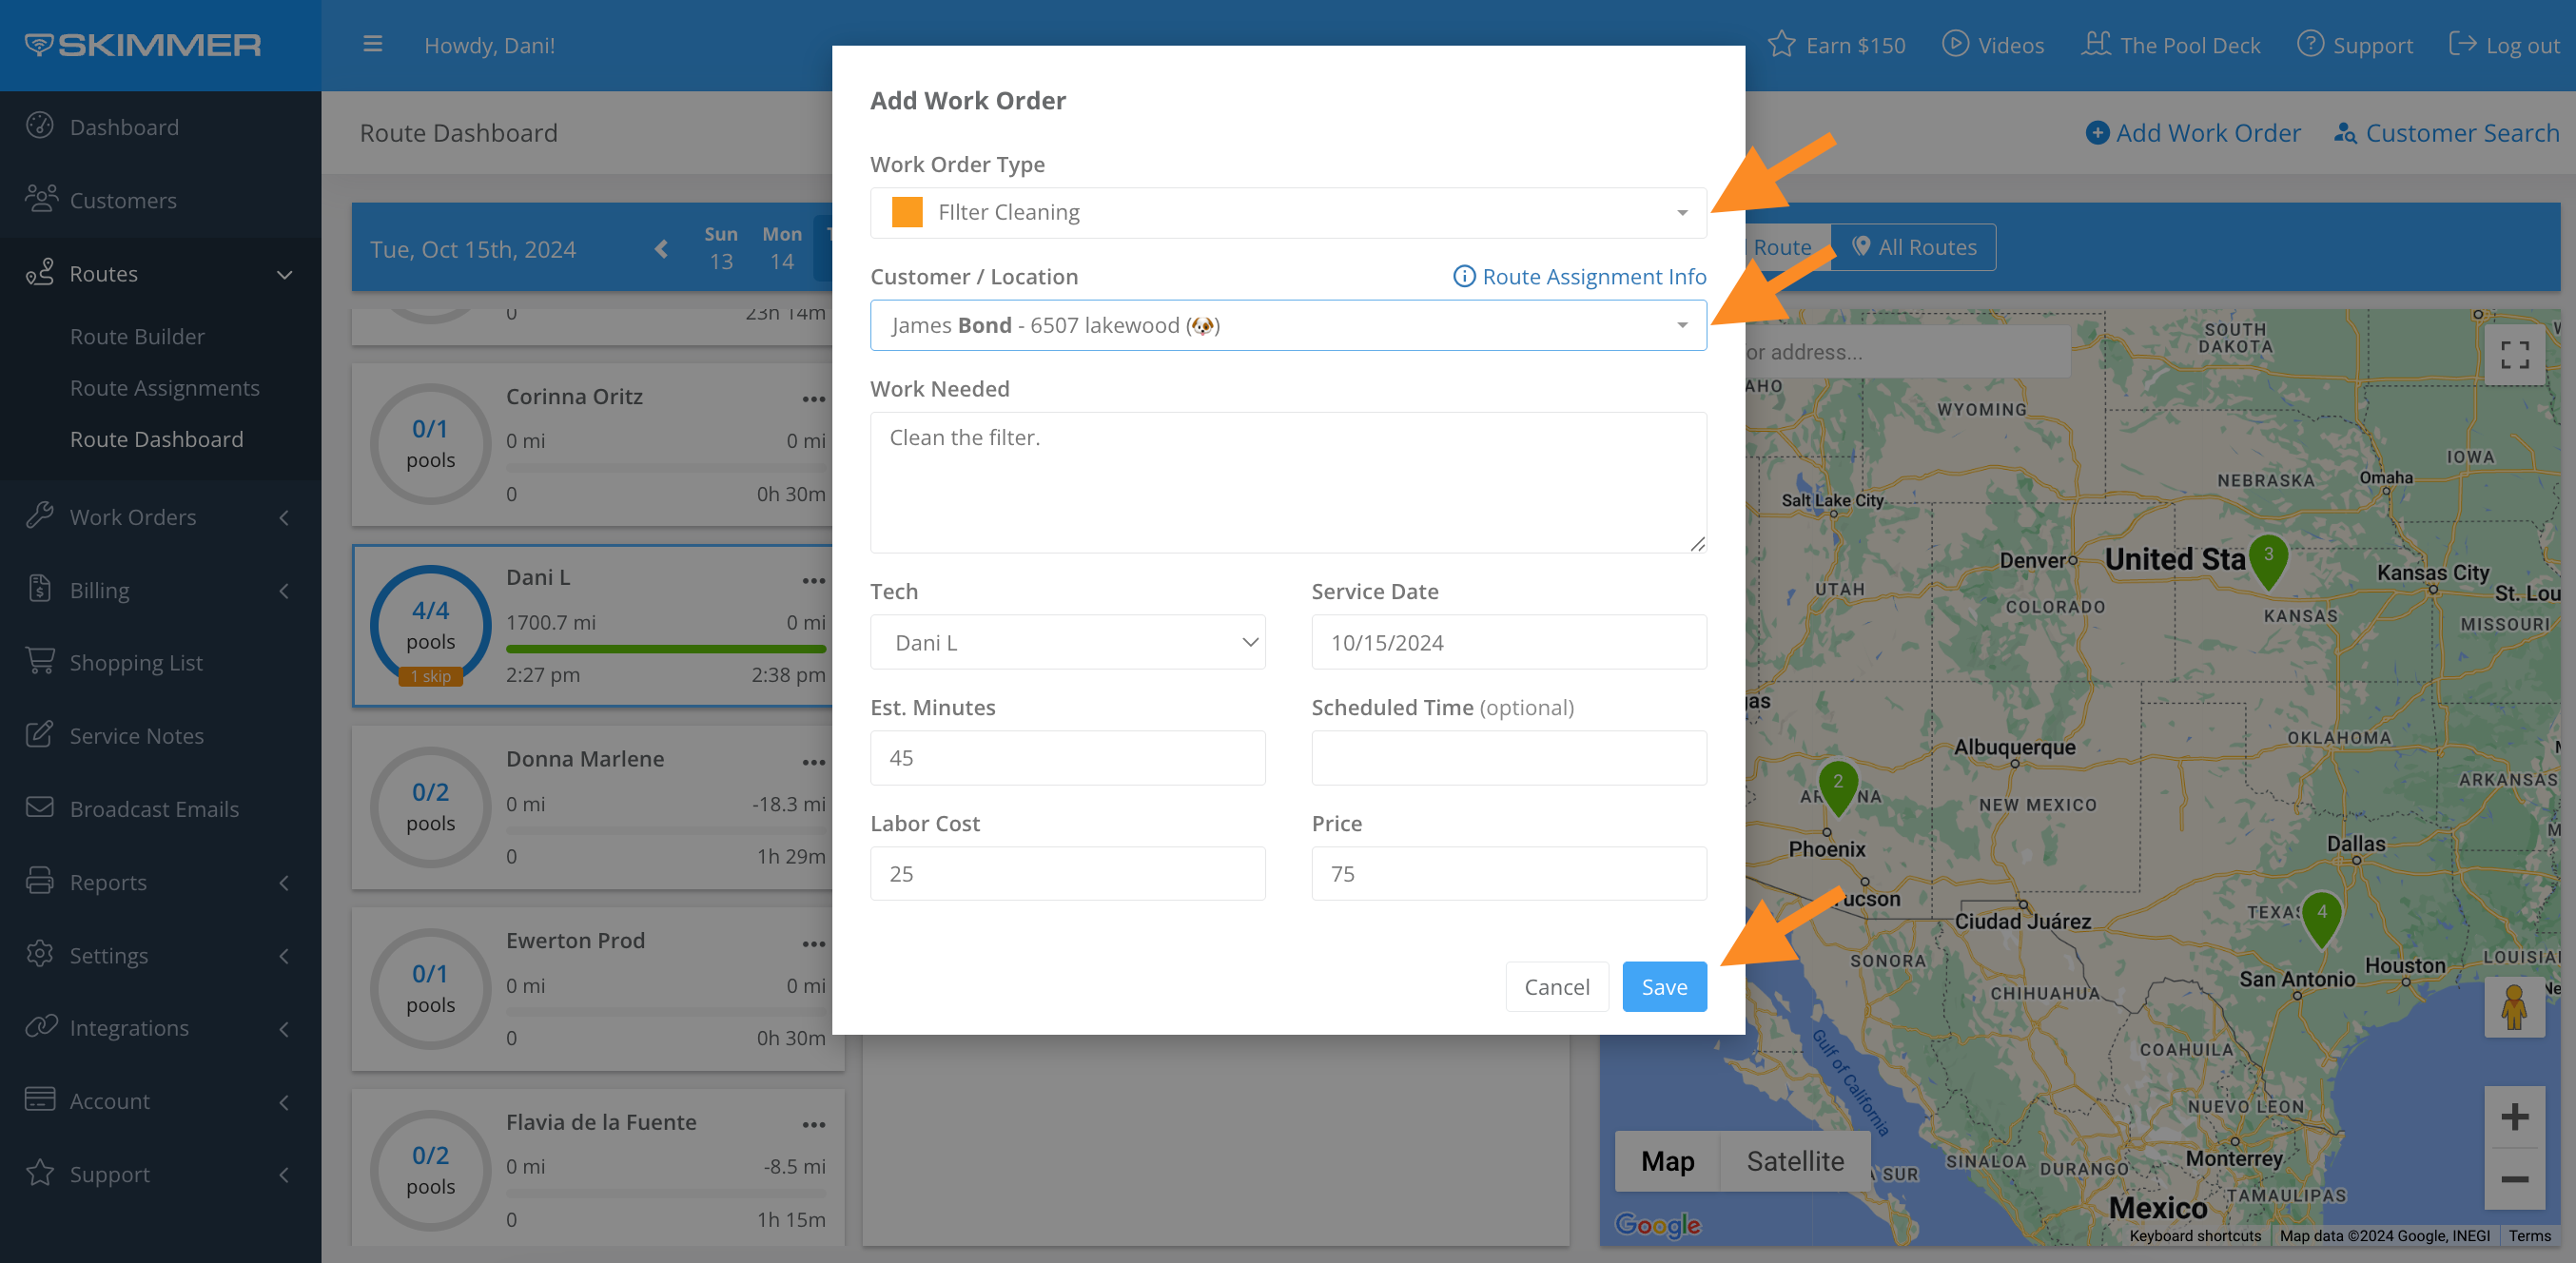
5. To add a work order, click on the three dots > Add Work Order > Work Order Type > Customer/Location > Tech > Service Date > Save.
- Default work order information will populate, but can be adjusted. (i.e. work needed, price).
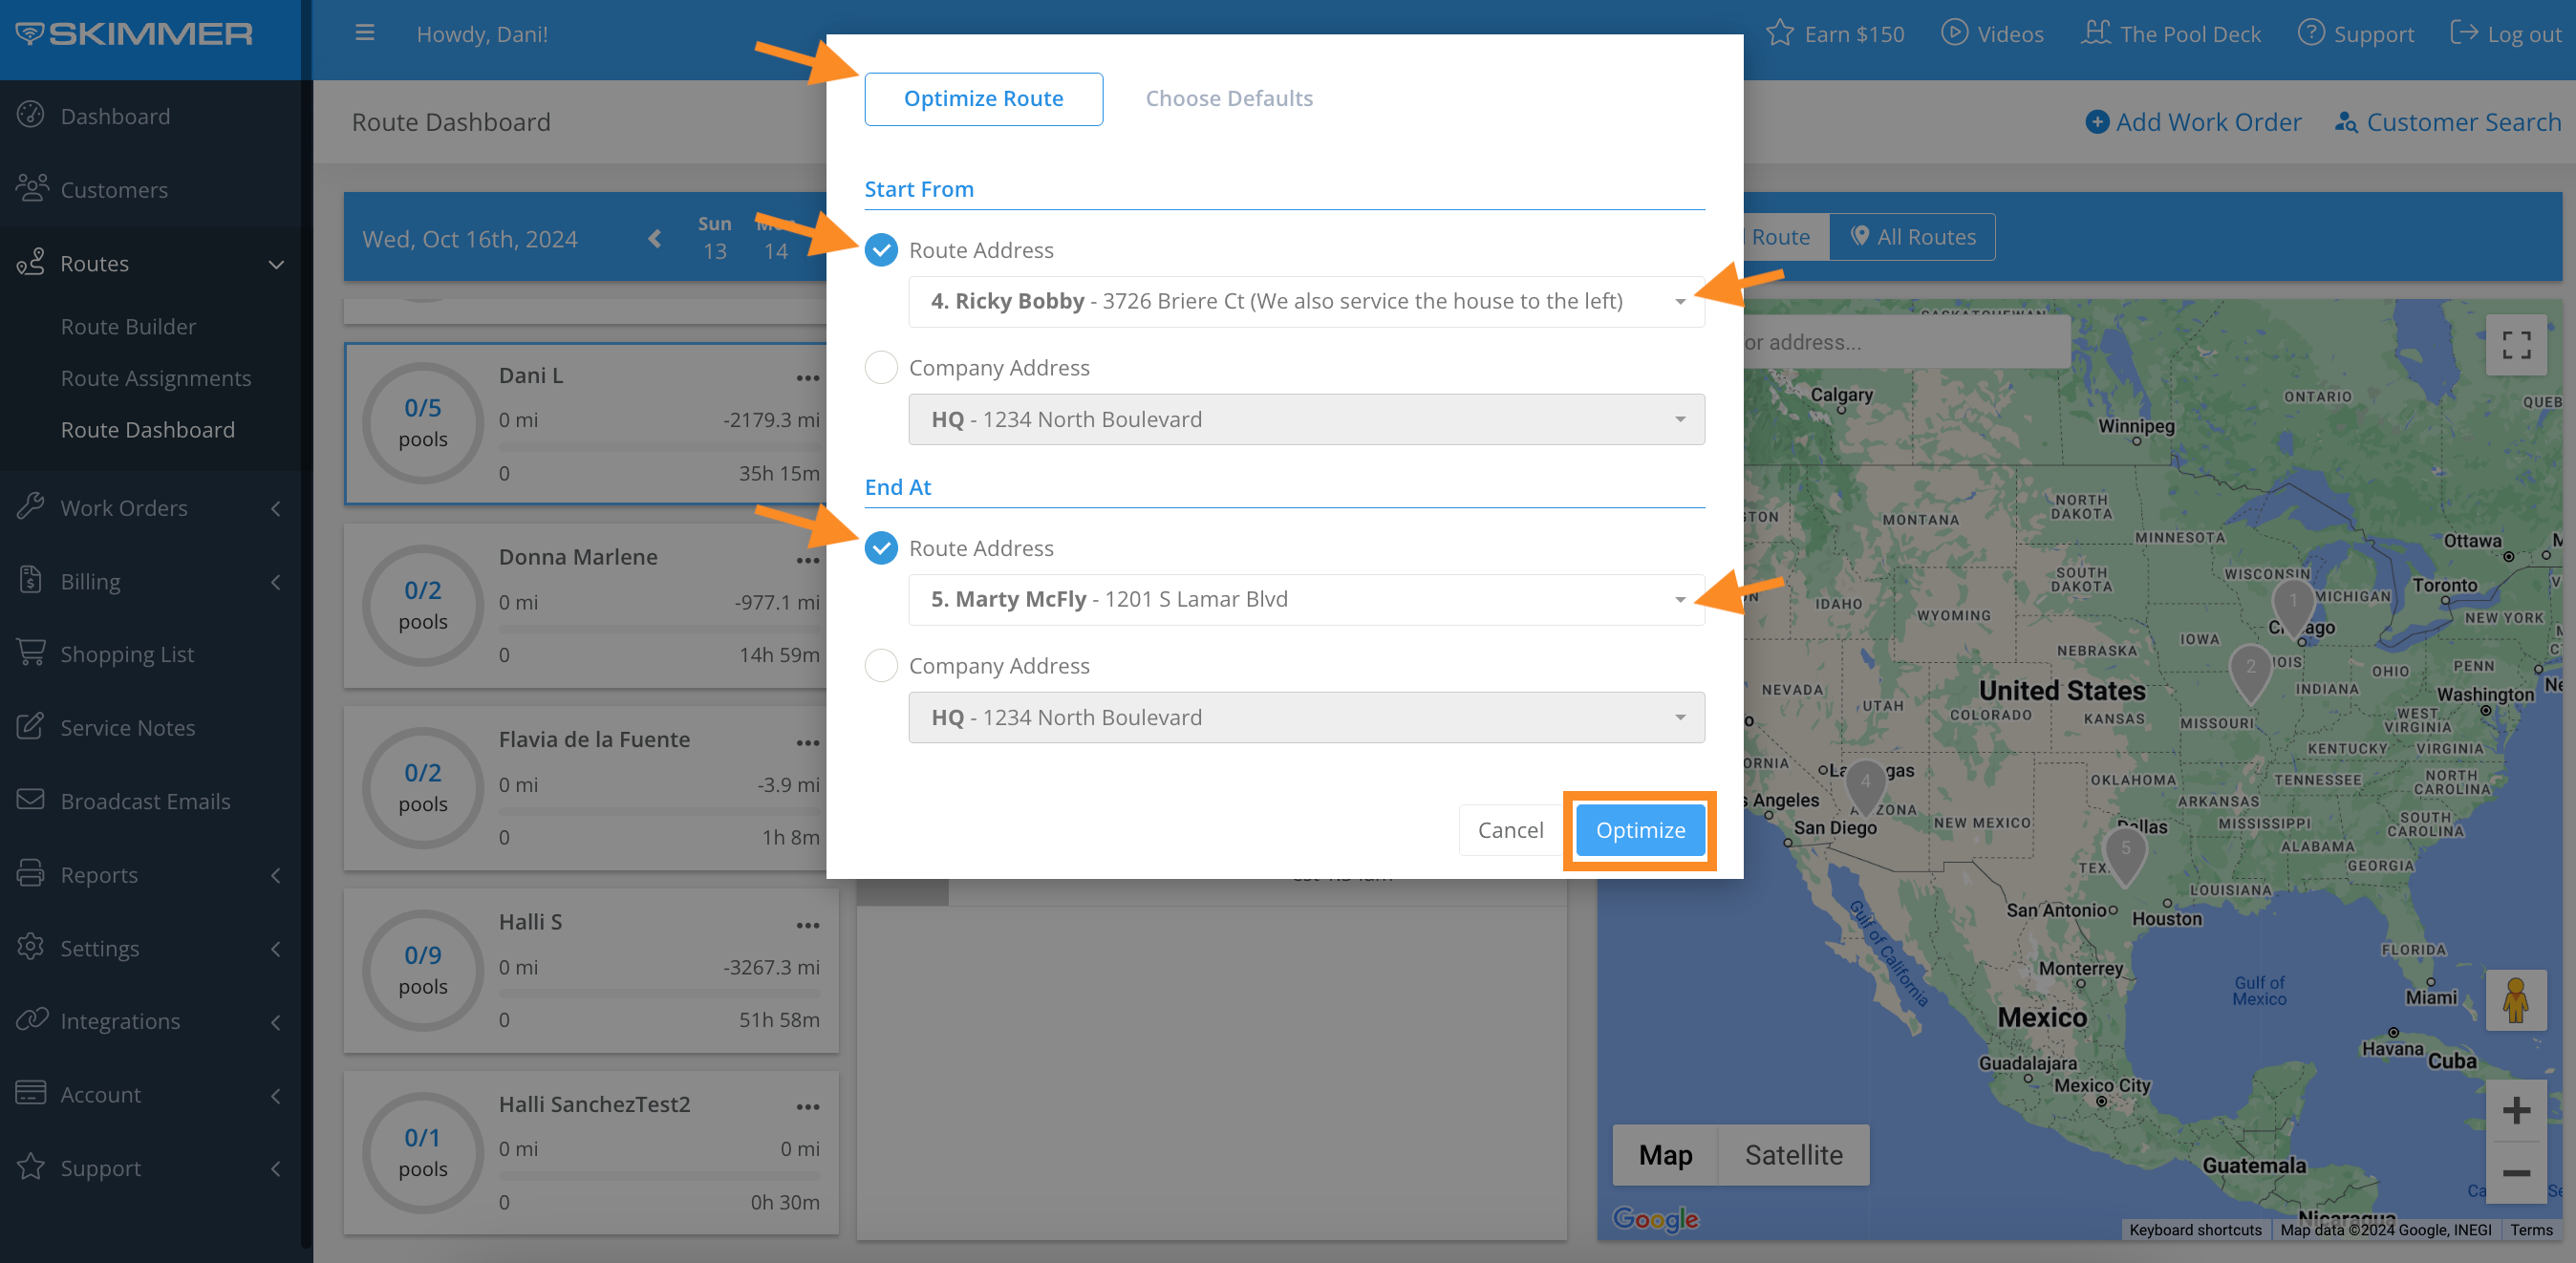
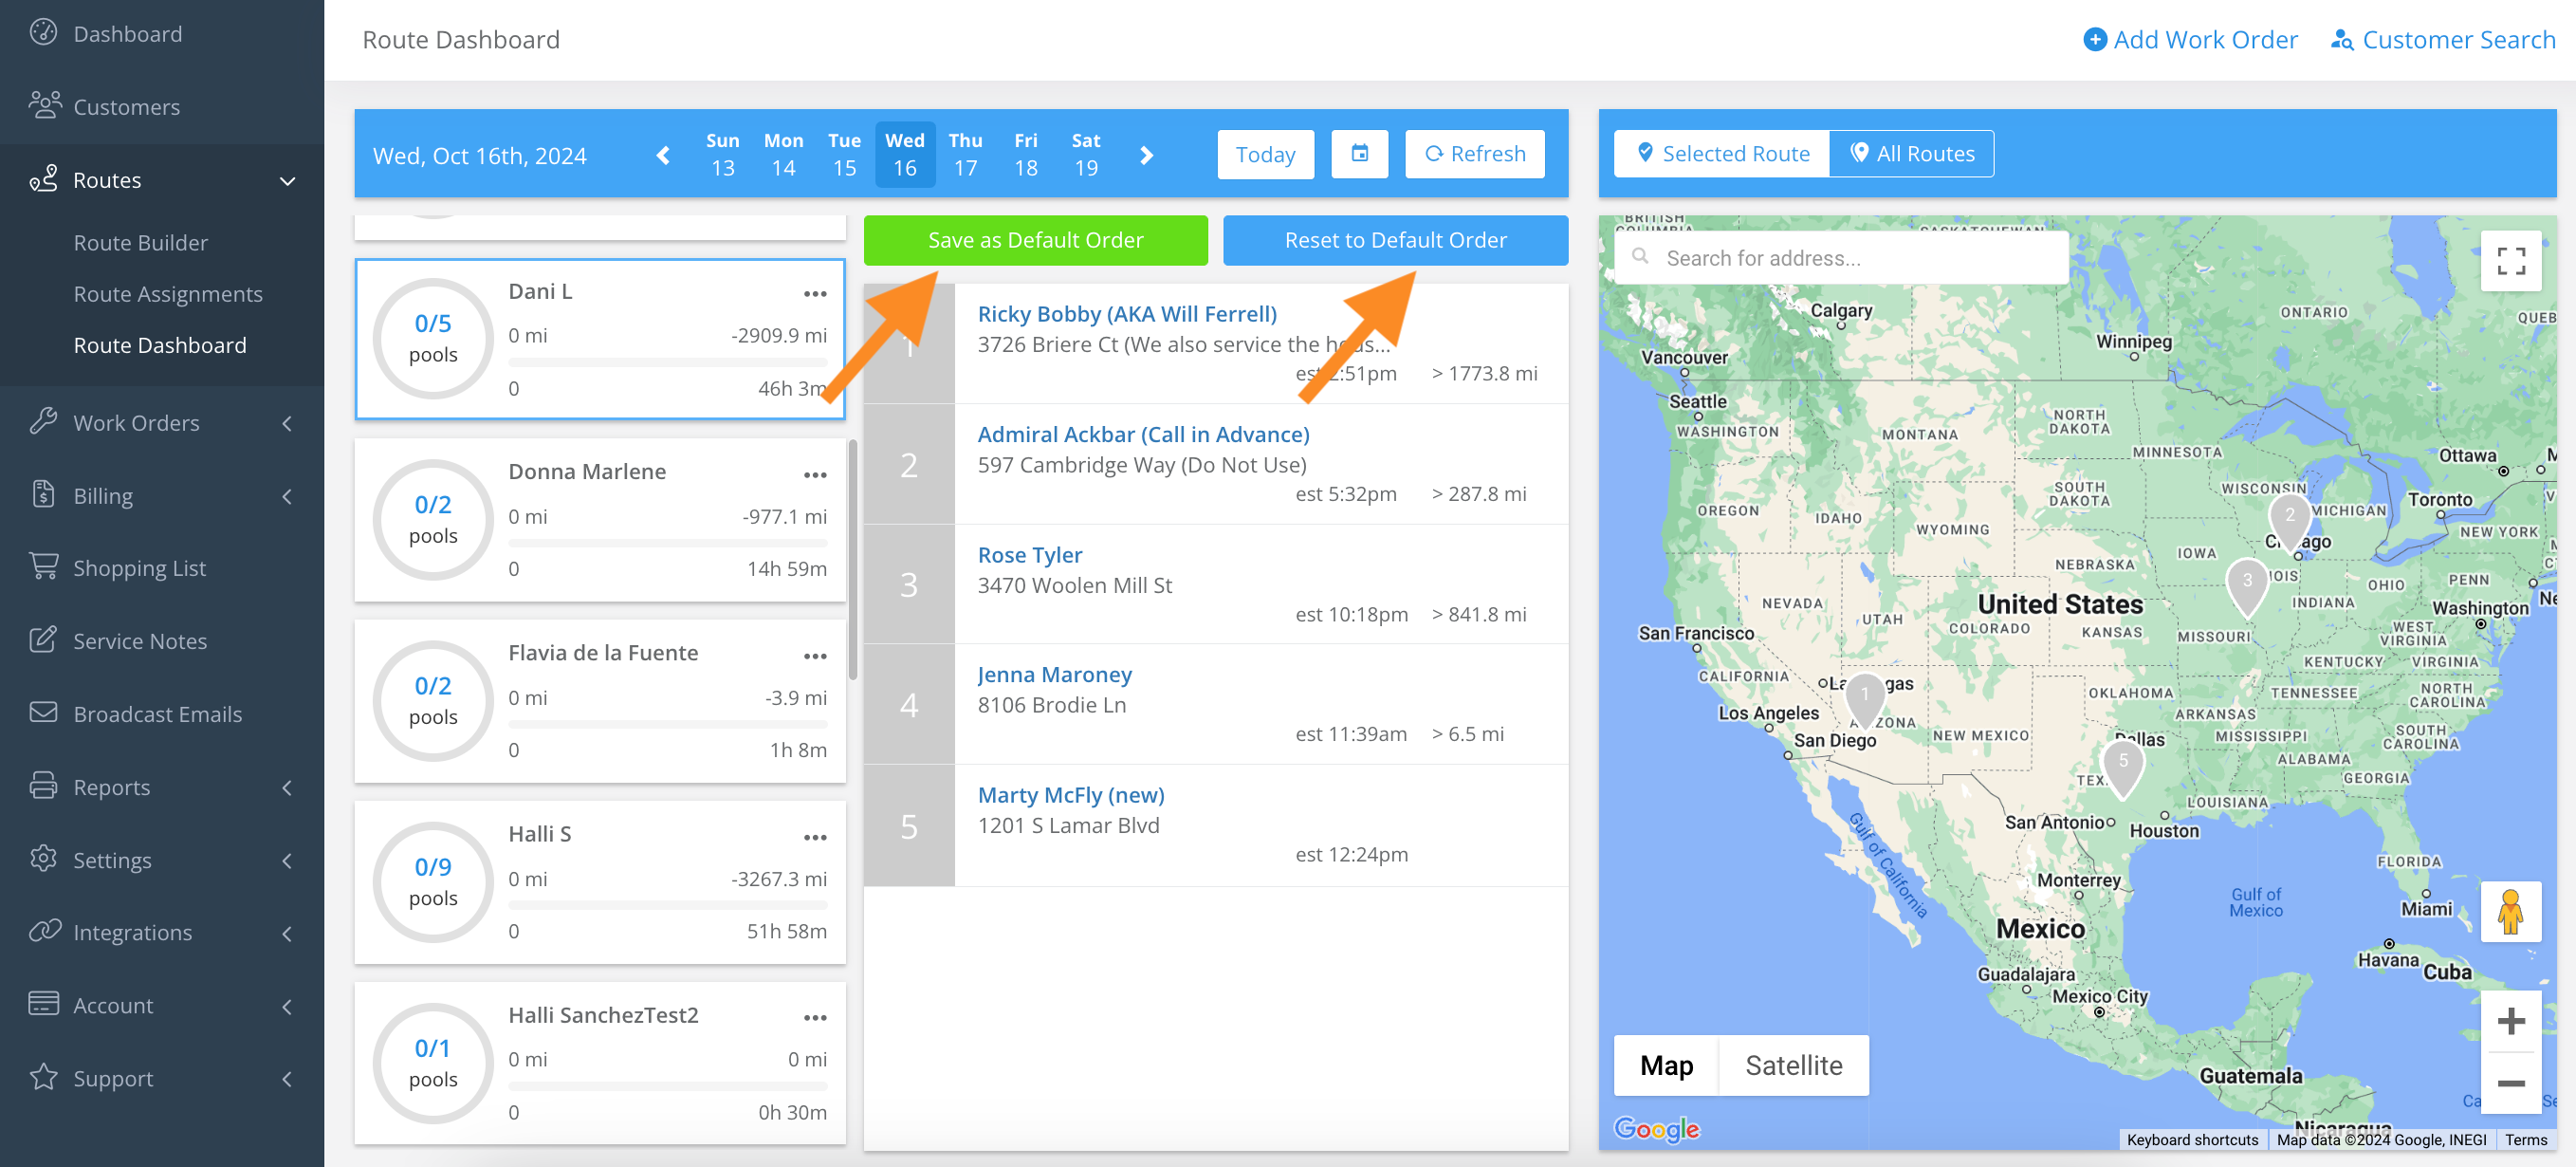
6. To optimize a route, click the three dots > Optimize Route > Start From > End At > Optimize.
- Save as Default Order or Reset to Default Order.
7. To manually reorder a route, click and hold the route stop number to drag and drop.
- Save as Default Order or Reset to Default Order.
- You cannot drag and drop a route stop from one Tech to another Tech.
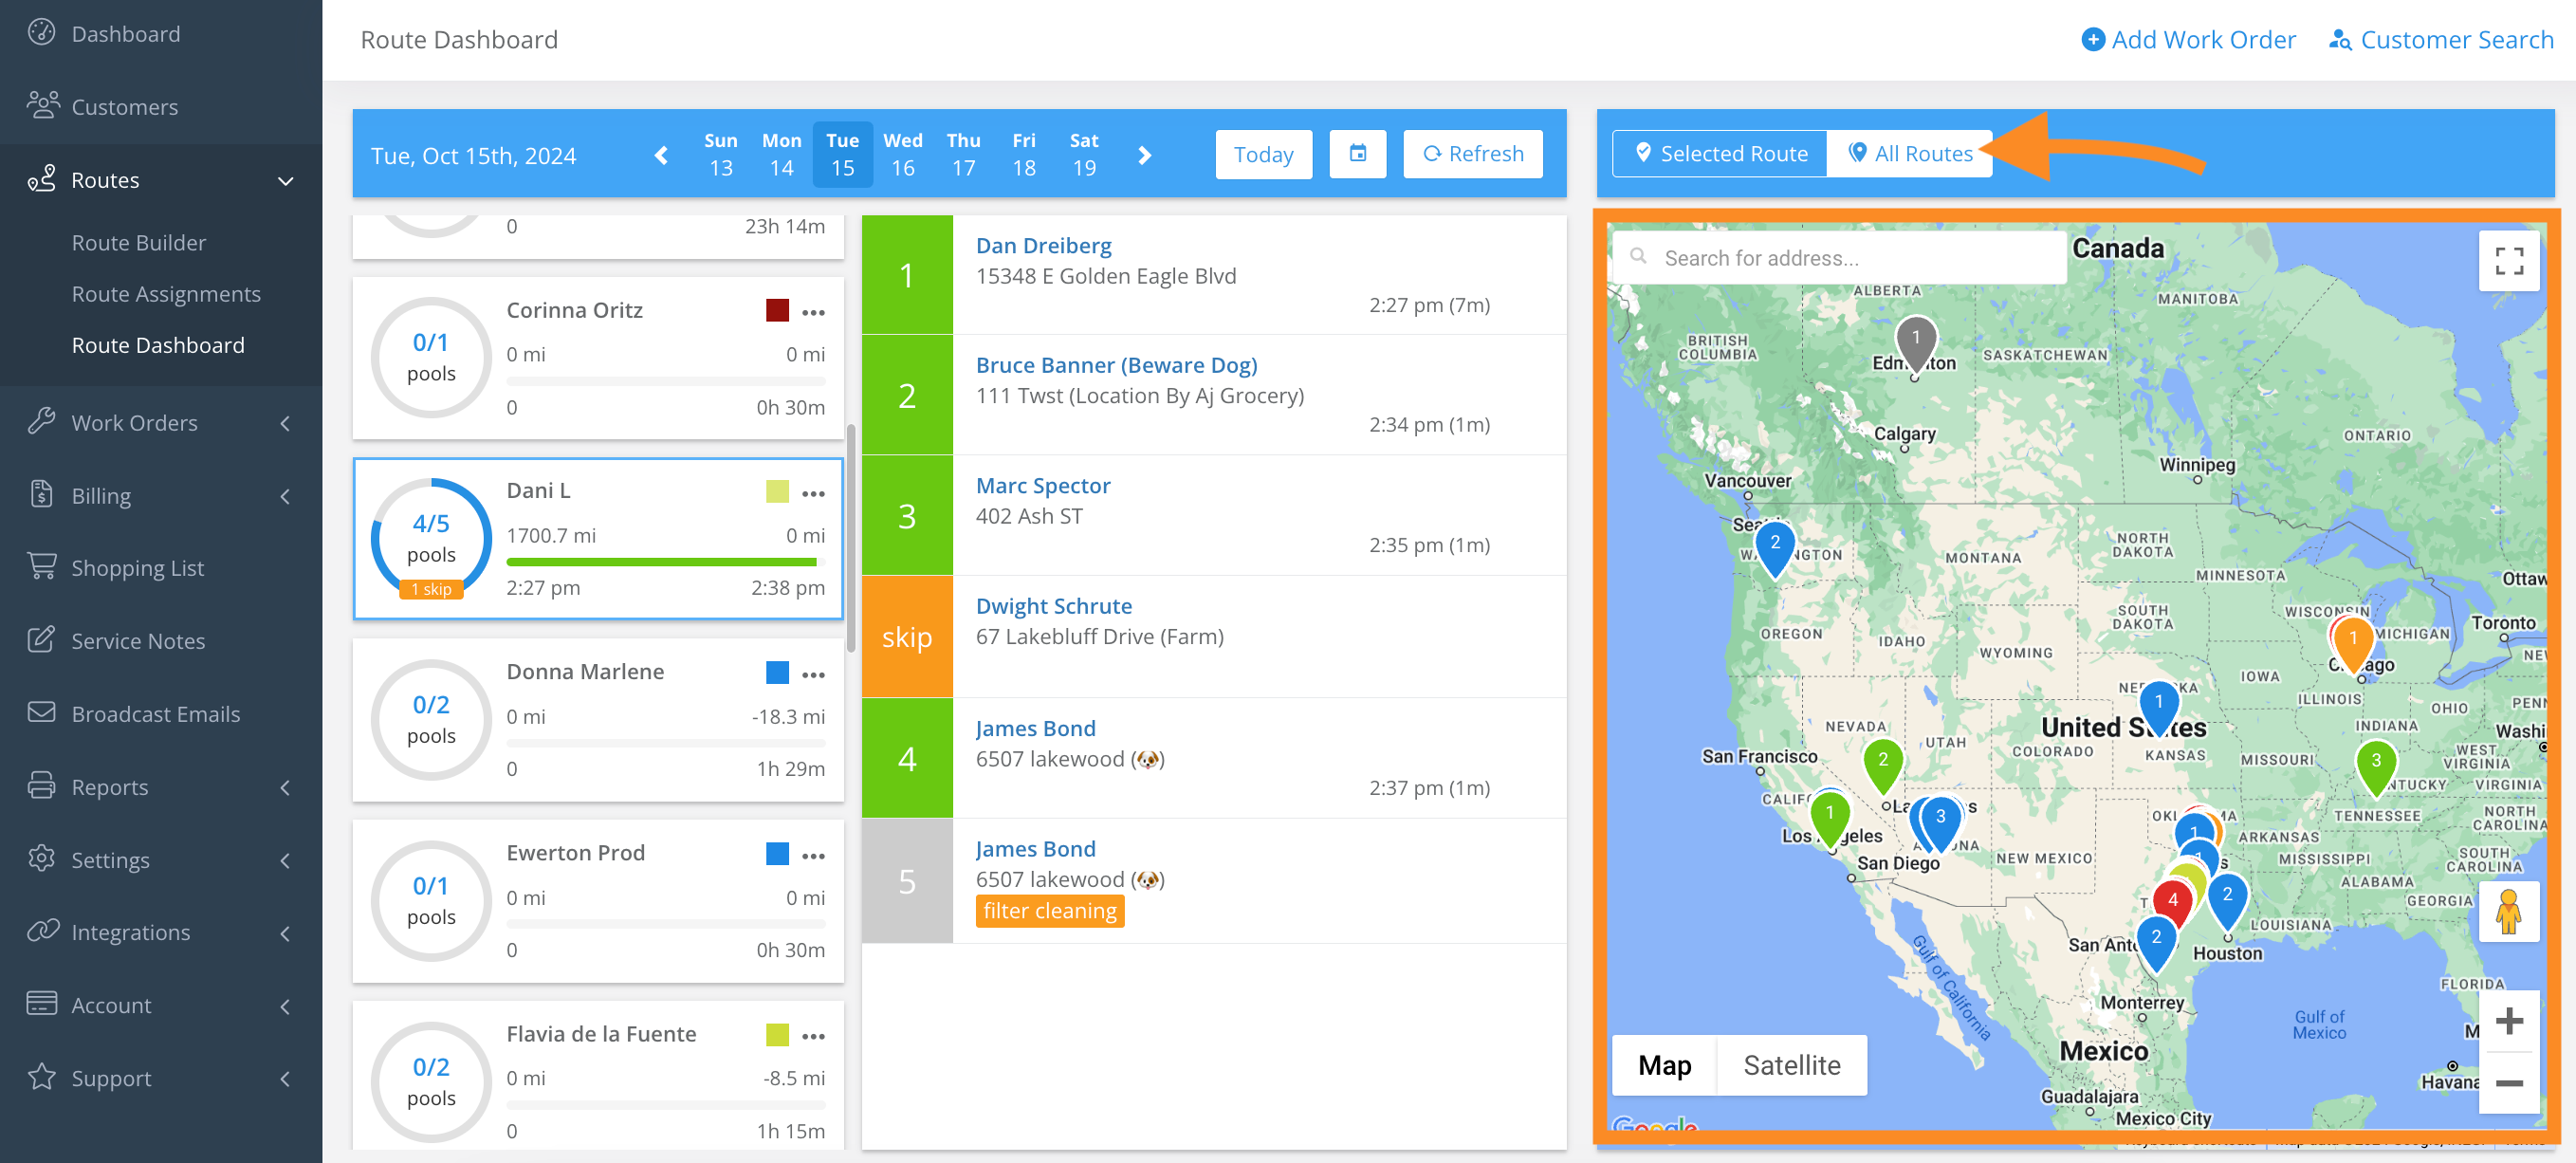
8. Click the Tech’s route assignment for the map to adjust.

9. Click on the route stop for the route to appear on the map.
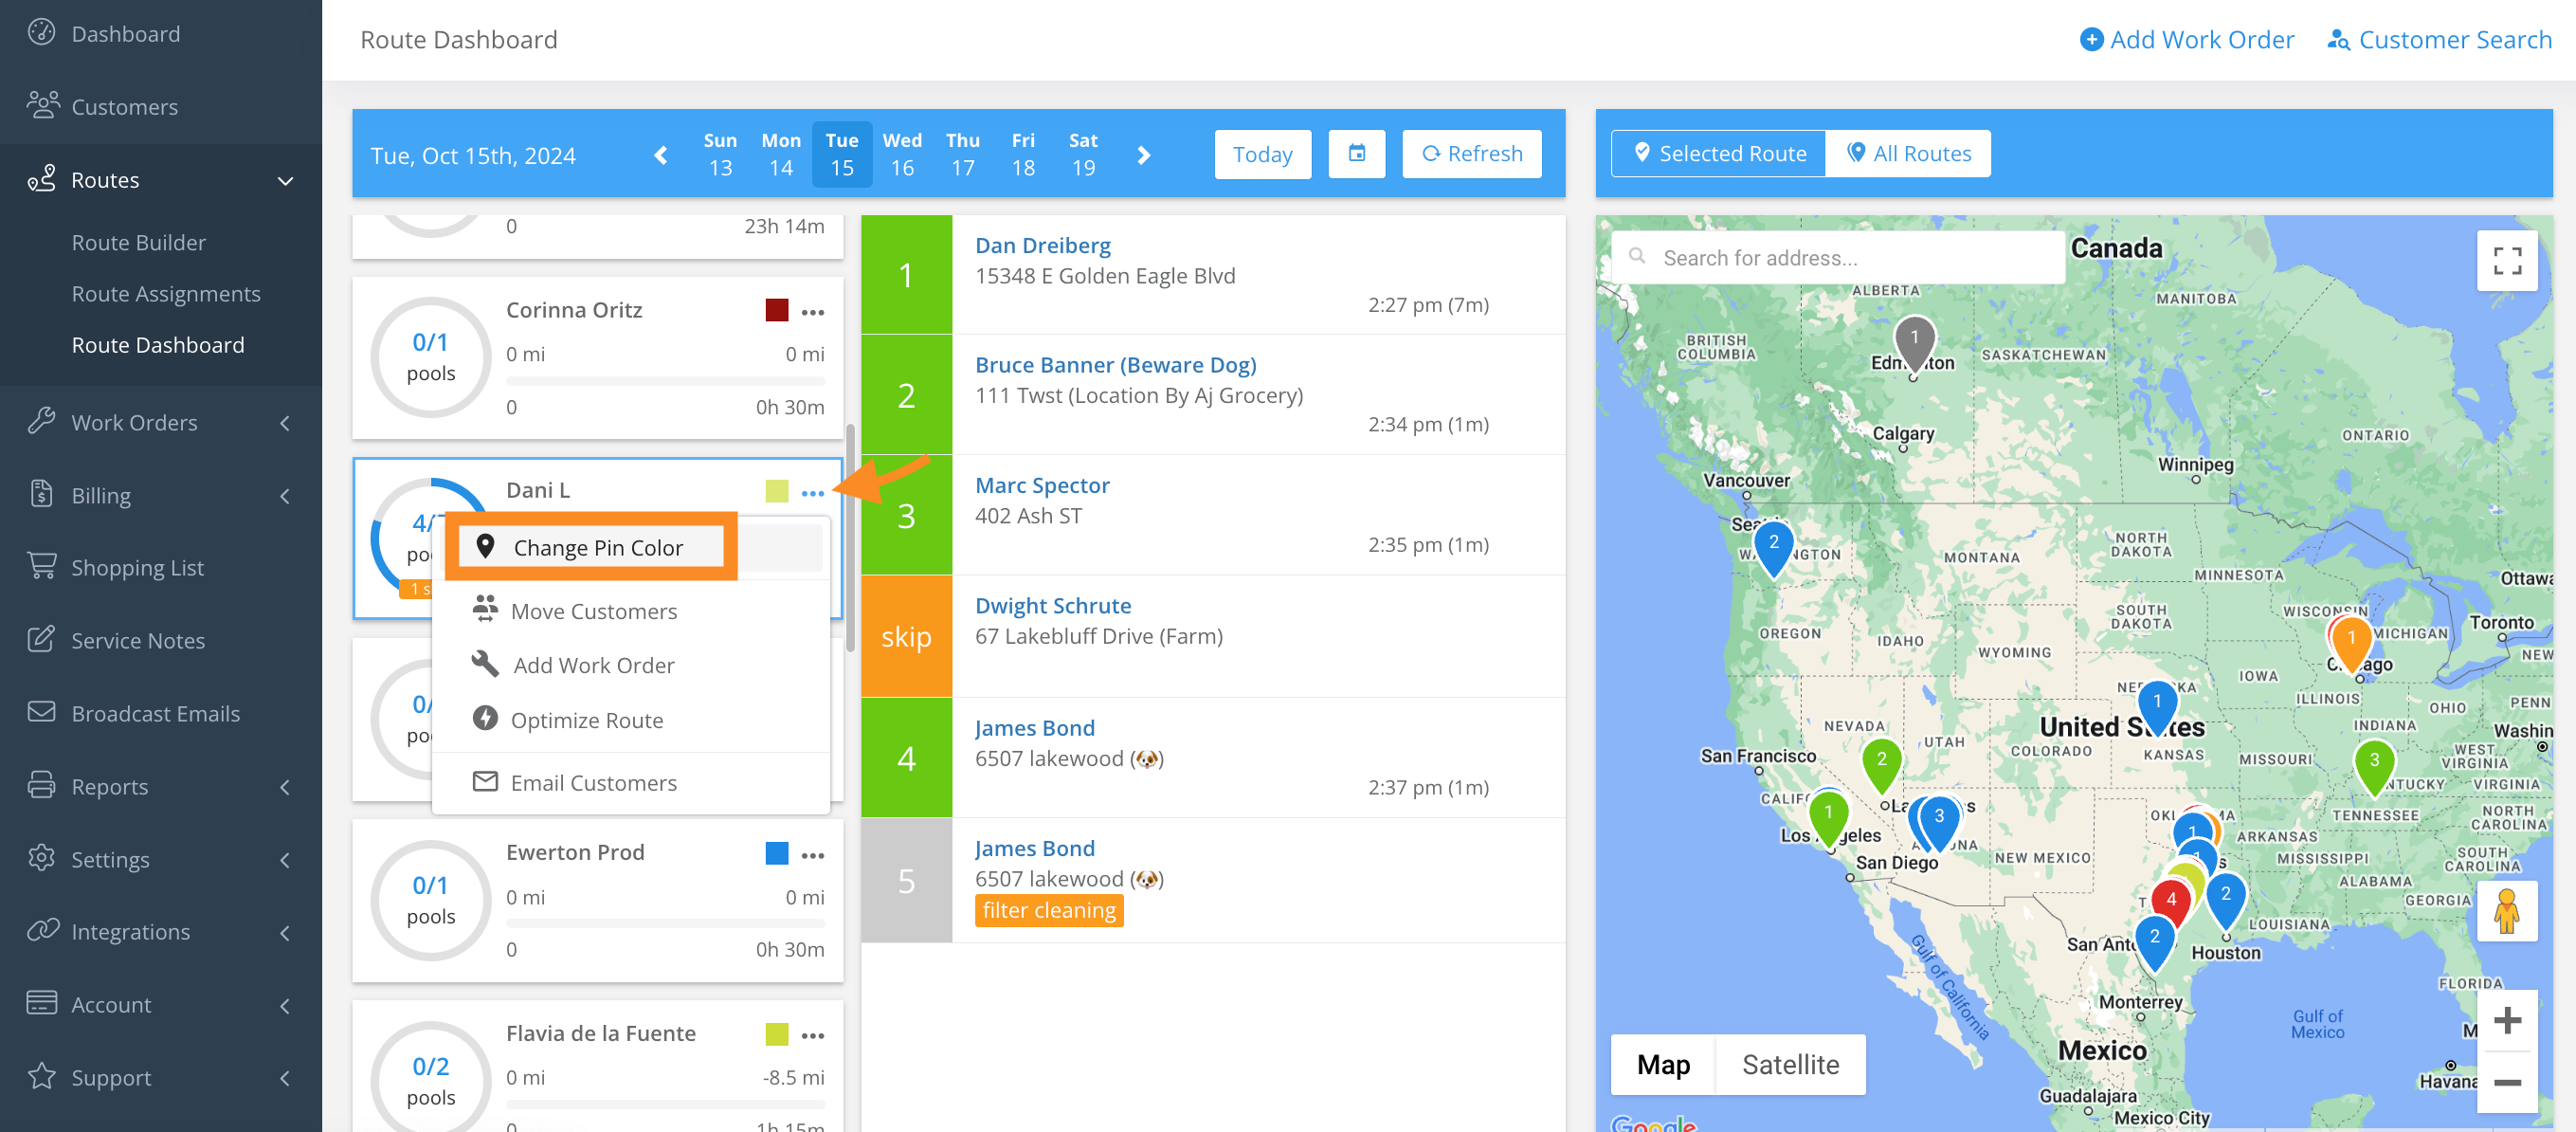
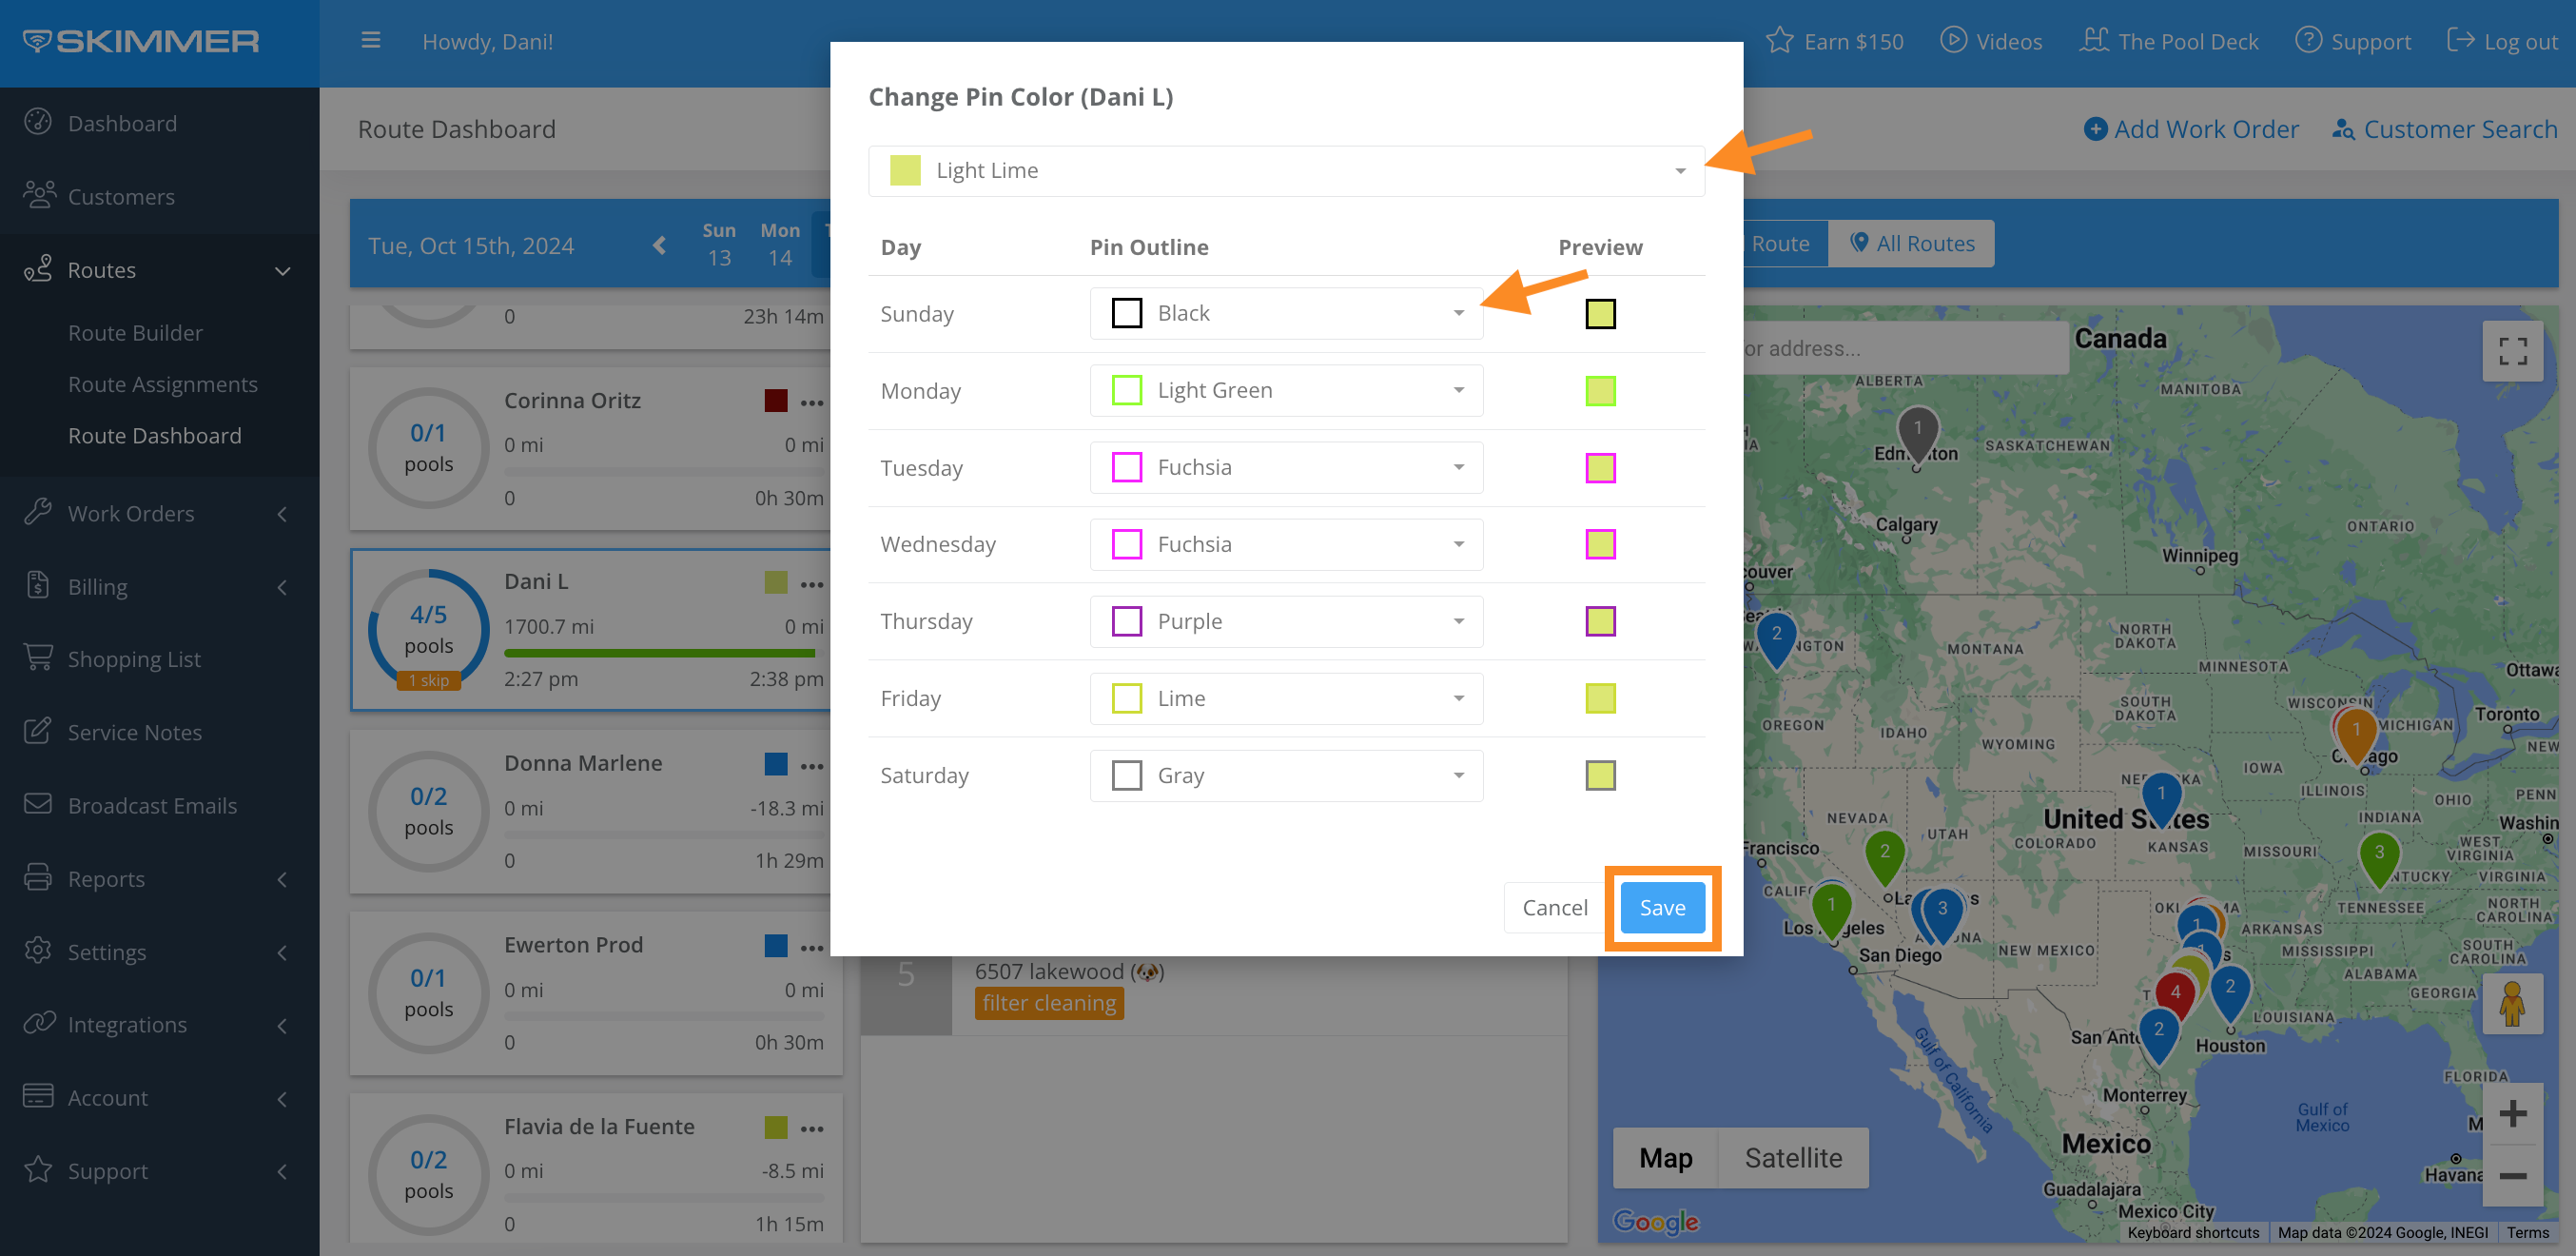
10. Click All Routes to view all route stops for the day.
- When the map is set to All Routes, there is the option to change the tech’s pin color by clicking on the three dots > Change Pin Color > Save.
Last updated on October 17, 2024