

Watch the video or scroll down for step-by-step instructions.
Access Tiers: Scaling Up, Owning the Market
Step-by-step instructions . . .
1. In this tutorial, we'll explore one of the three modules that make up the Schedule—the Calendar. To keep the focus on the Calendar, we'll deselect "Unscheduled" and "Map."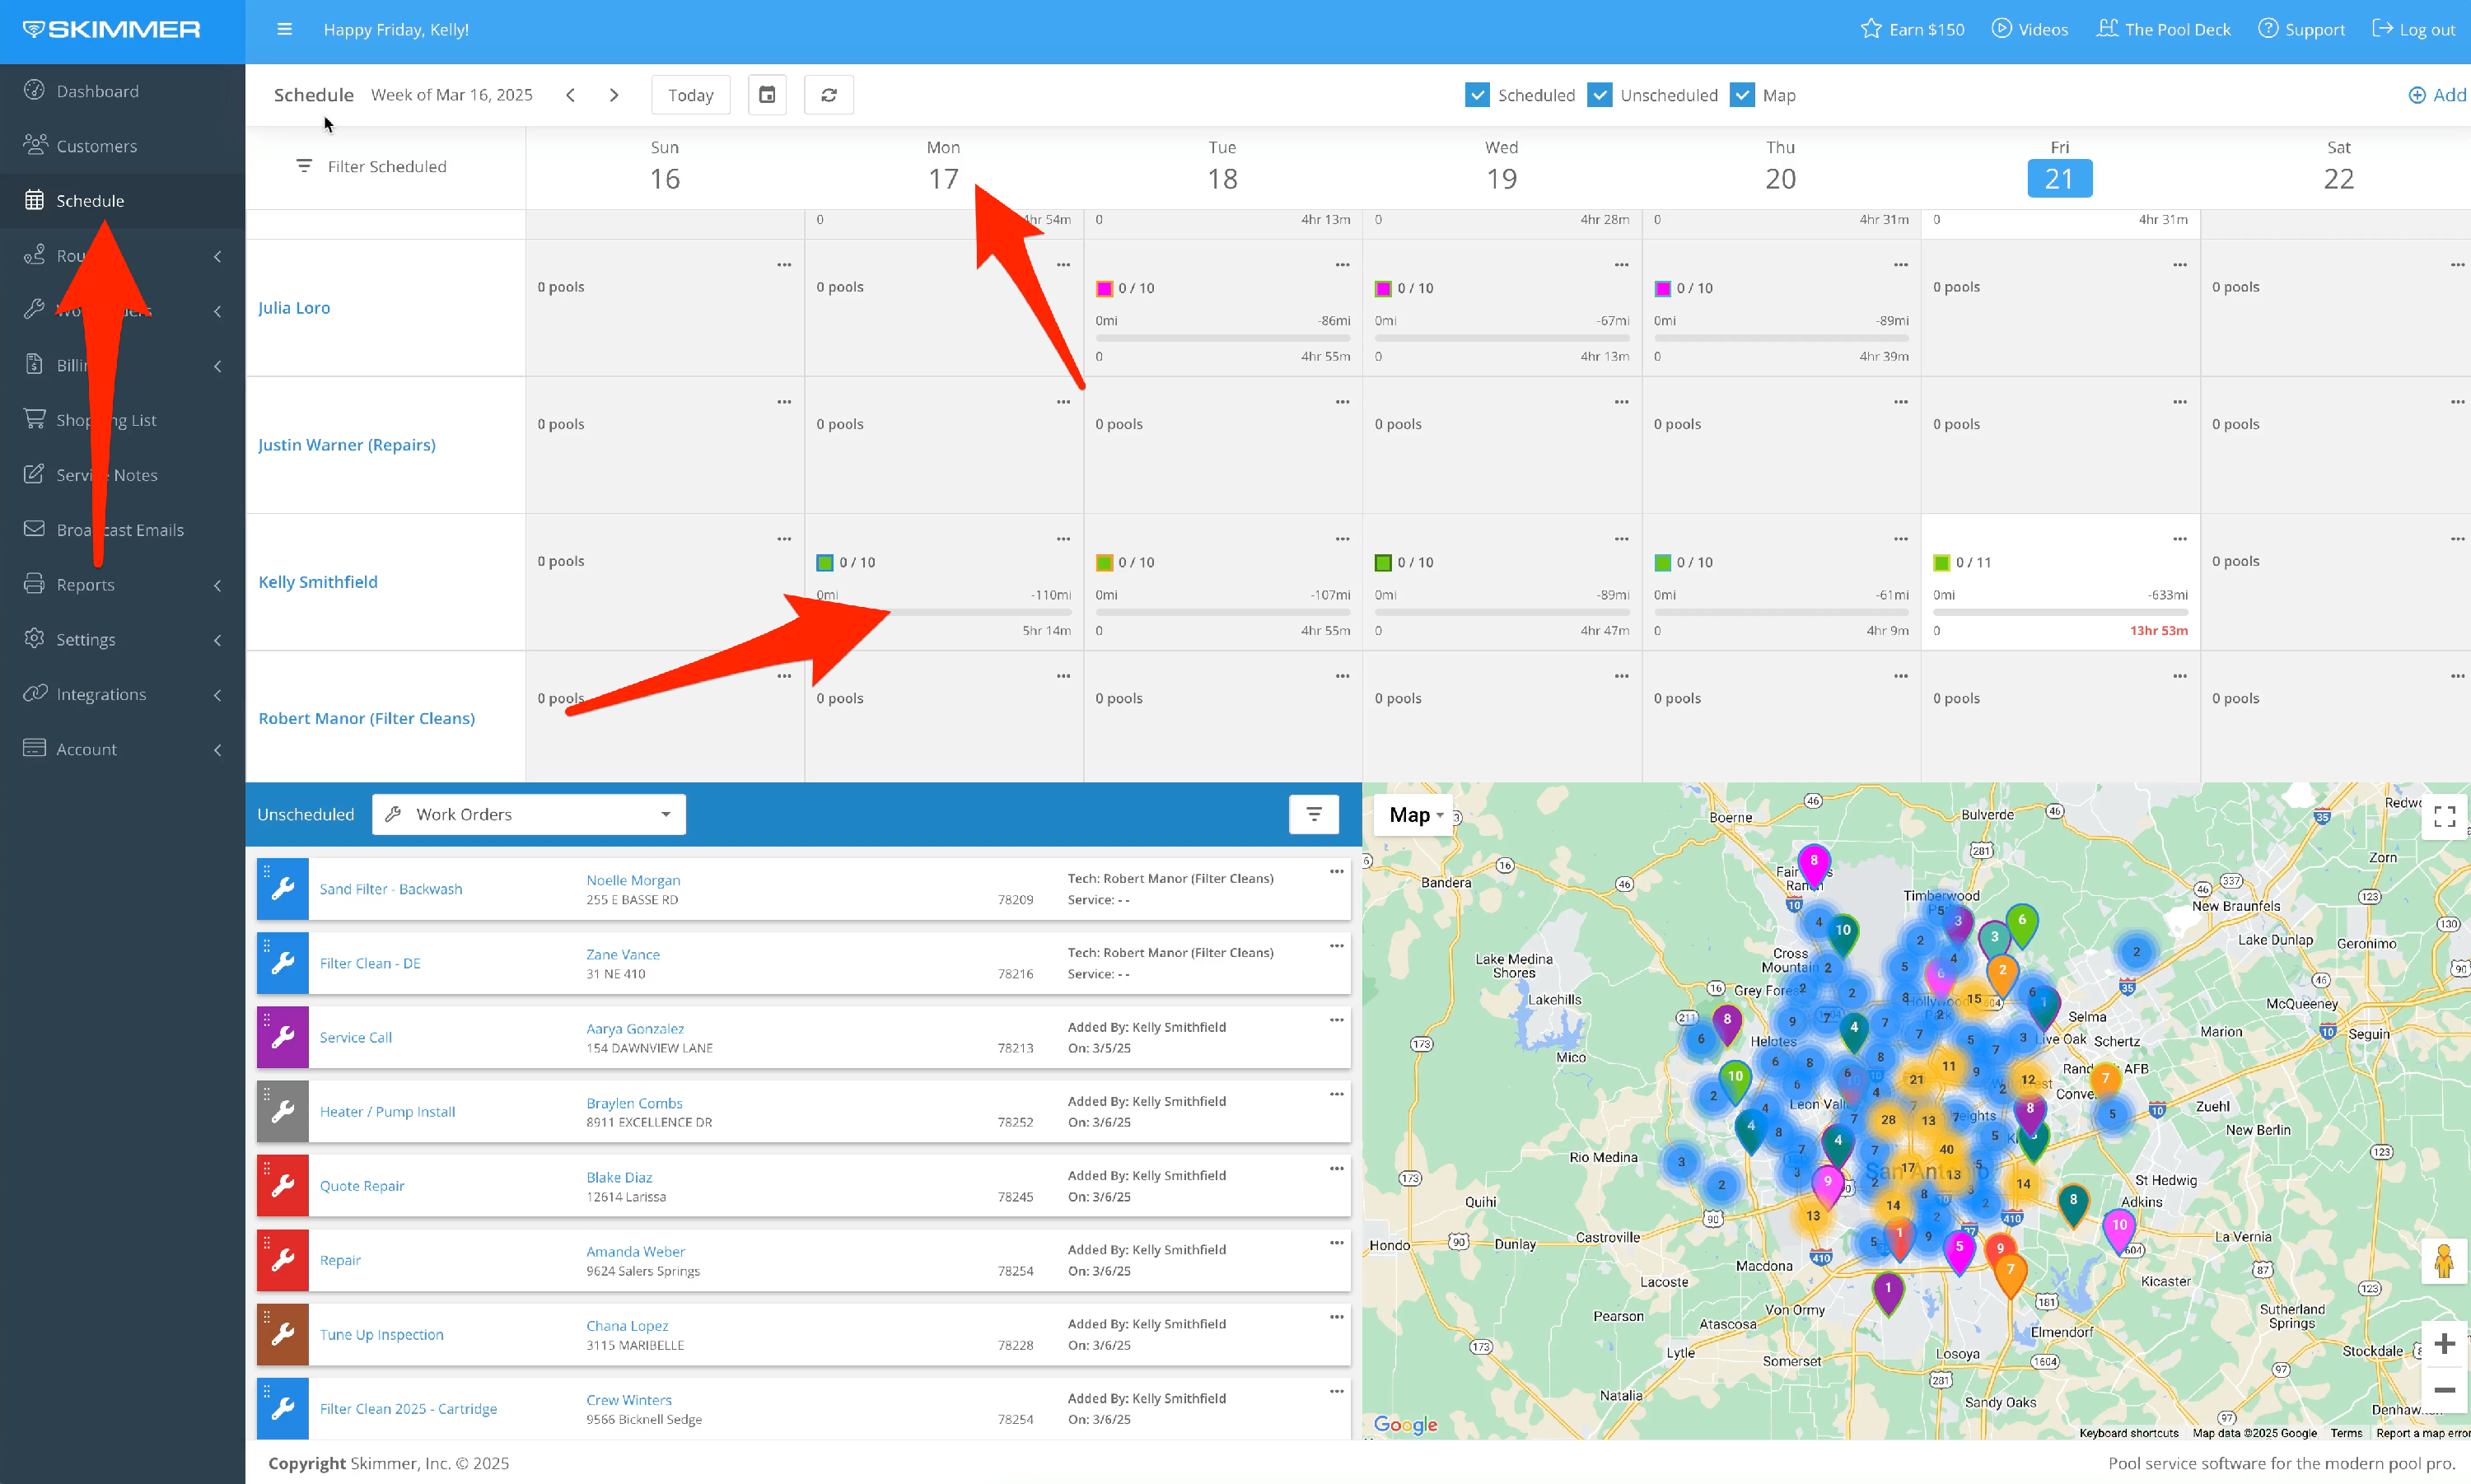
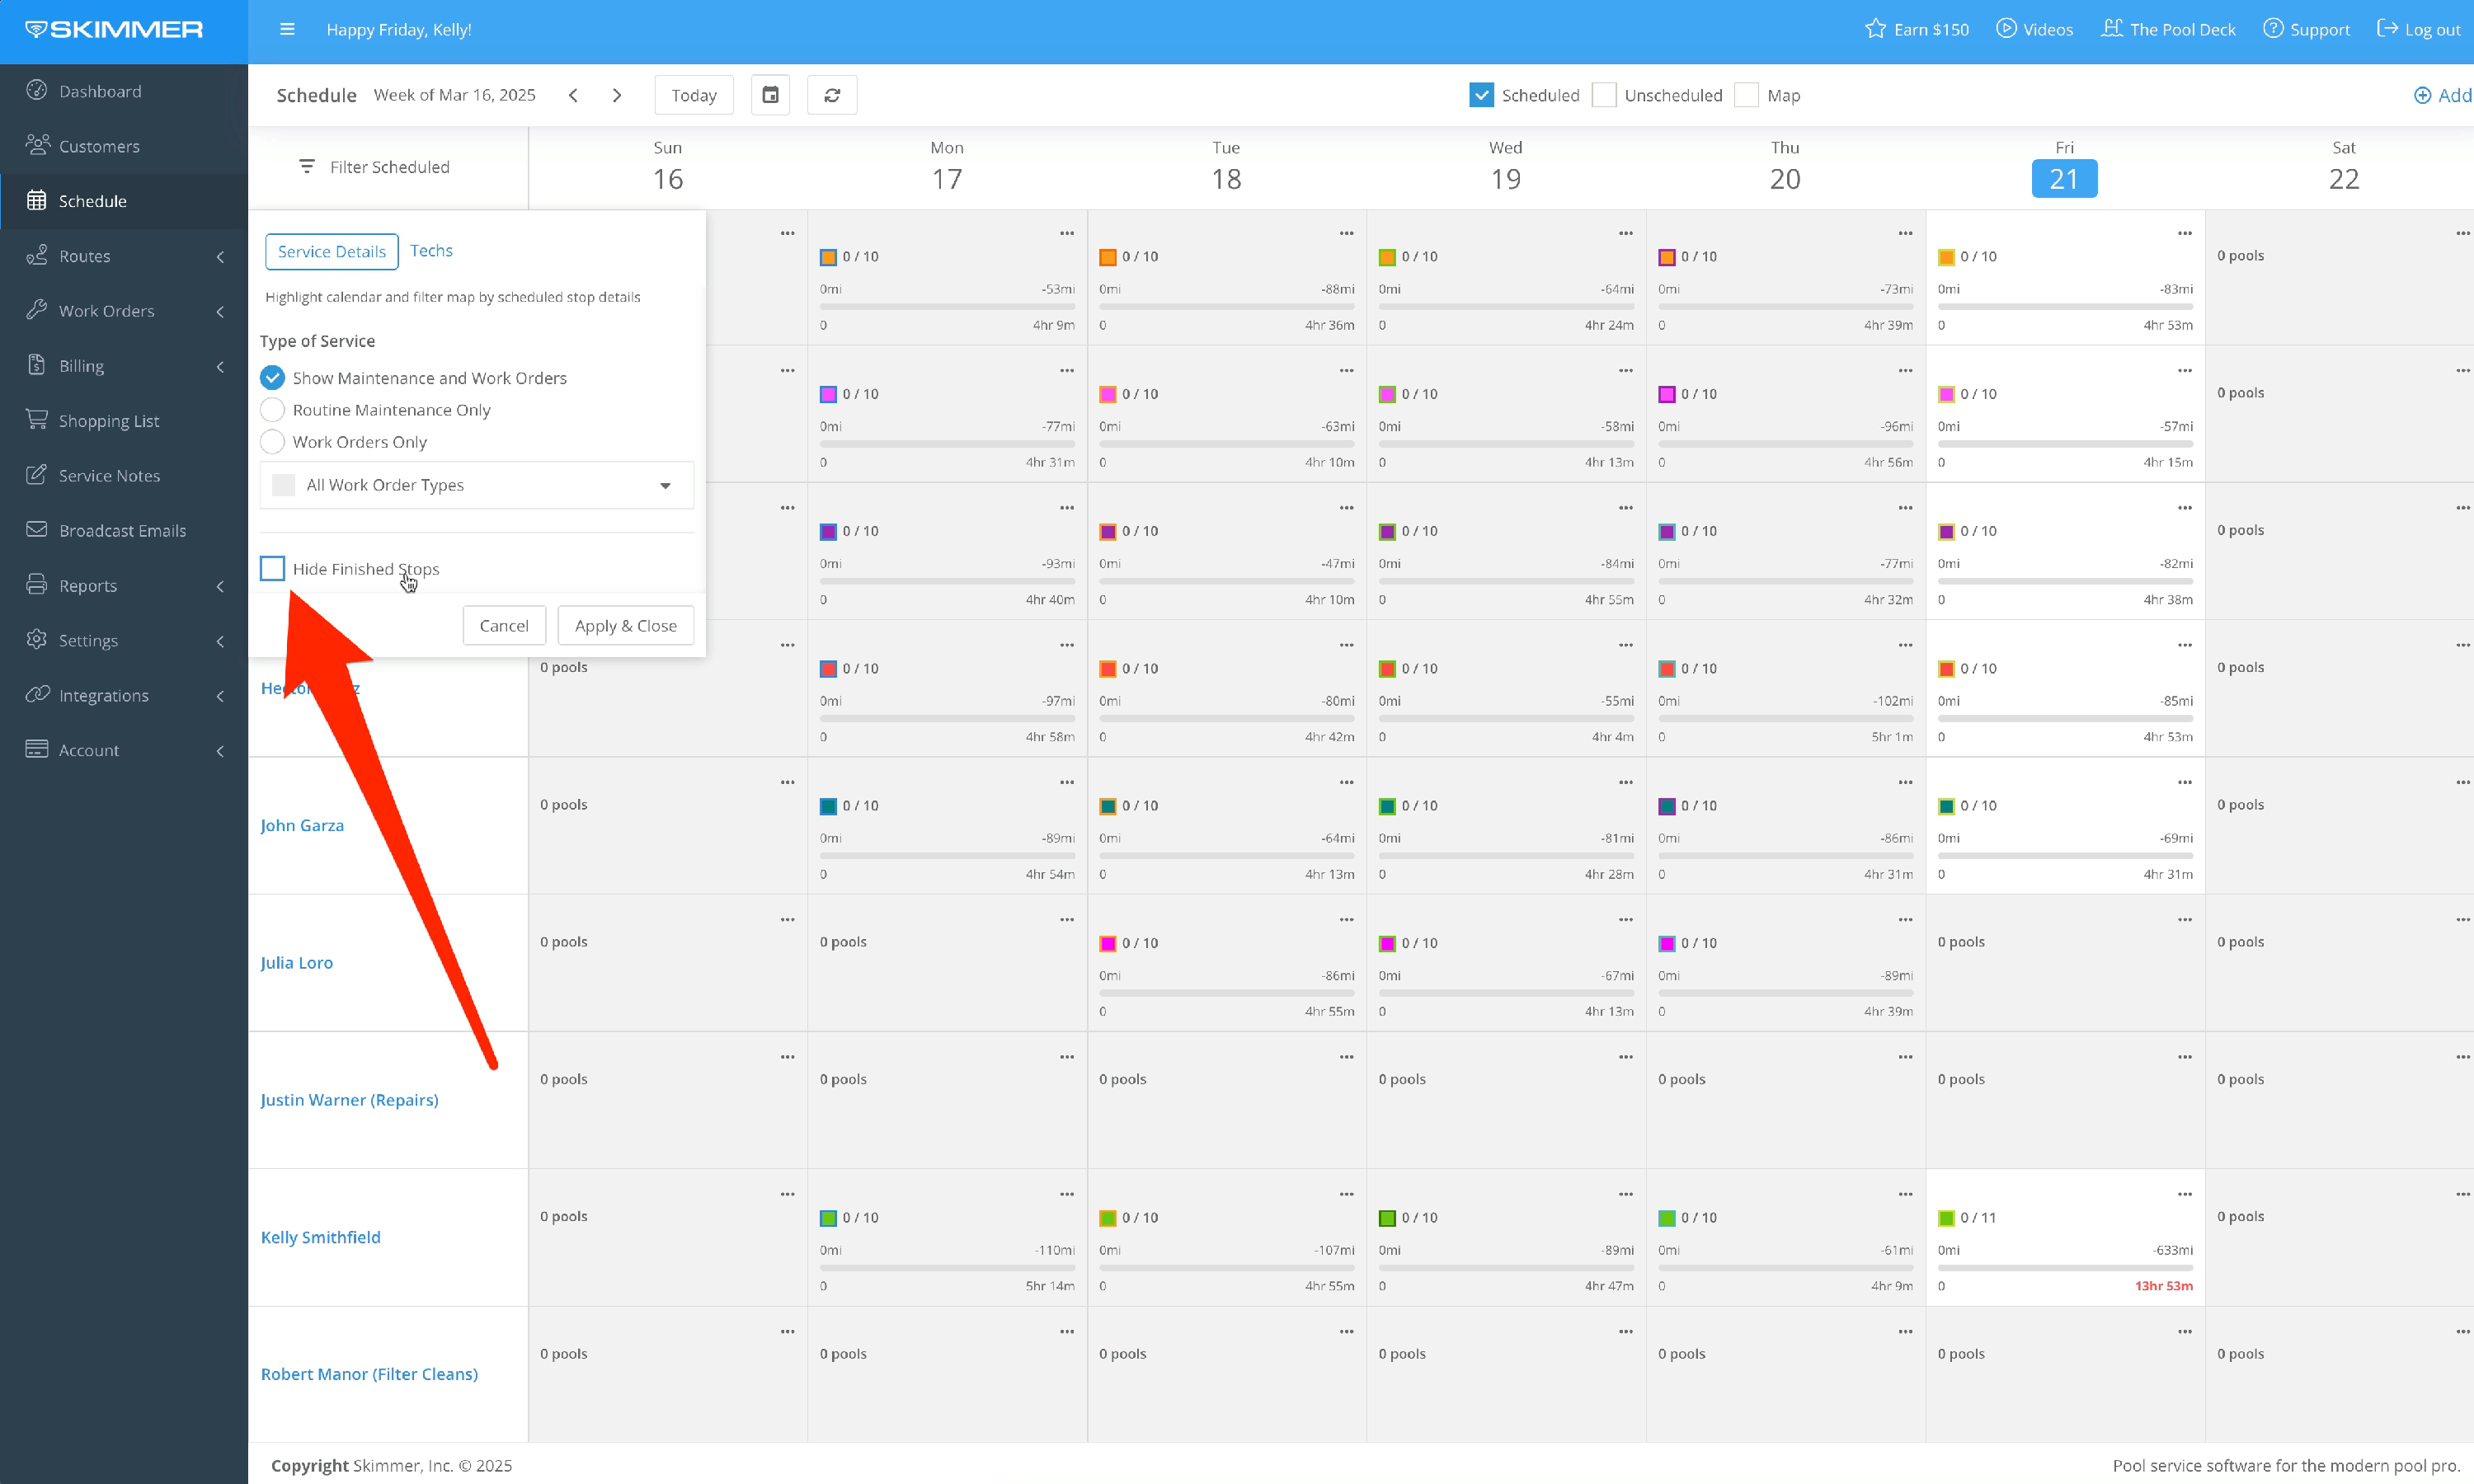
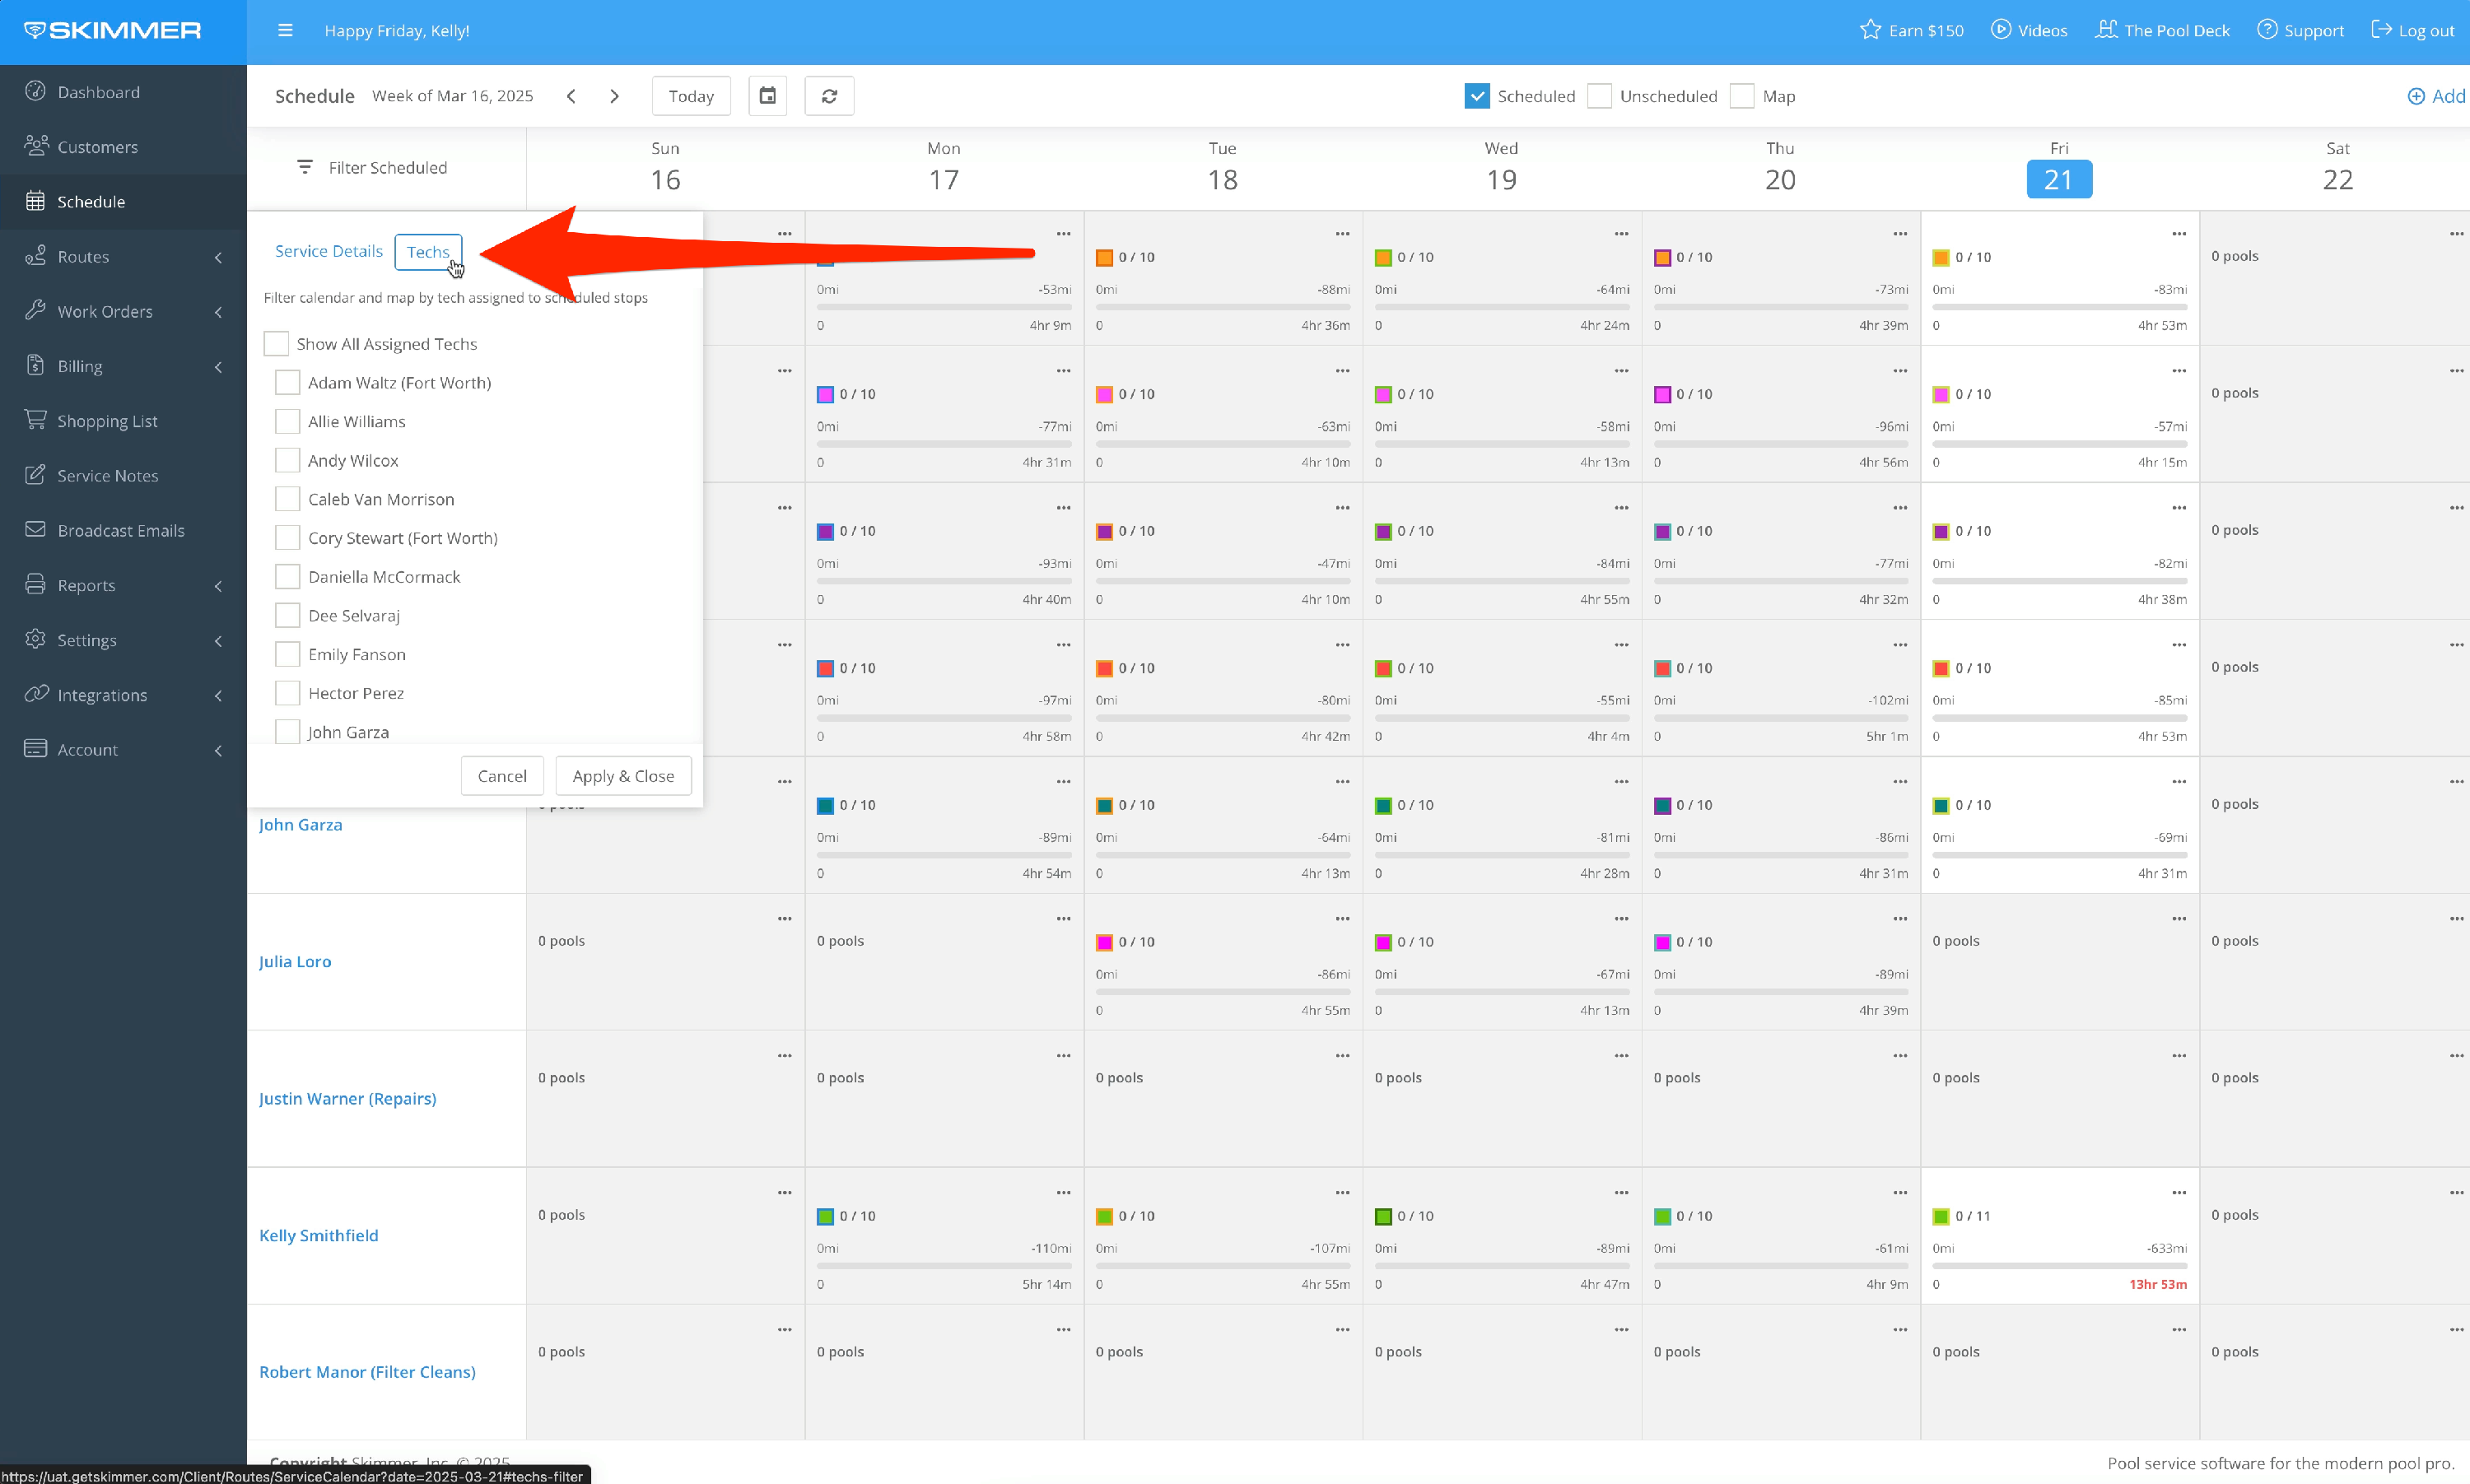
2. At the top left, click the Calendar’s filter options. You can filter by work type—displaying all regular route stops along with work orders or focus on one category. If you prefer to see only work orders, you can further specify the work order type. Additionally, you can hide completed tasks to view only pending work and filter by technician.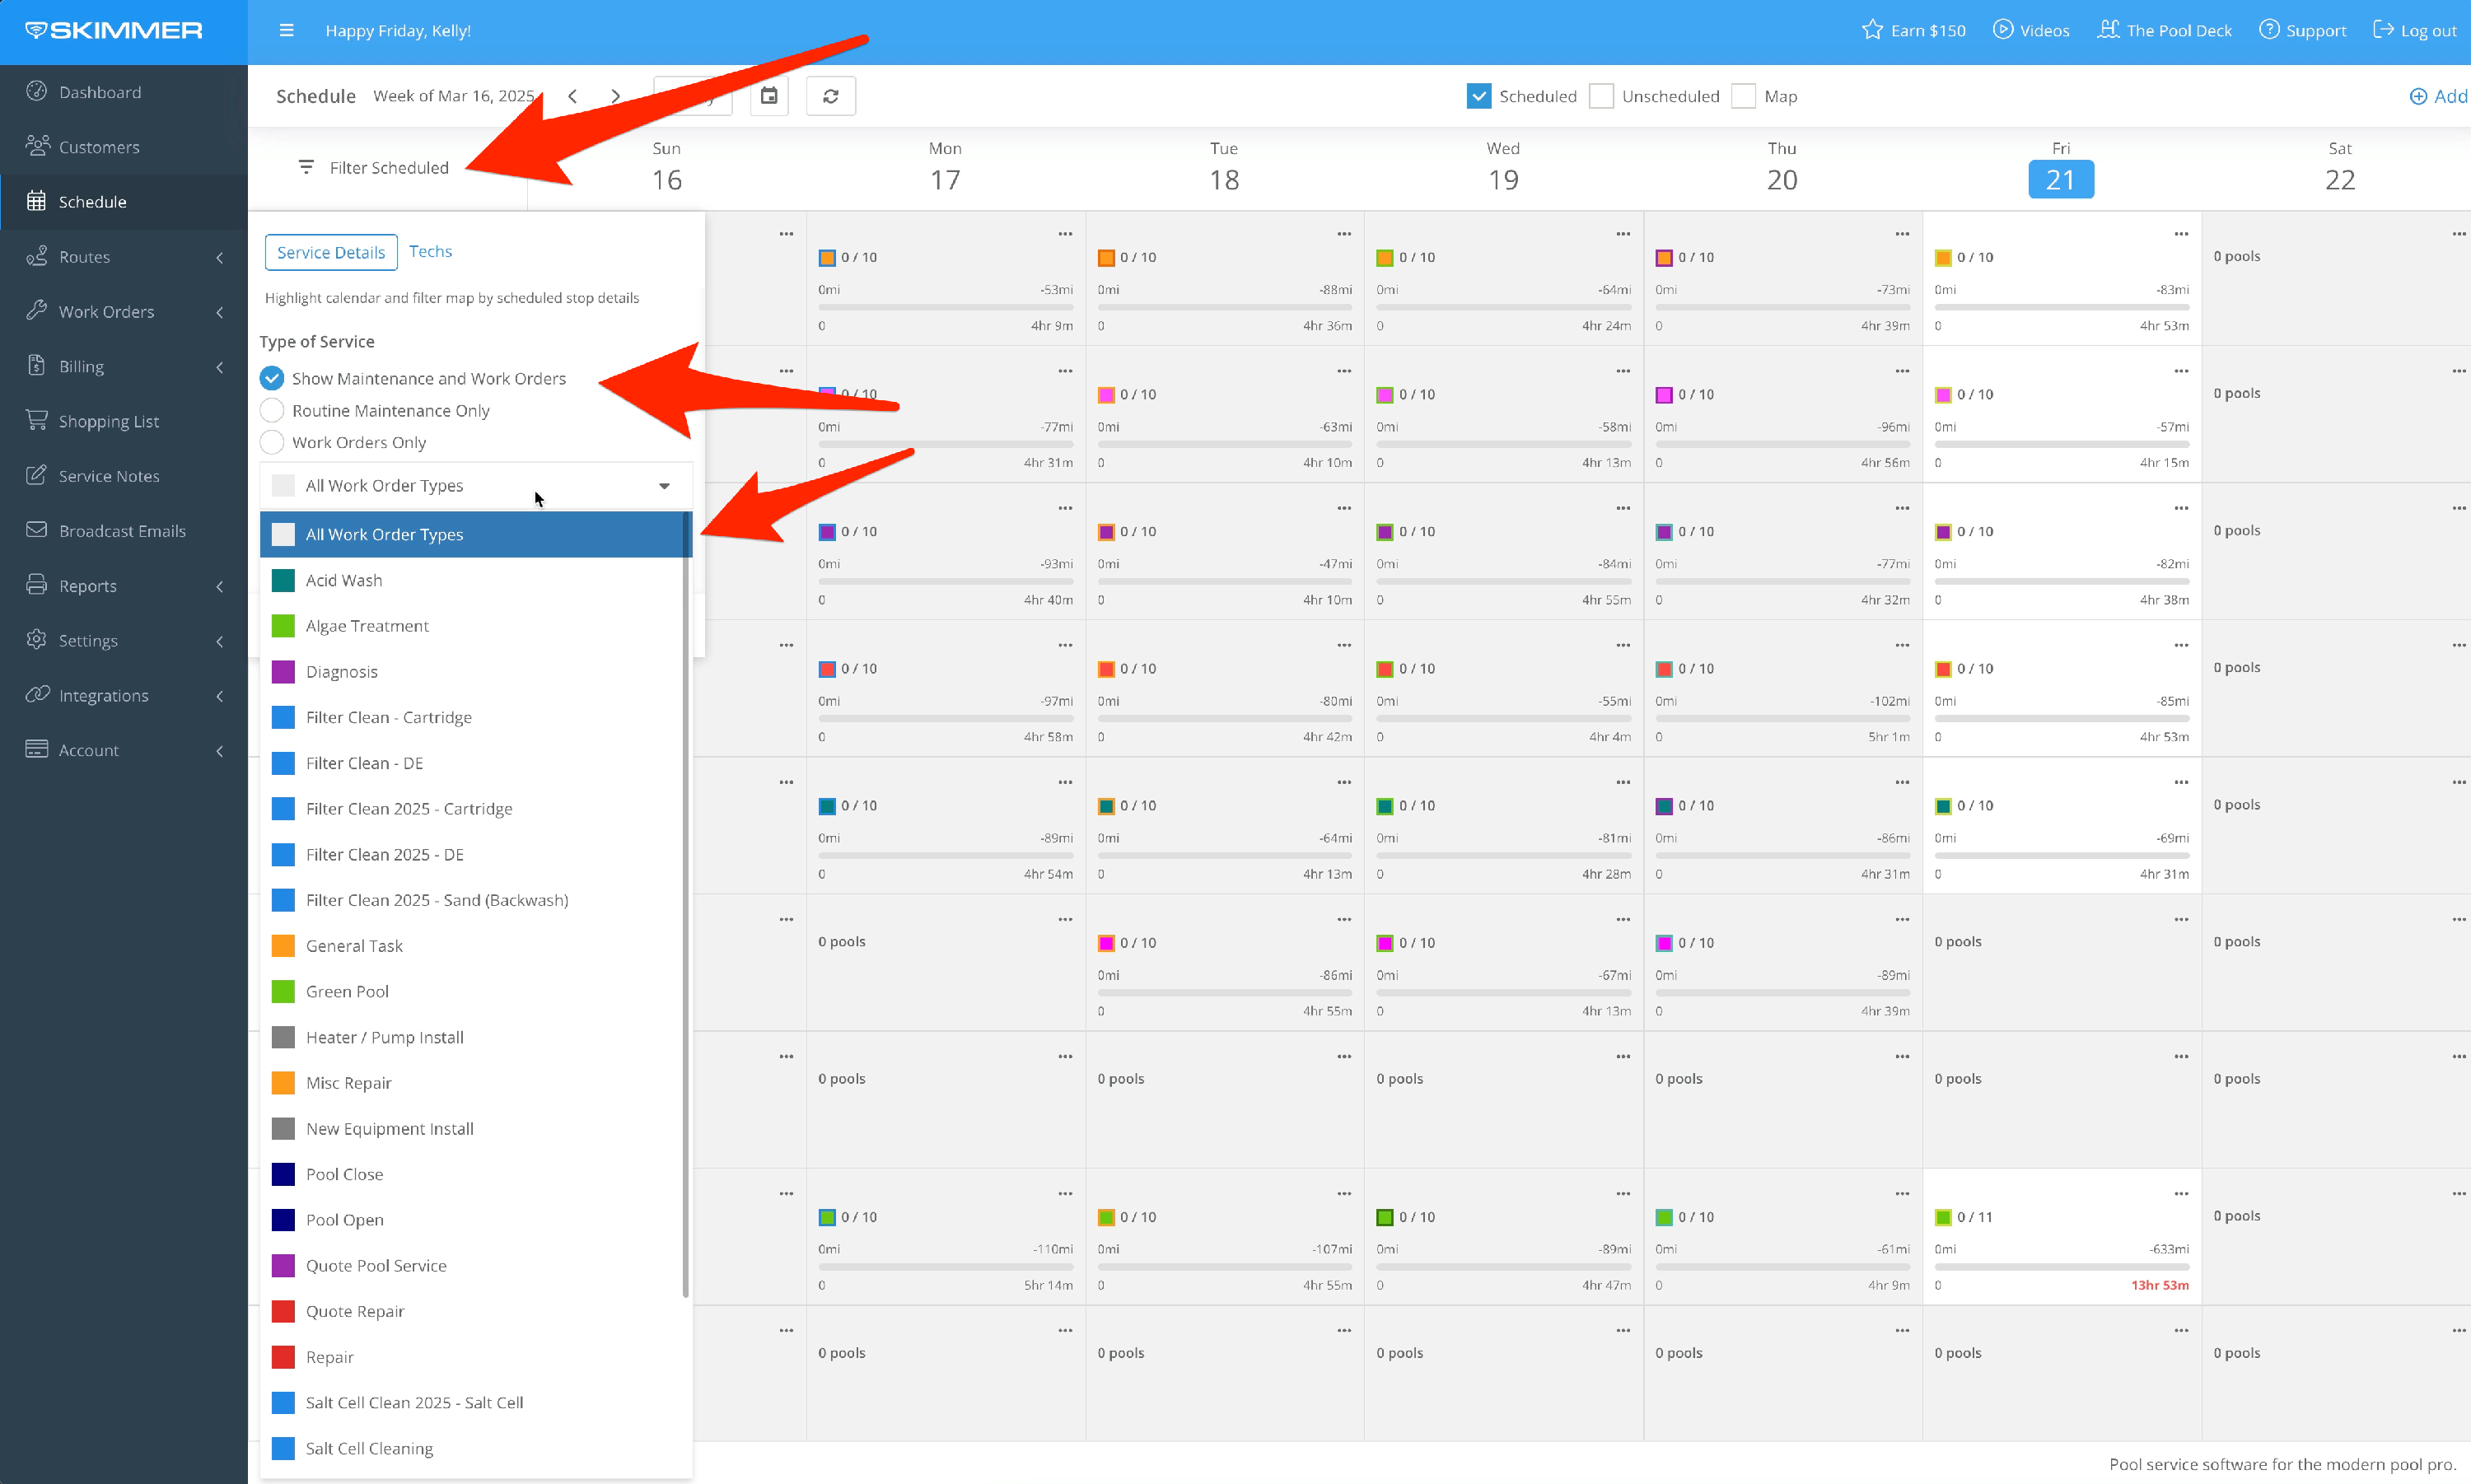
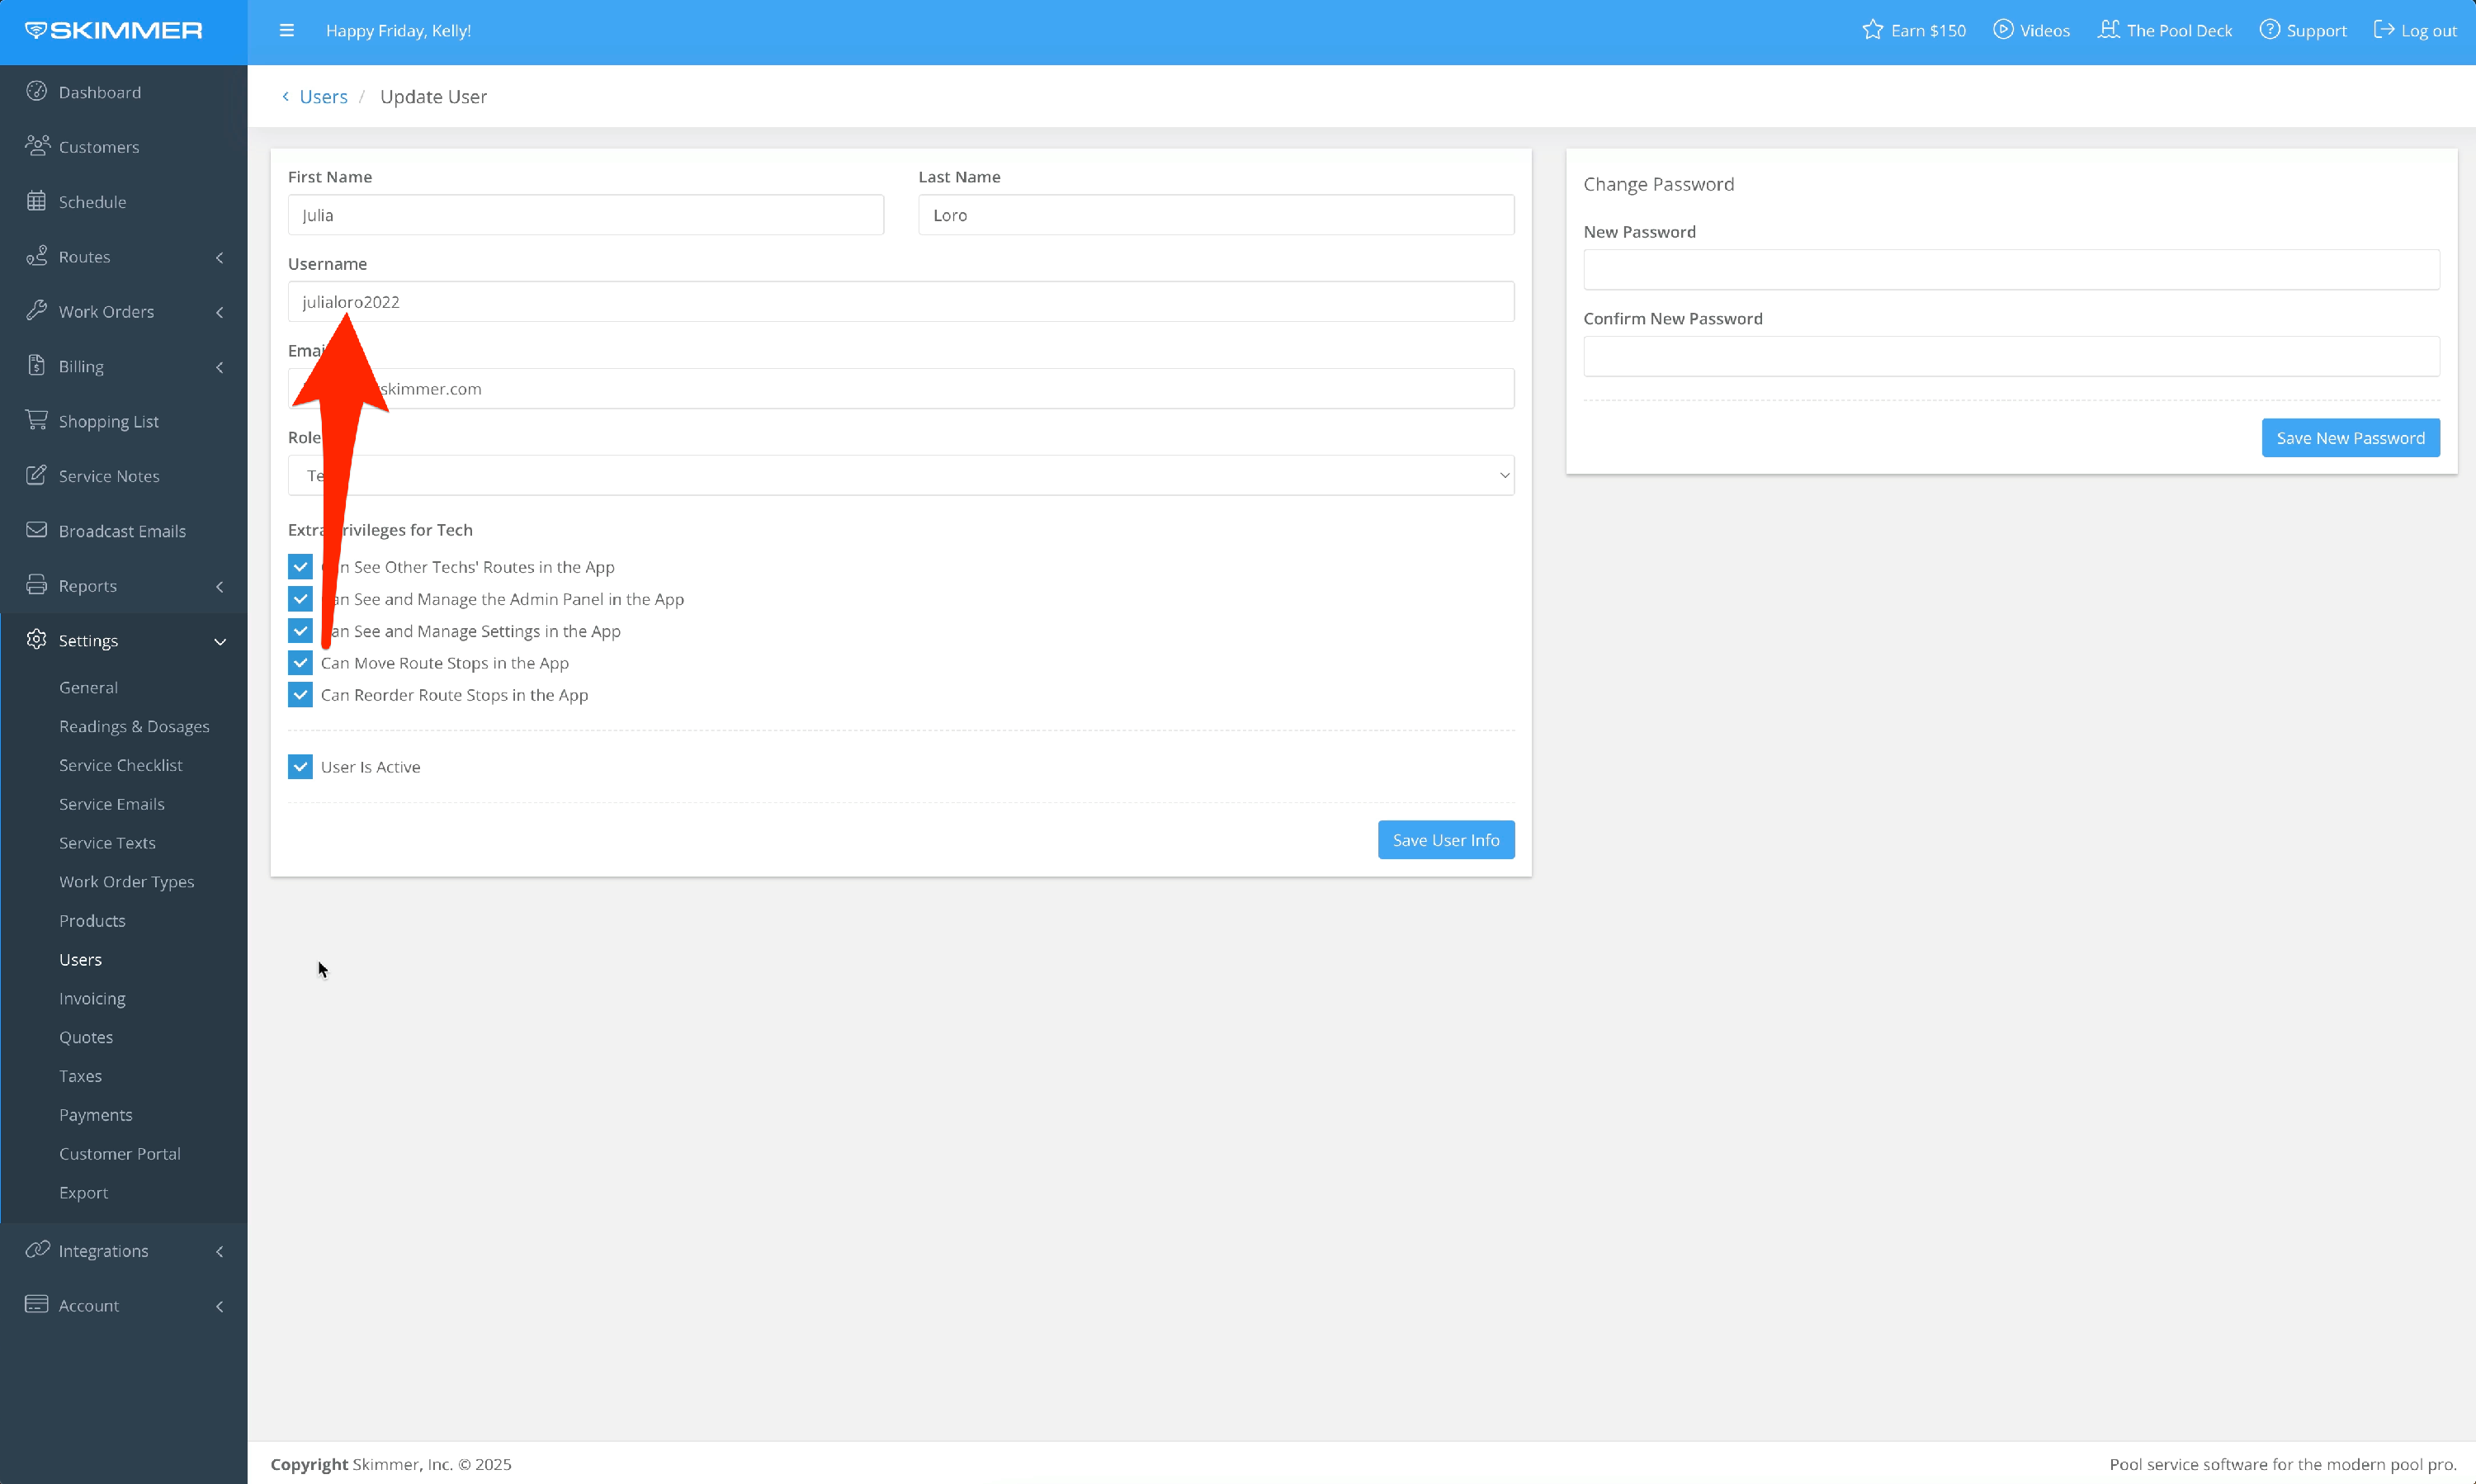
3. On the left, you'll see a list of all company user accounts—including both technicians and administrators, as both can have scheduled work. Simply click on a user’s name to open their profile screen.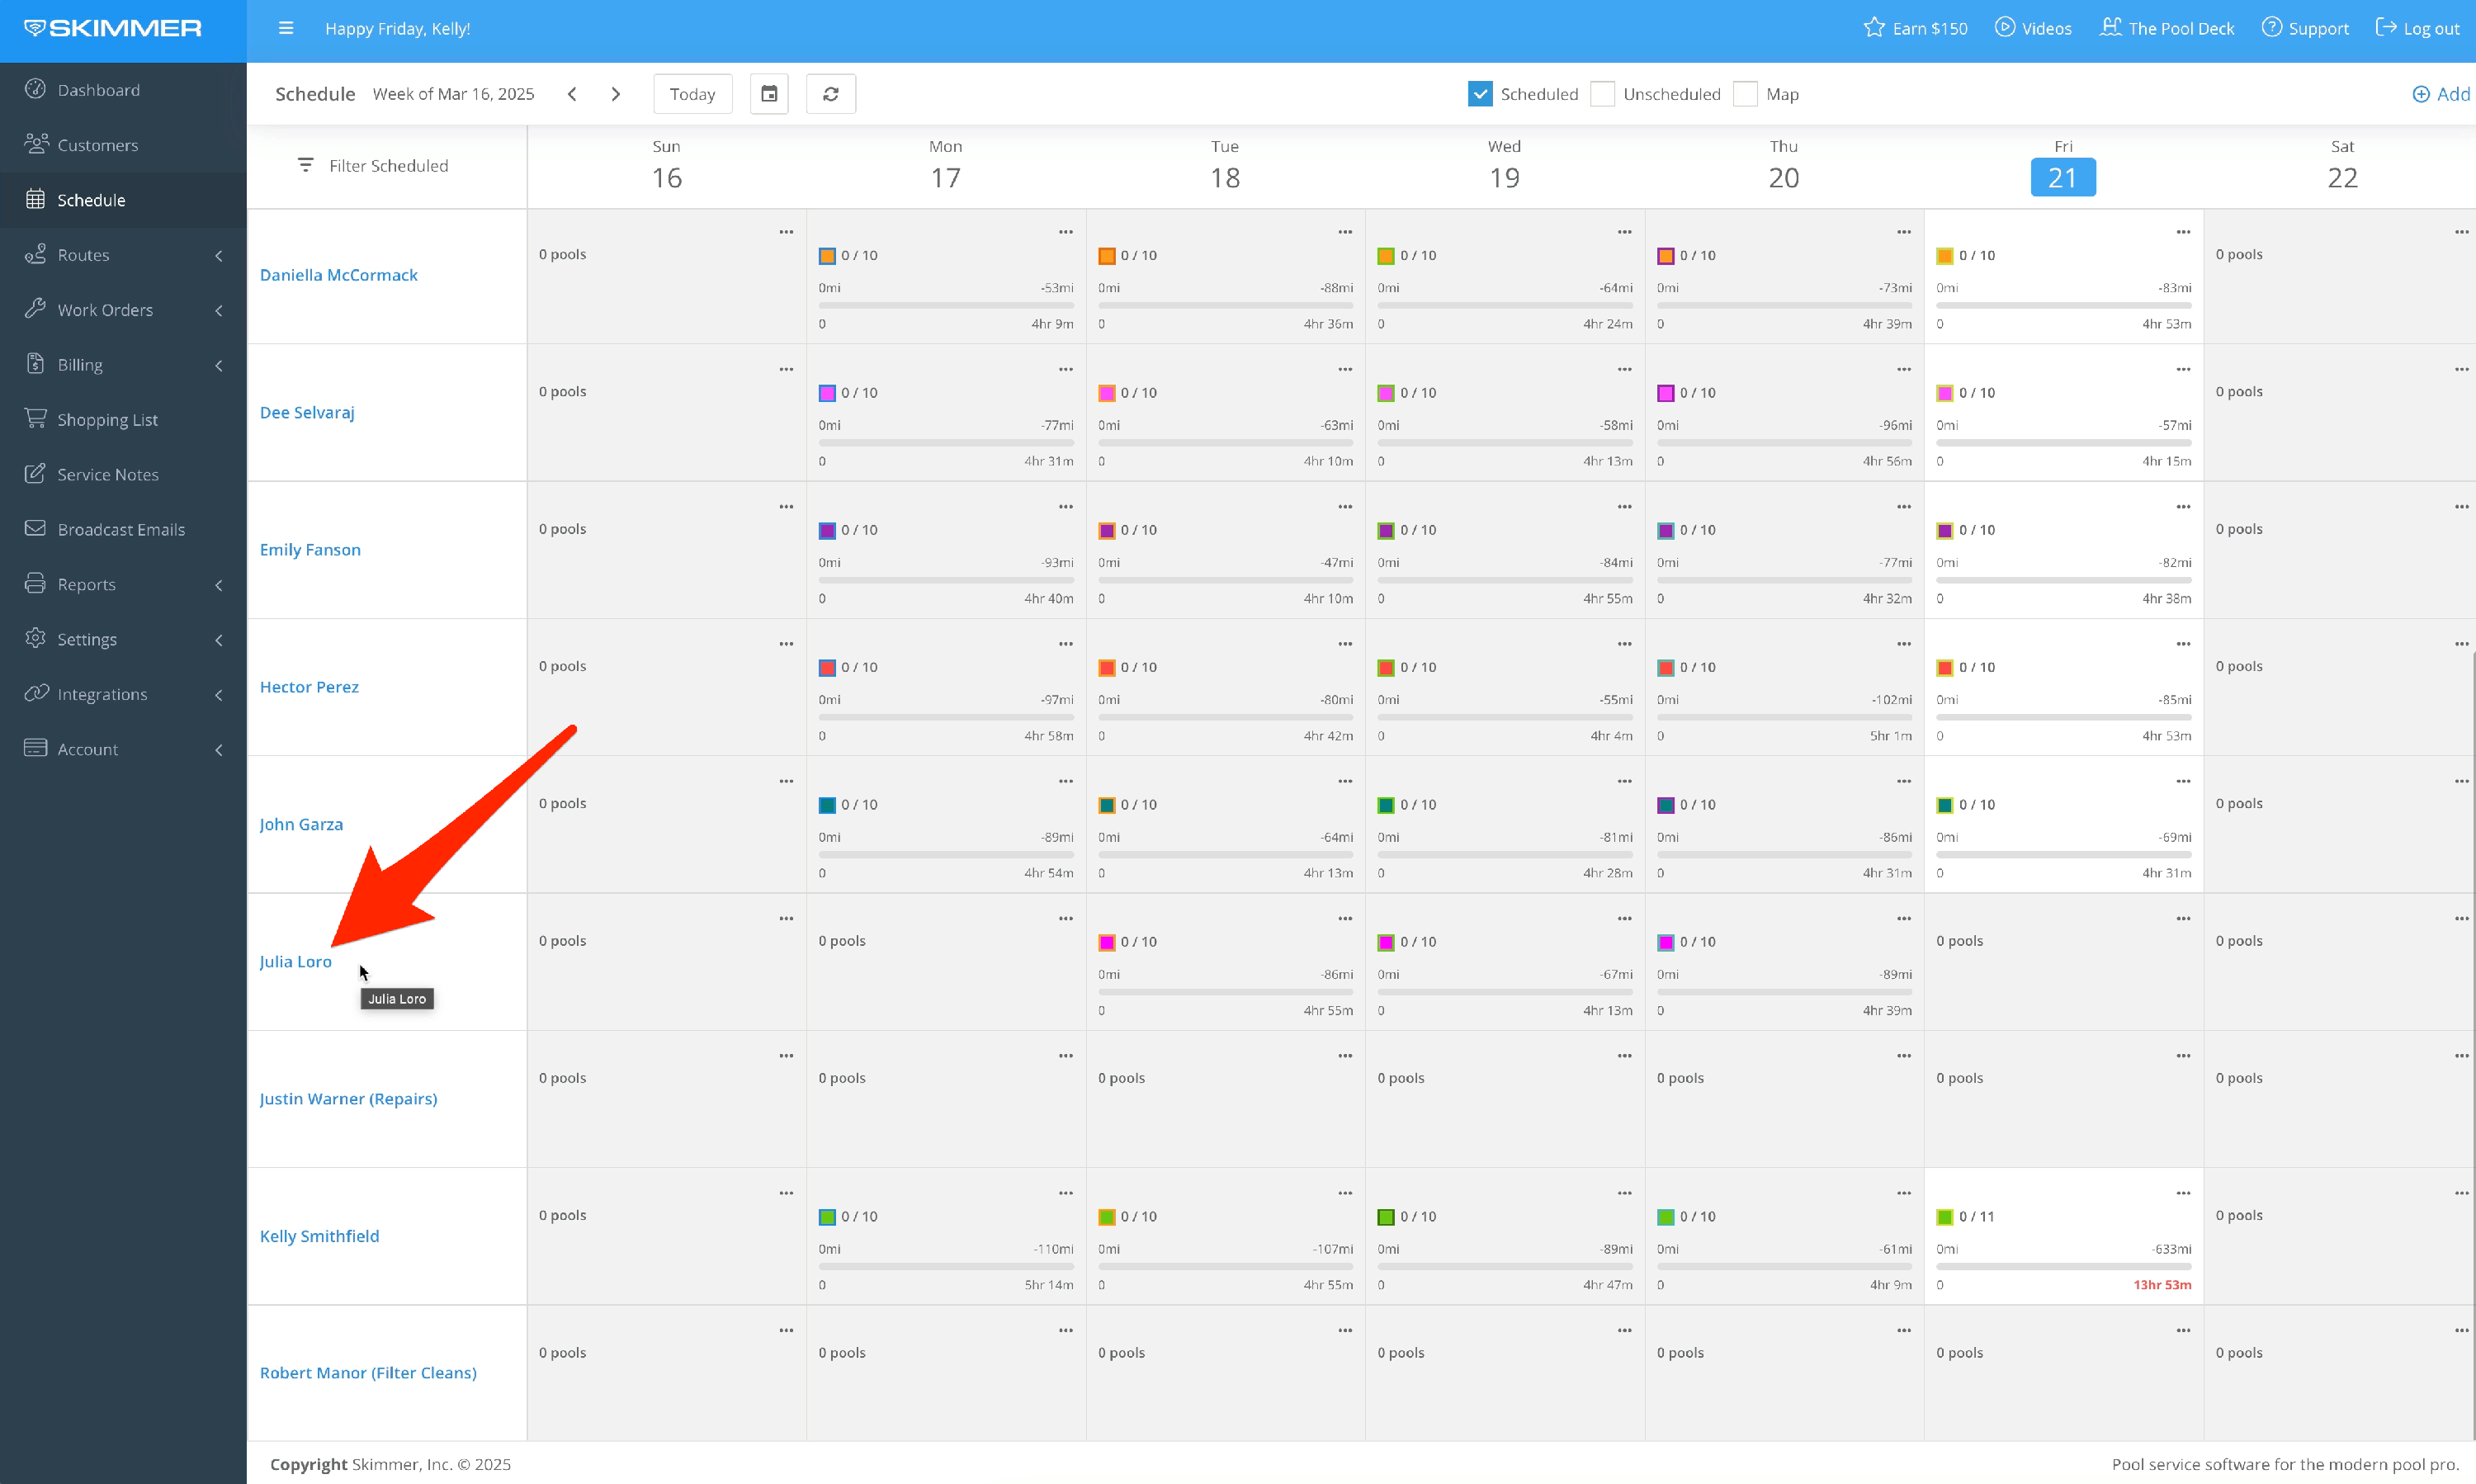
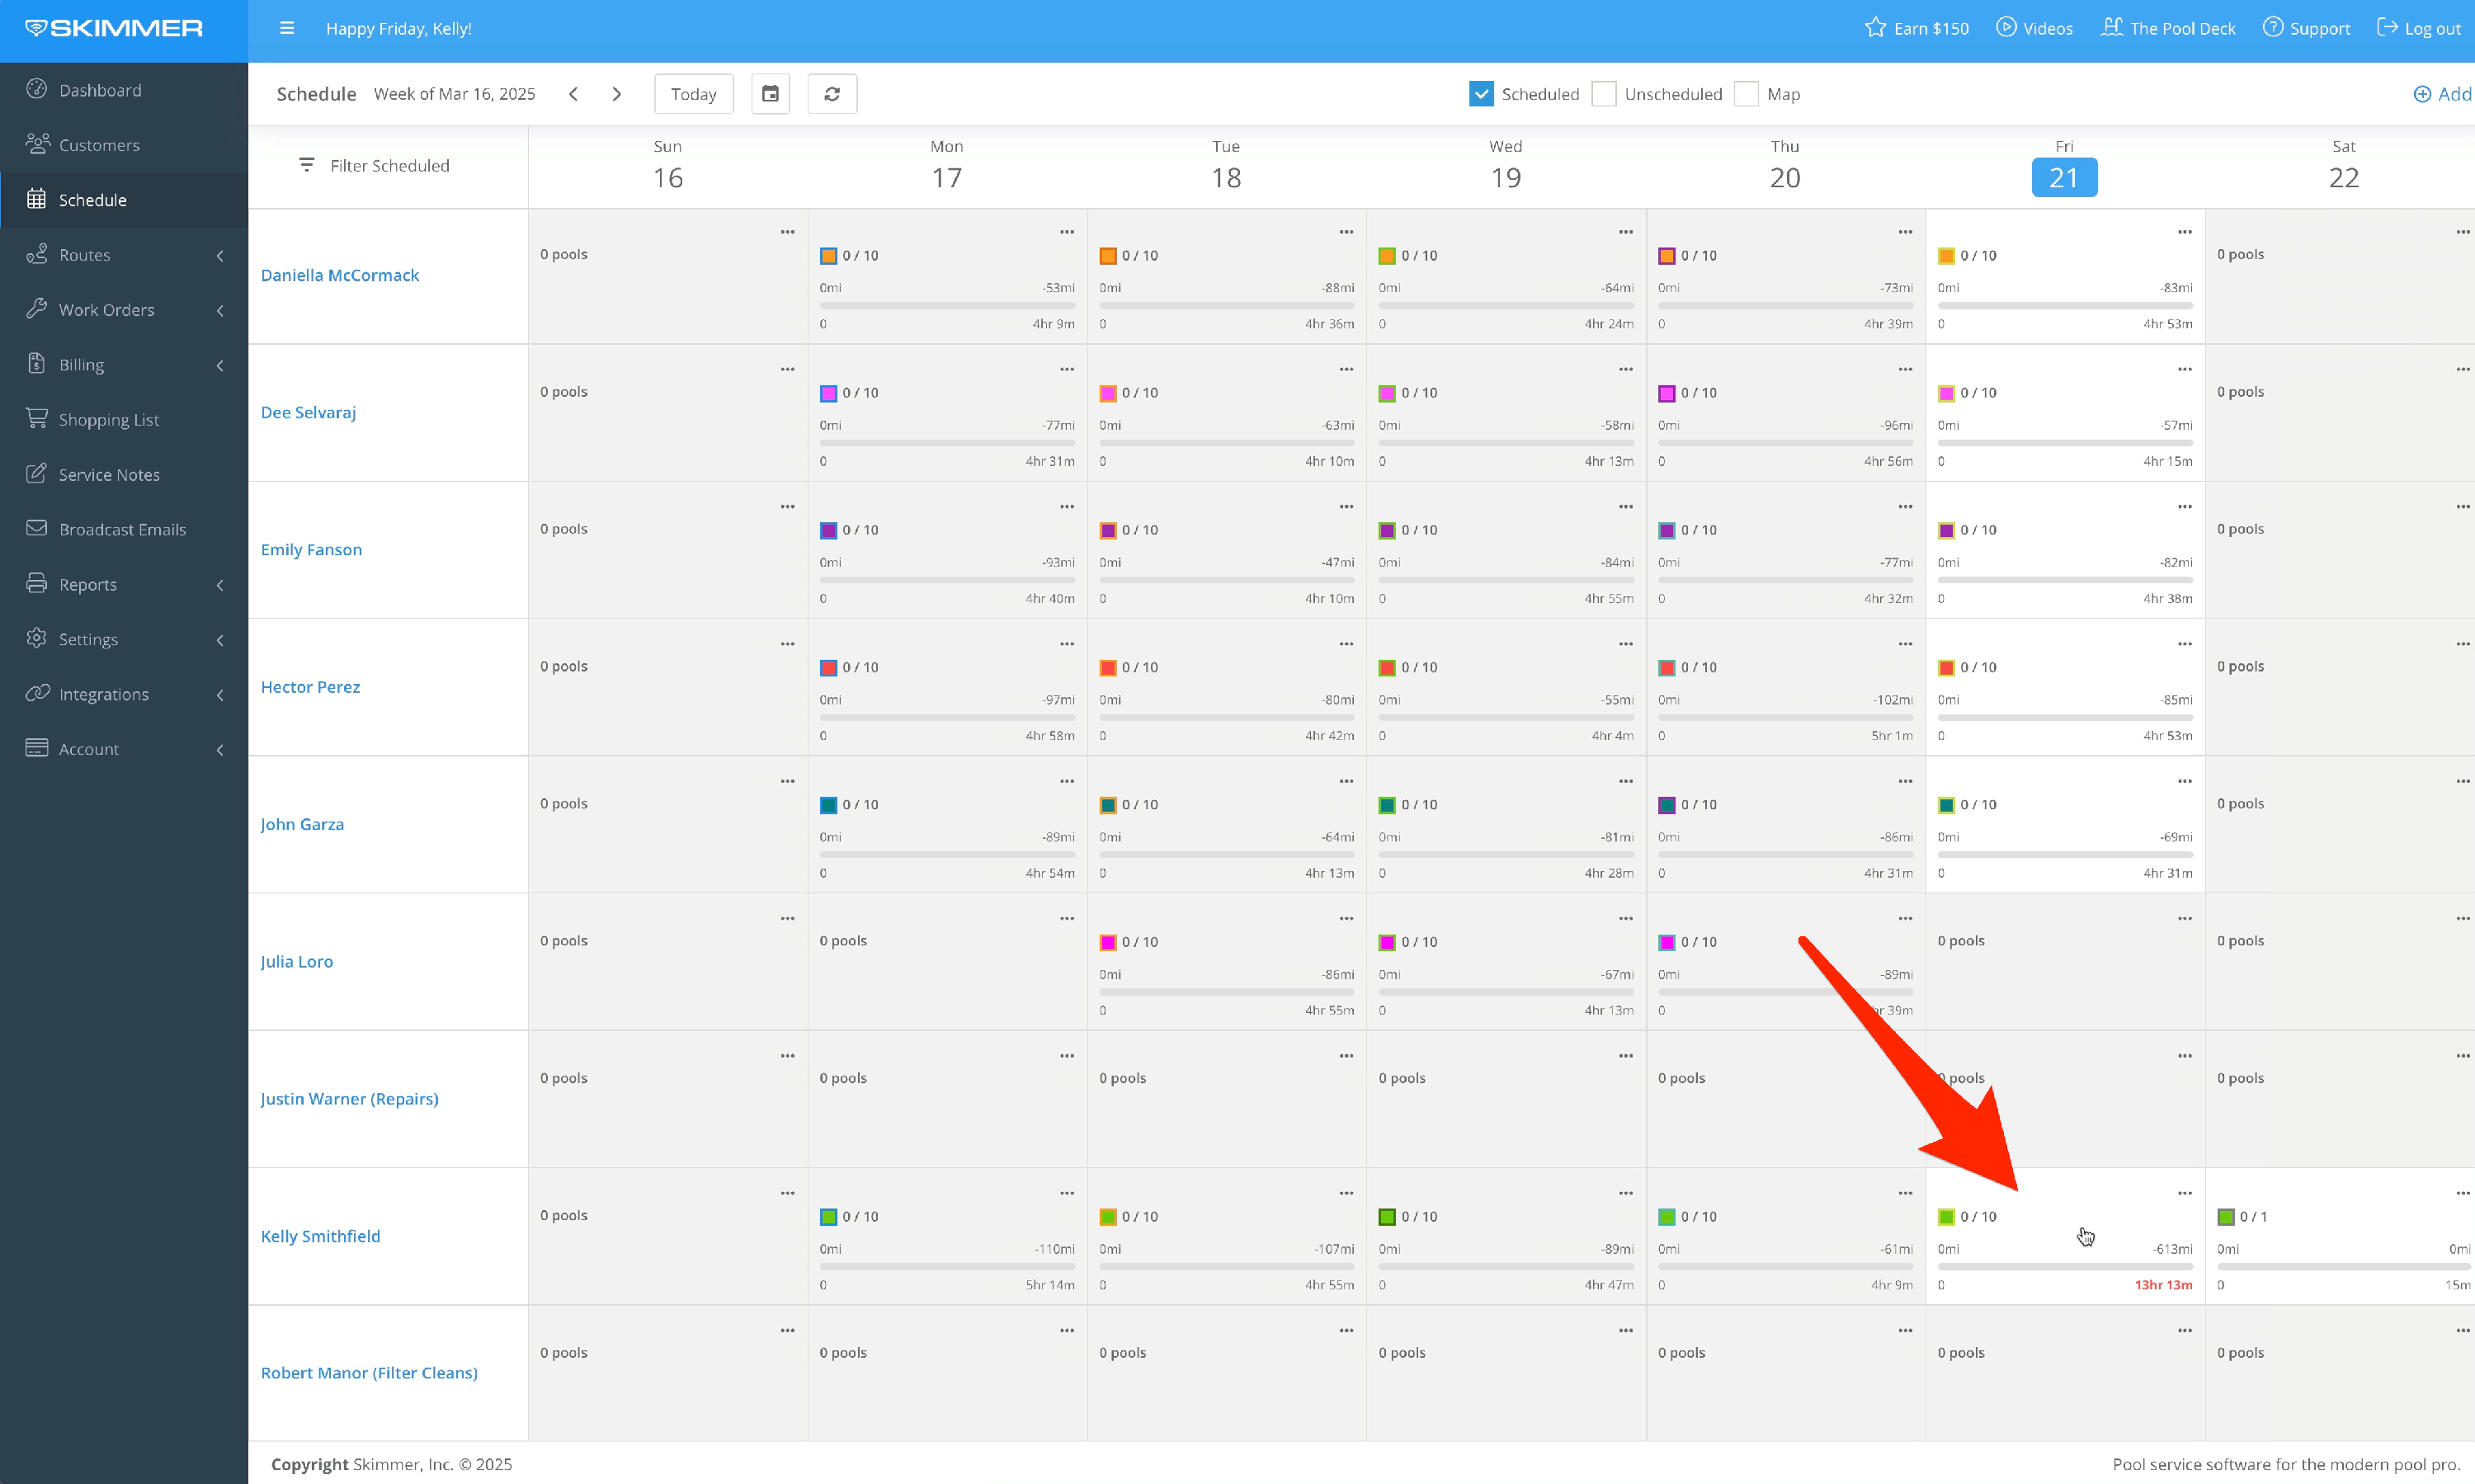
4. The scheduled work calendar updates in real time as field tasks are completed. Each square represents a summary of an individual’s assigned work for the day—a Route Summary.
A gray square indicates that the day is either in the past or has no scheduled work. Each summary also shows the estimated route duration, based on your default stop duration and projected drive times between stops.
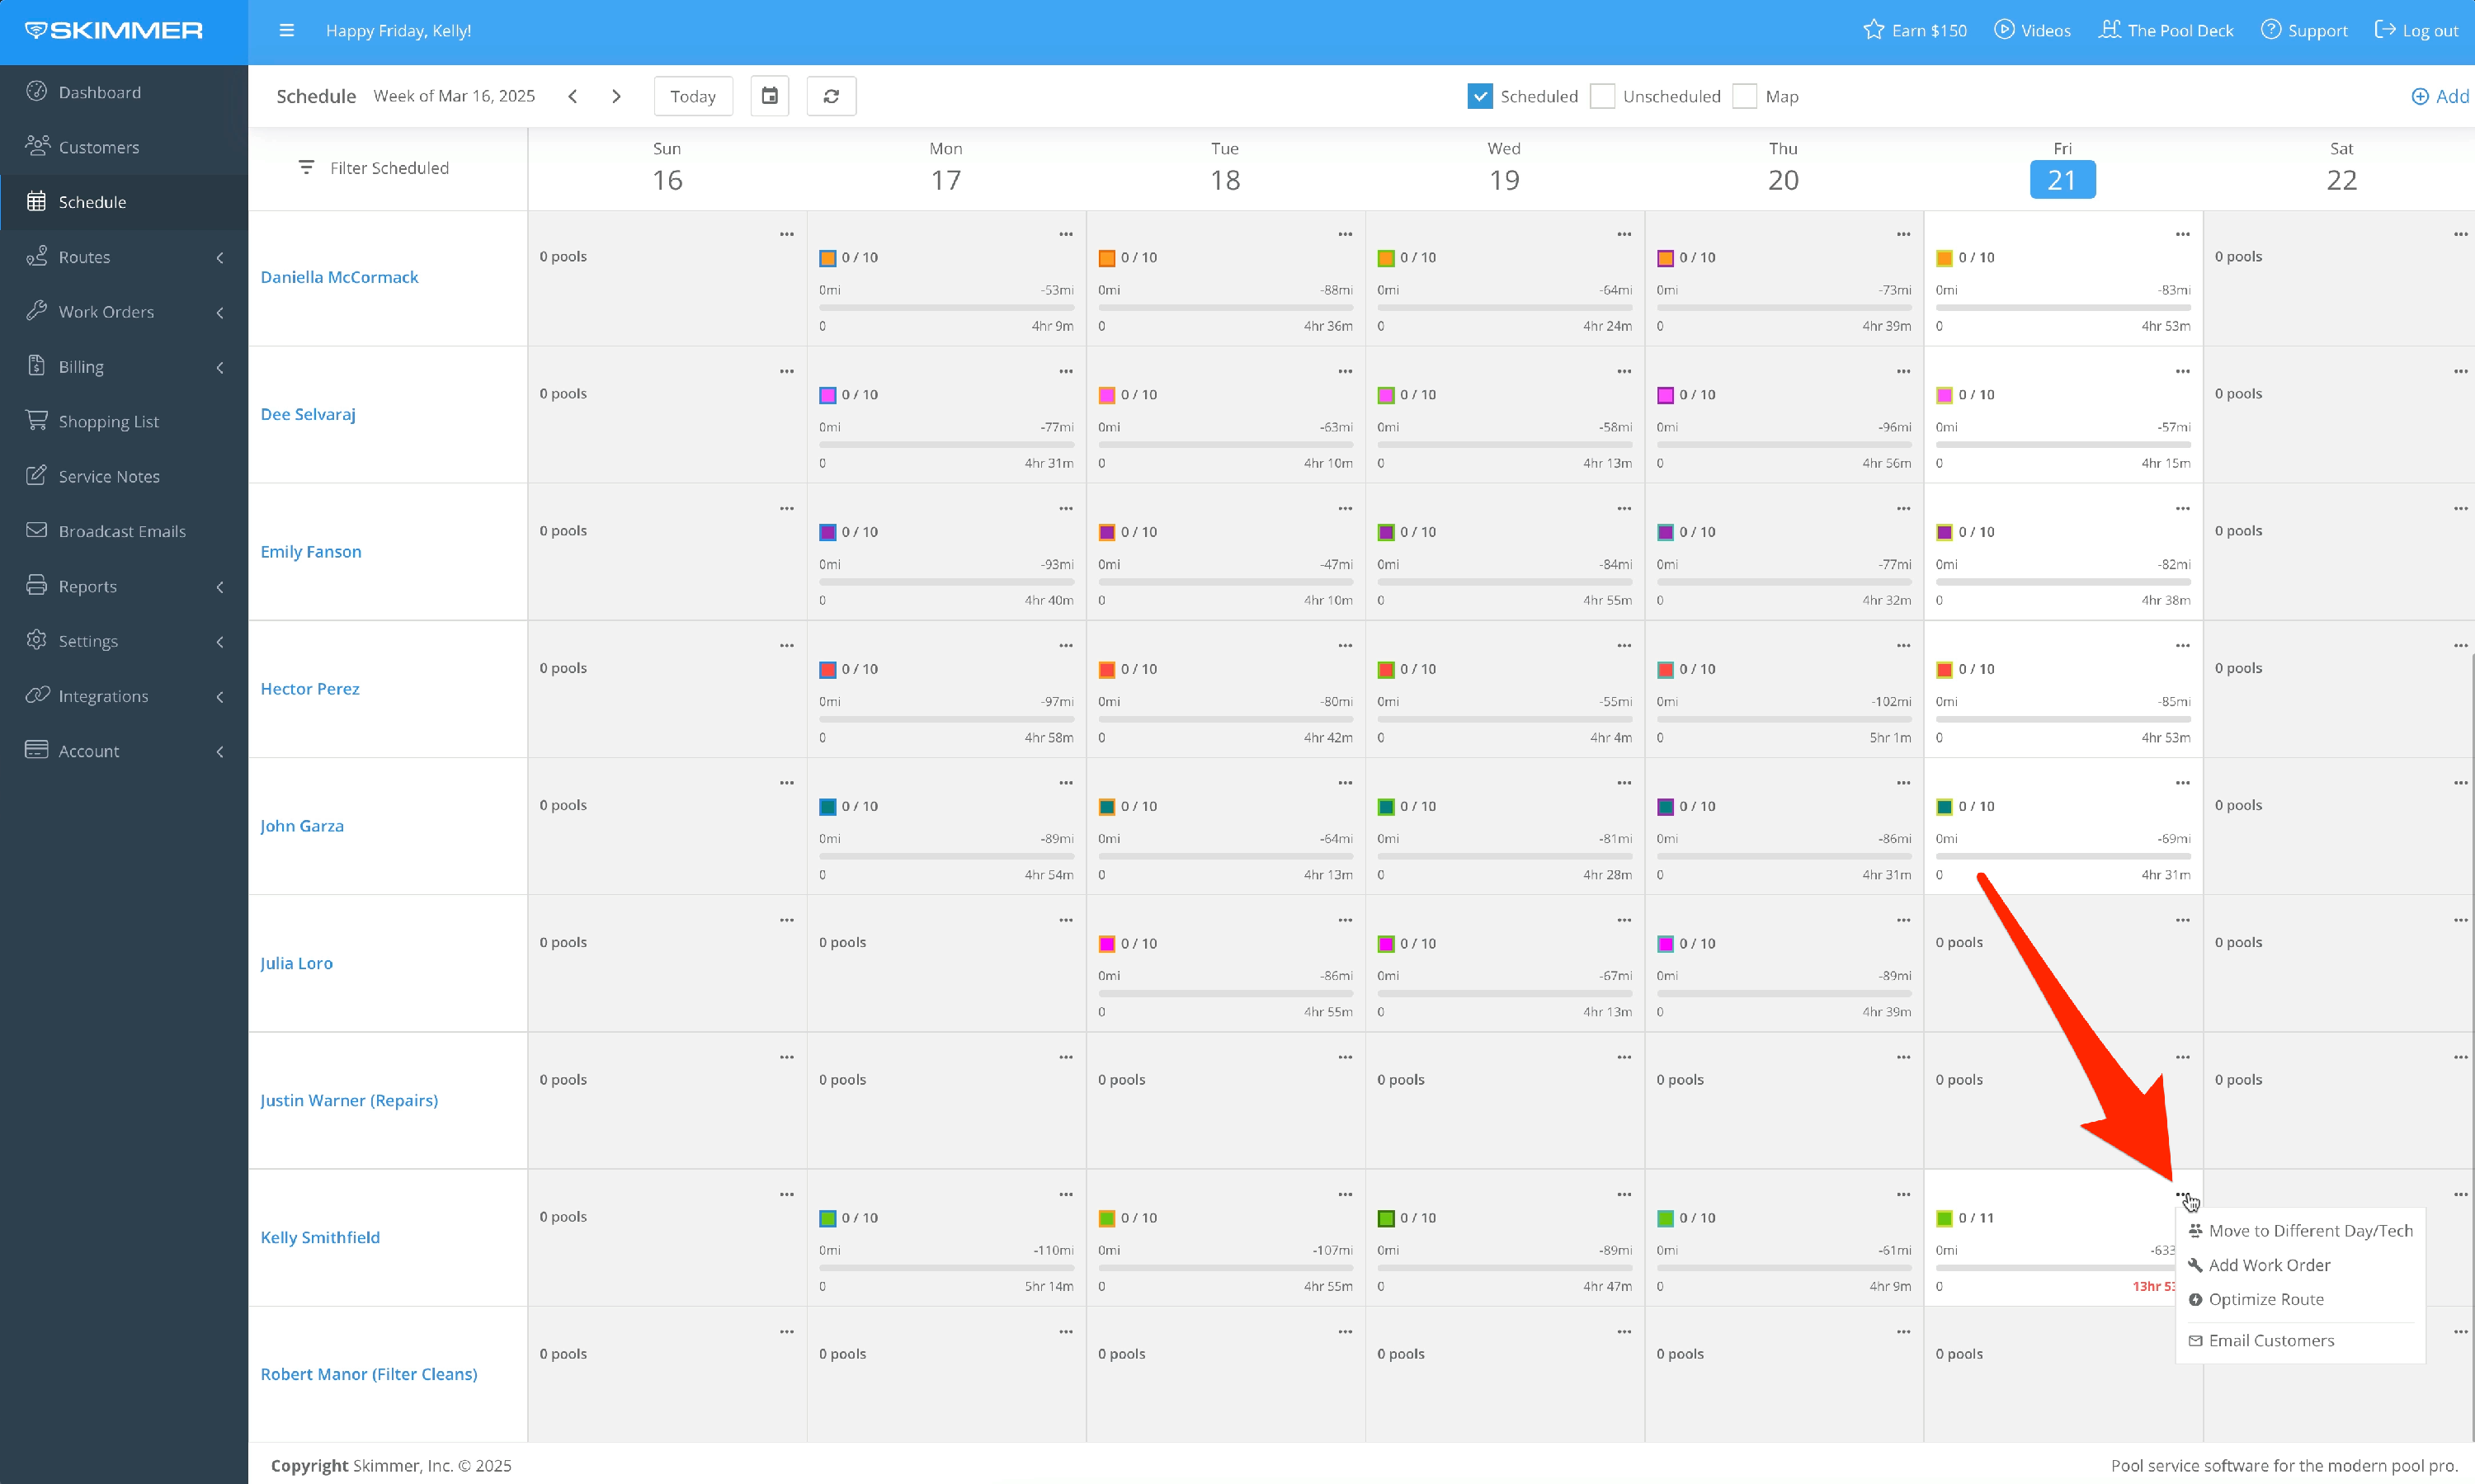
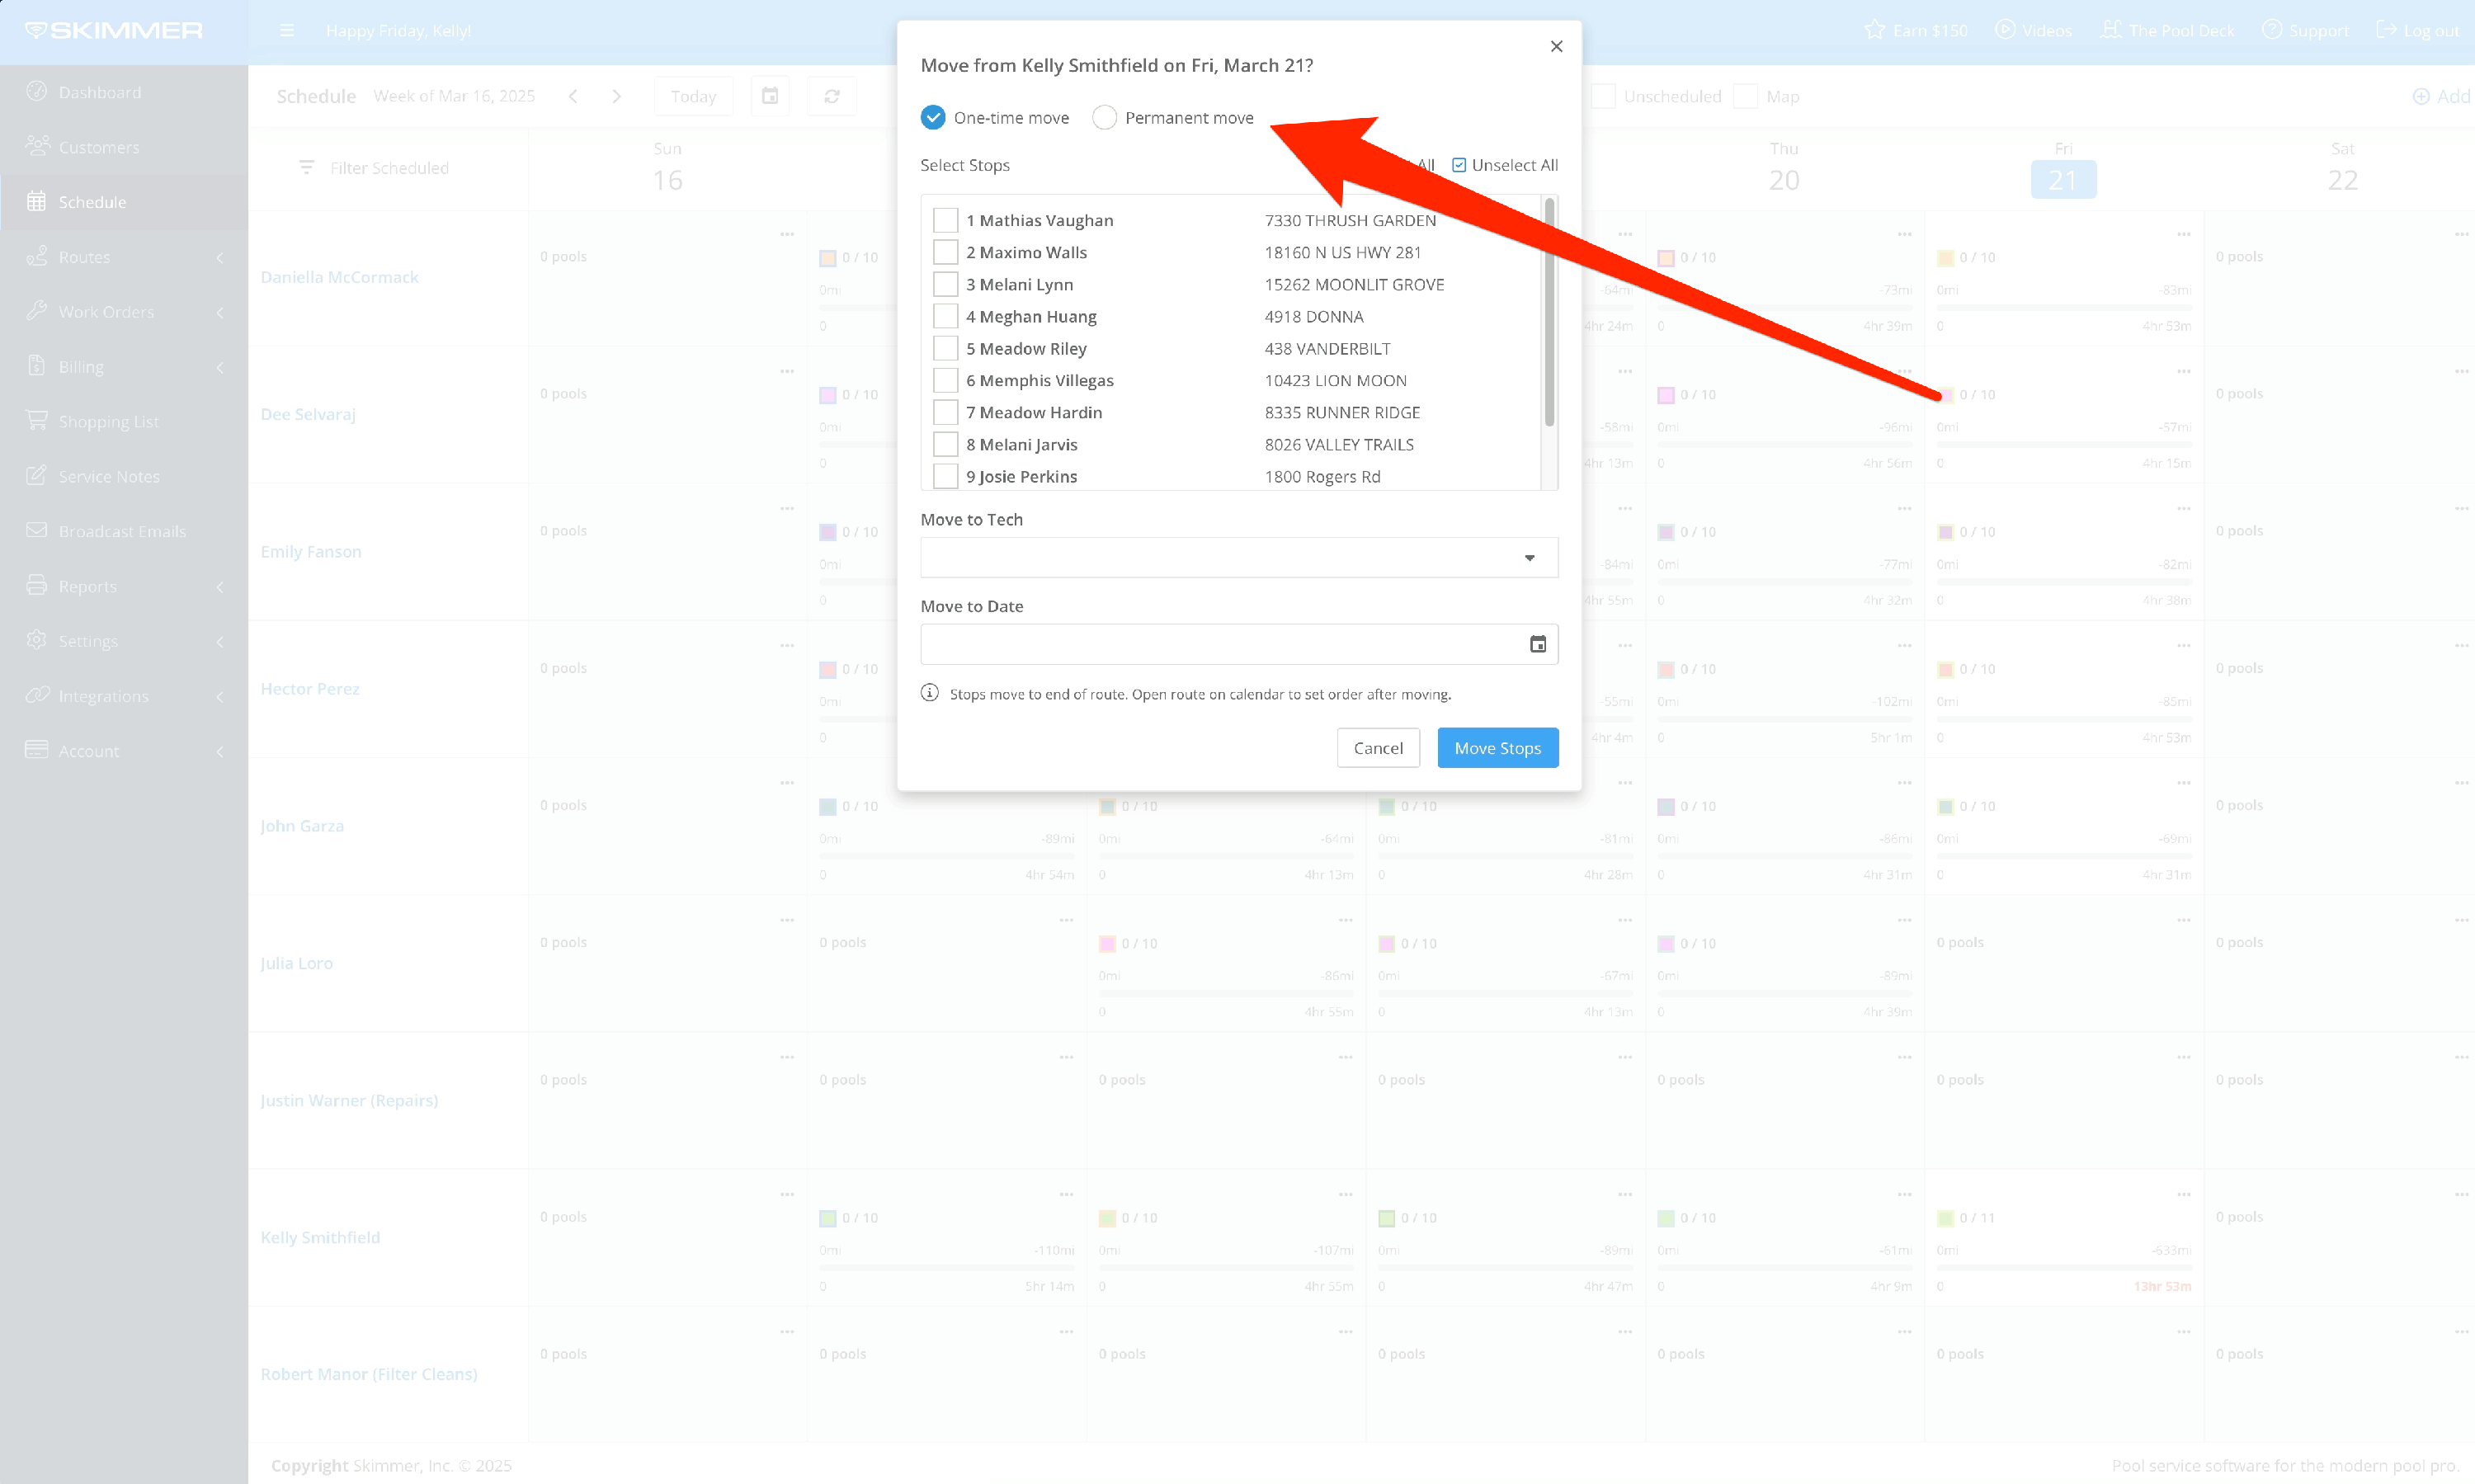
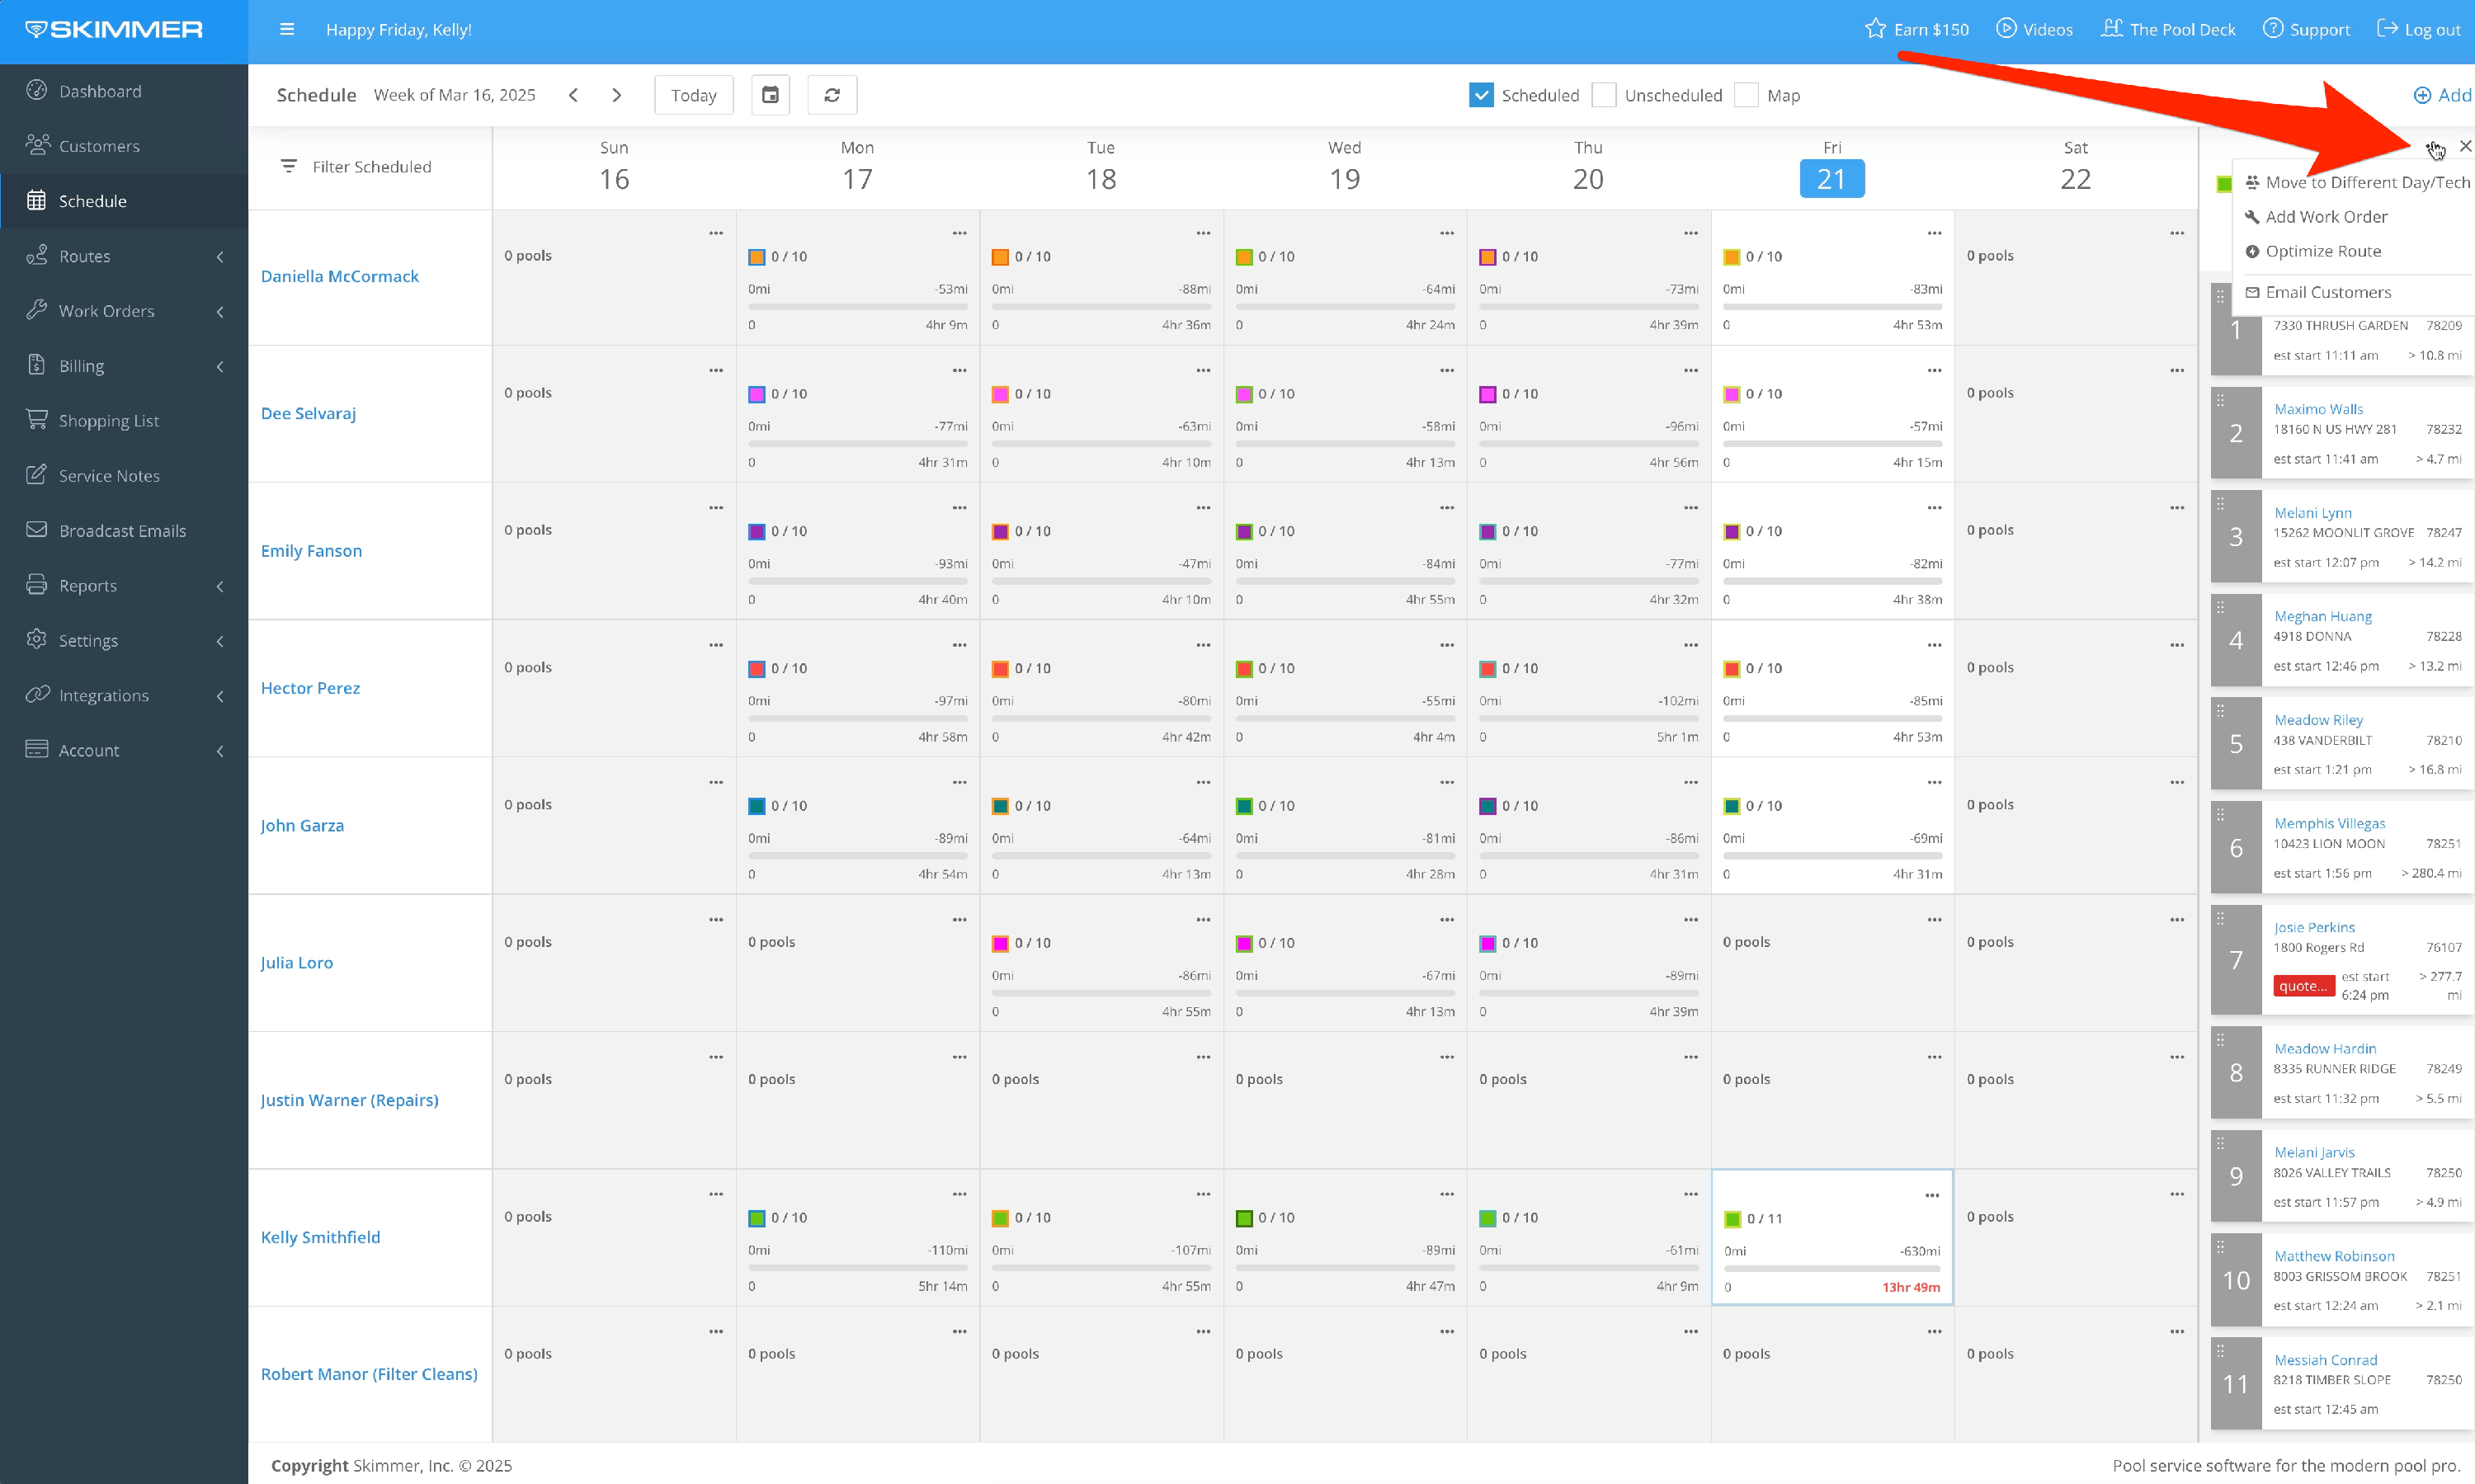
To manage work, click the dots in the square’s top right corner. This will open options to move some or all tasks to a different day or technician—with the choice of a one-time or permanent move. You can also add a new work order and optimize that technician’s route for the day.

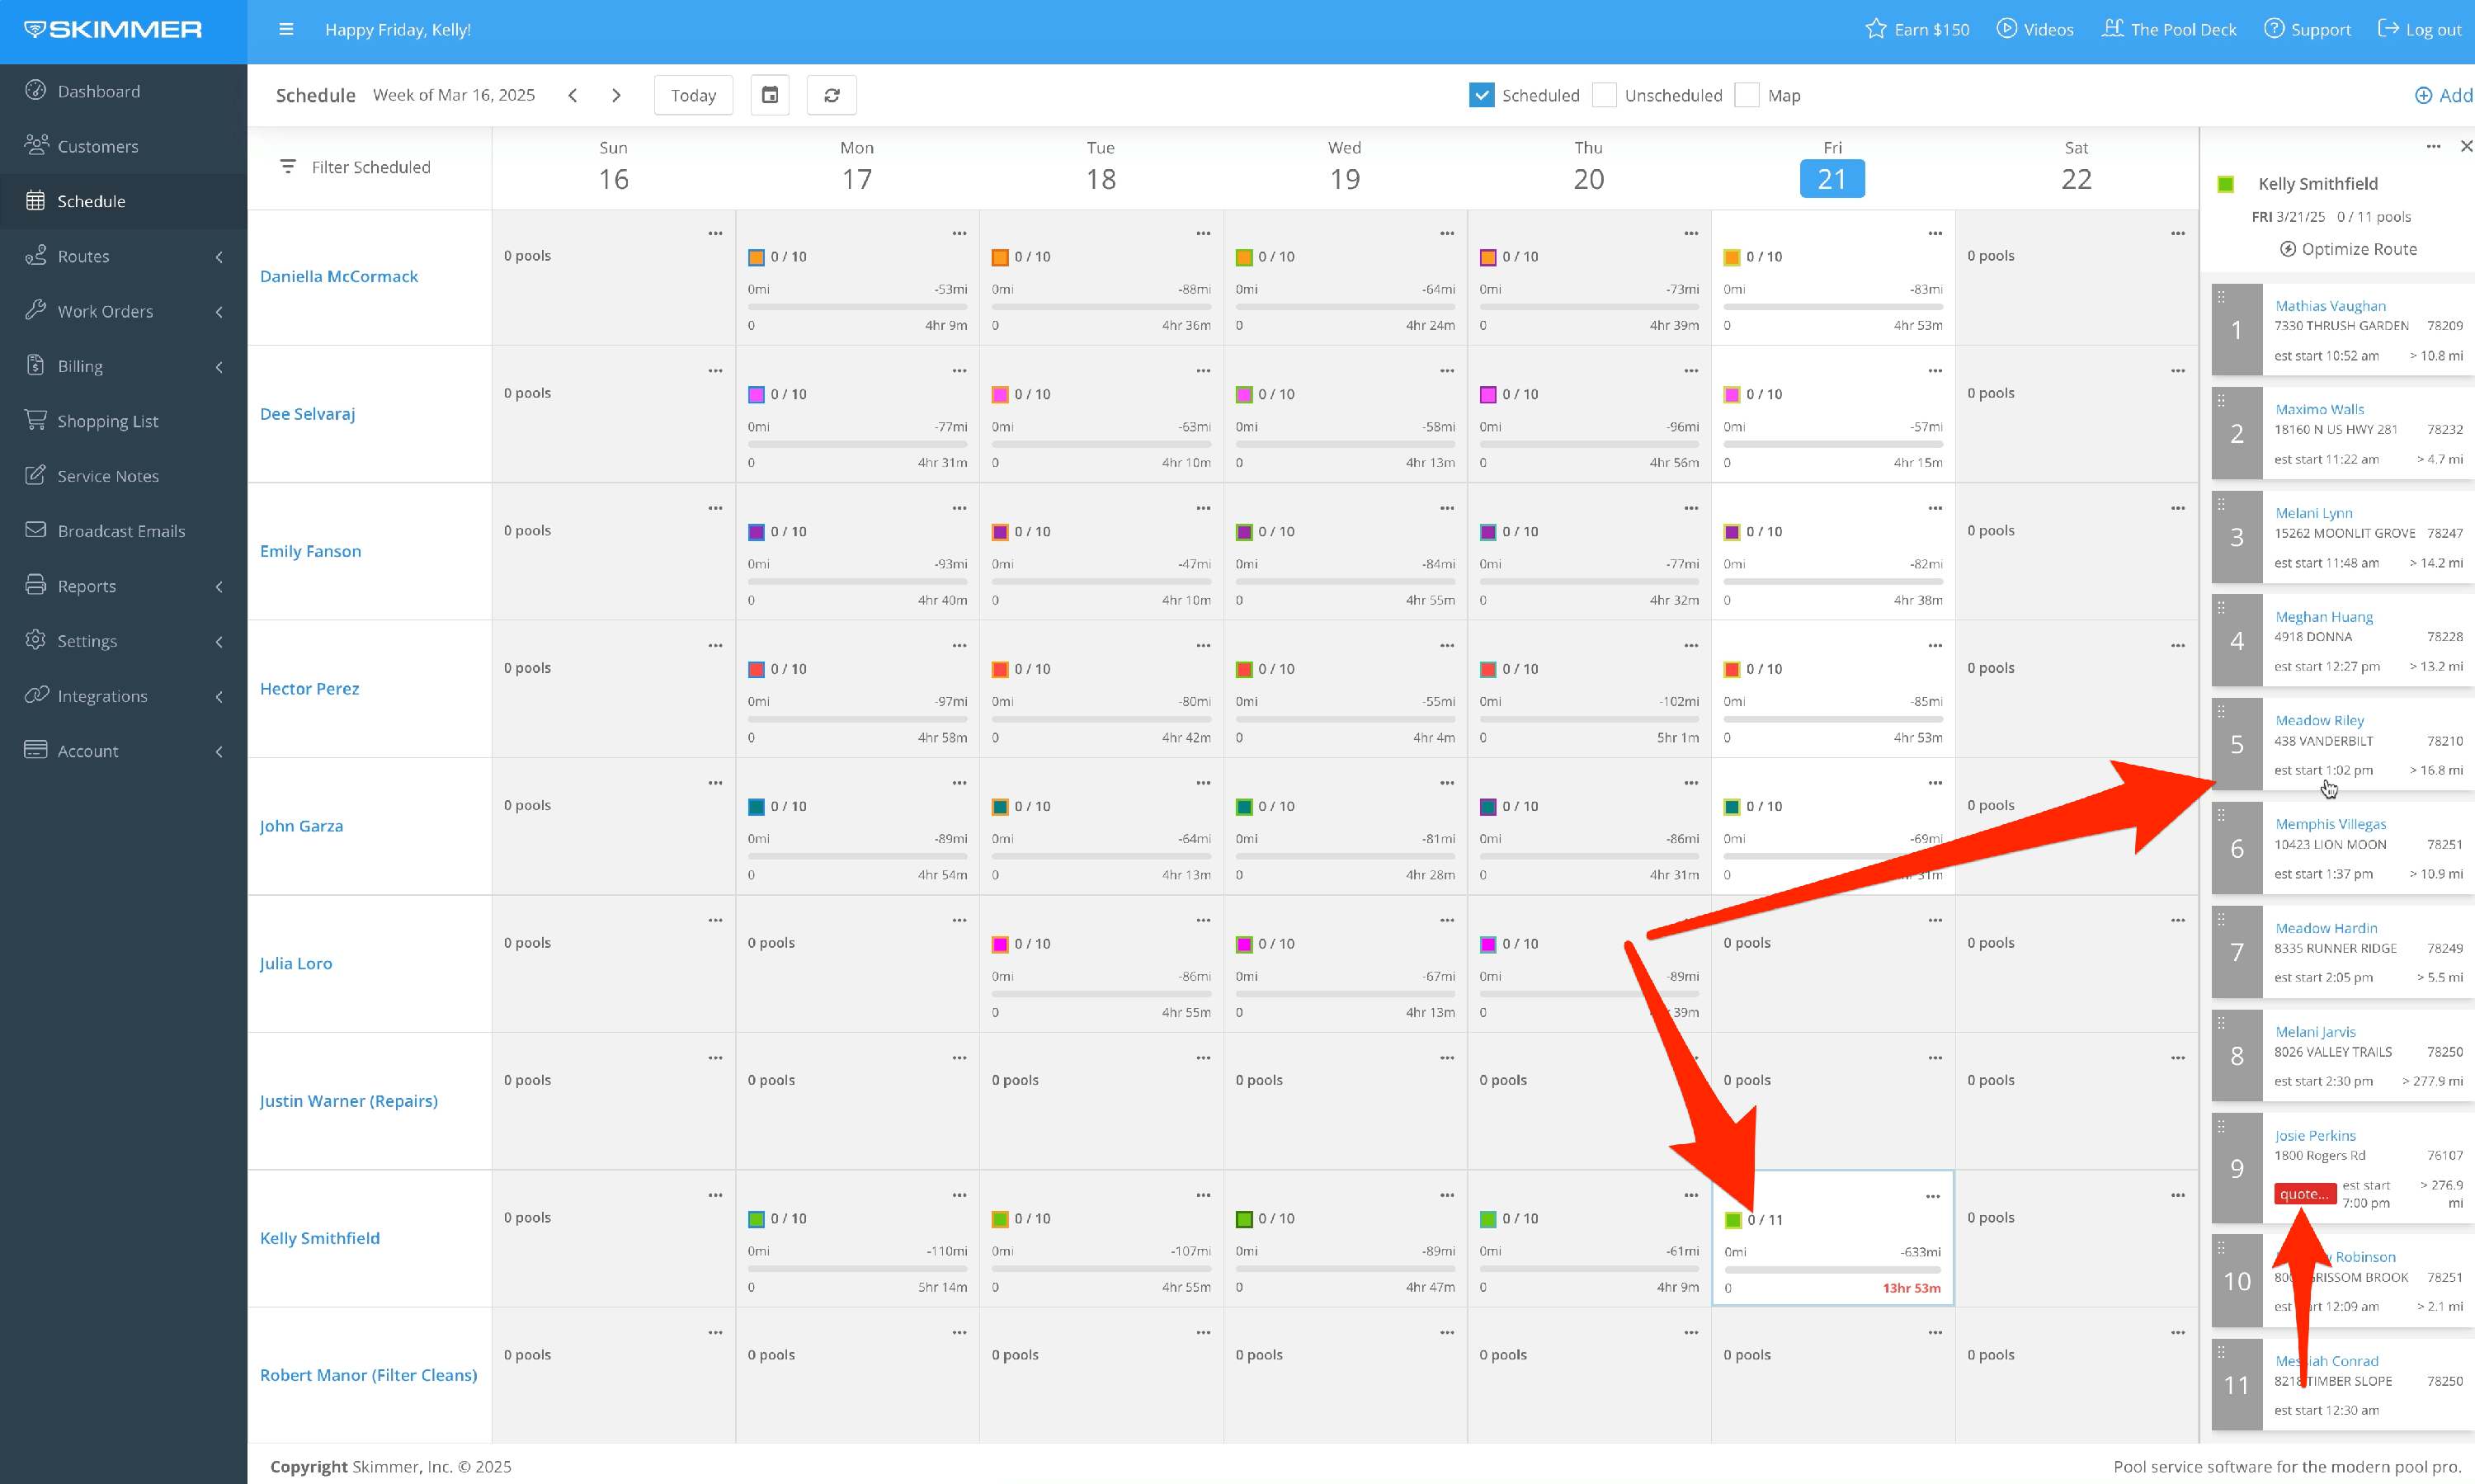
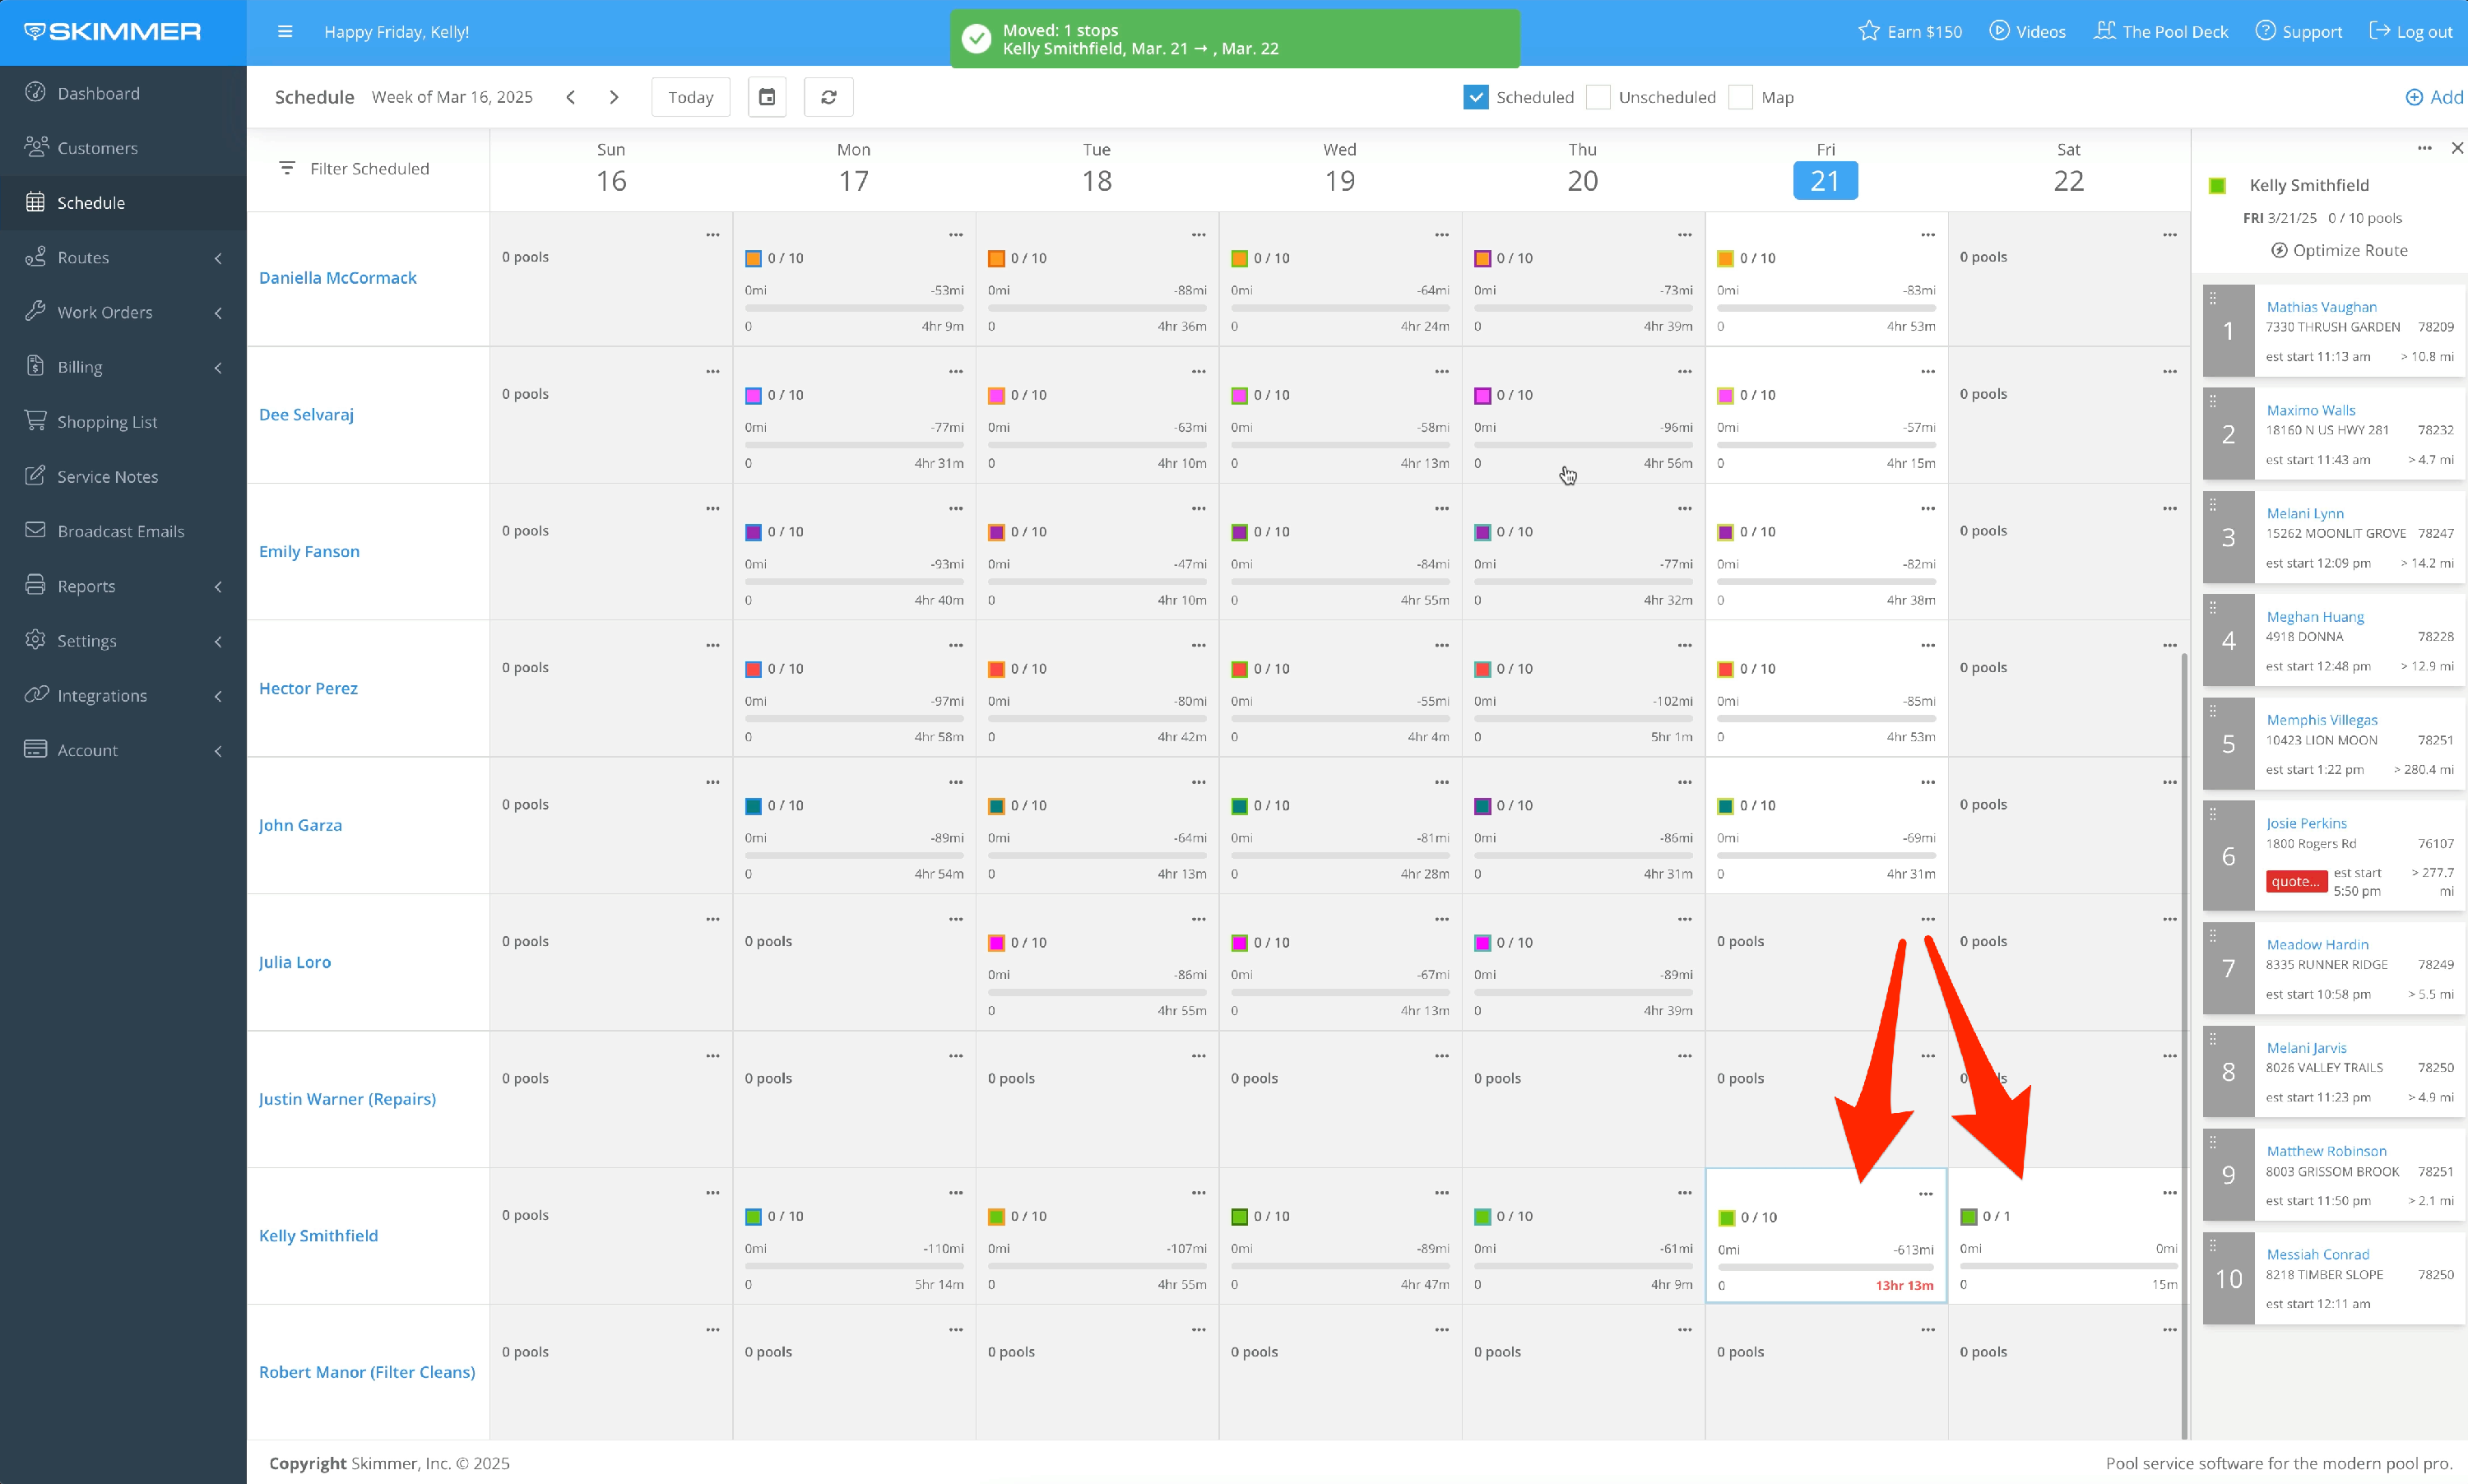
5. When you click on a Route Summary, an expanded view—called the Route Detail—appears on the right side. This view displays additional information about the assigned work, including customer names, locations, and, when applicable, labels for work order types.
To rearrange the work order, simply click and drag the route stop or work order to a new position.
At the top of the Route Detail view, you'll find options to move work, add a work order, optimize the route, or send a mass email to the customers.
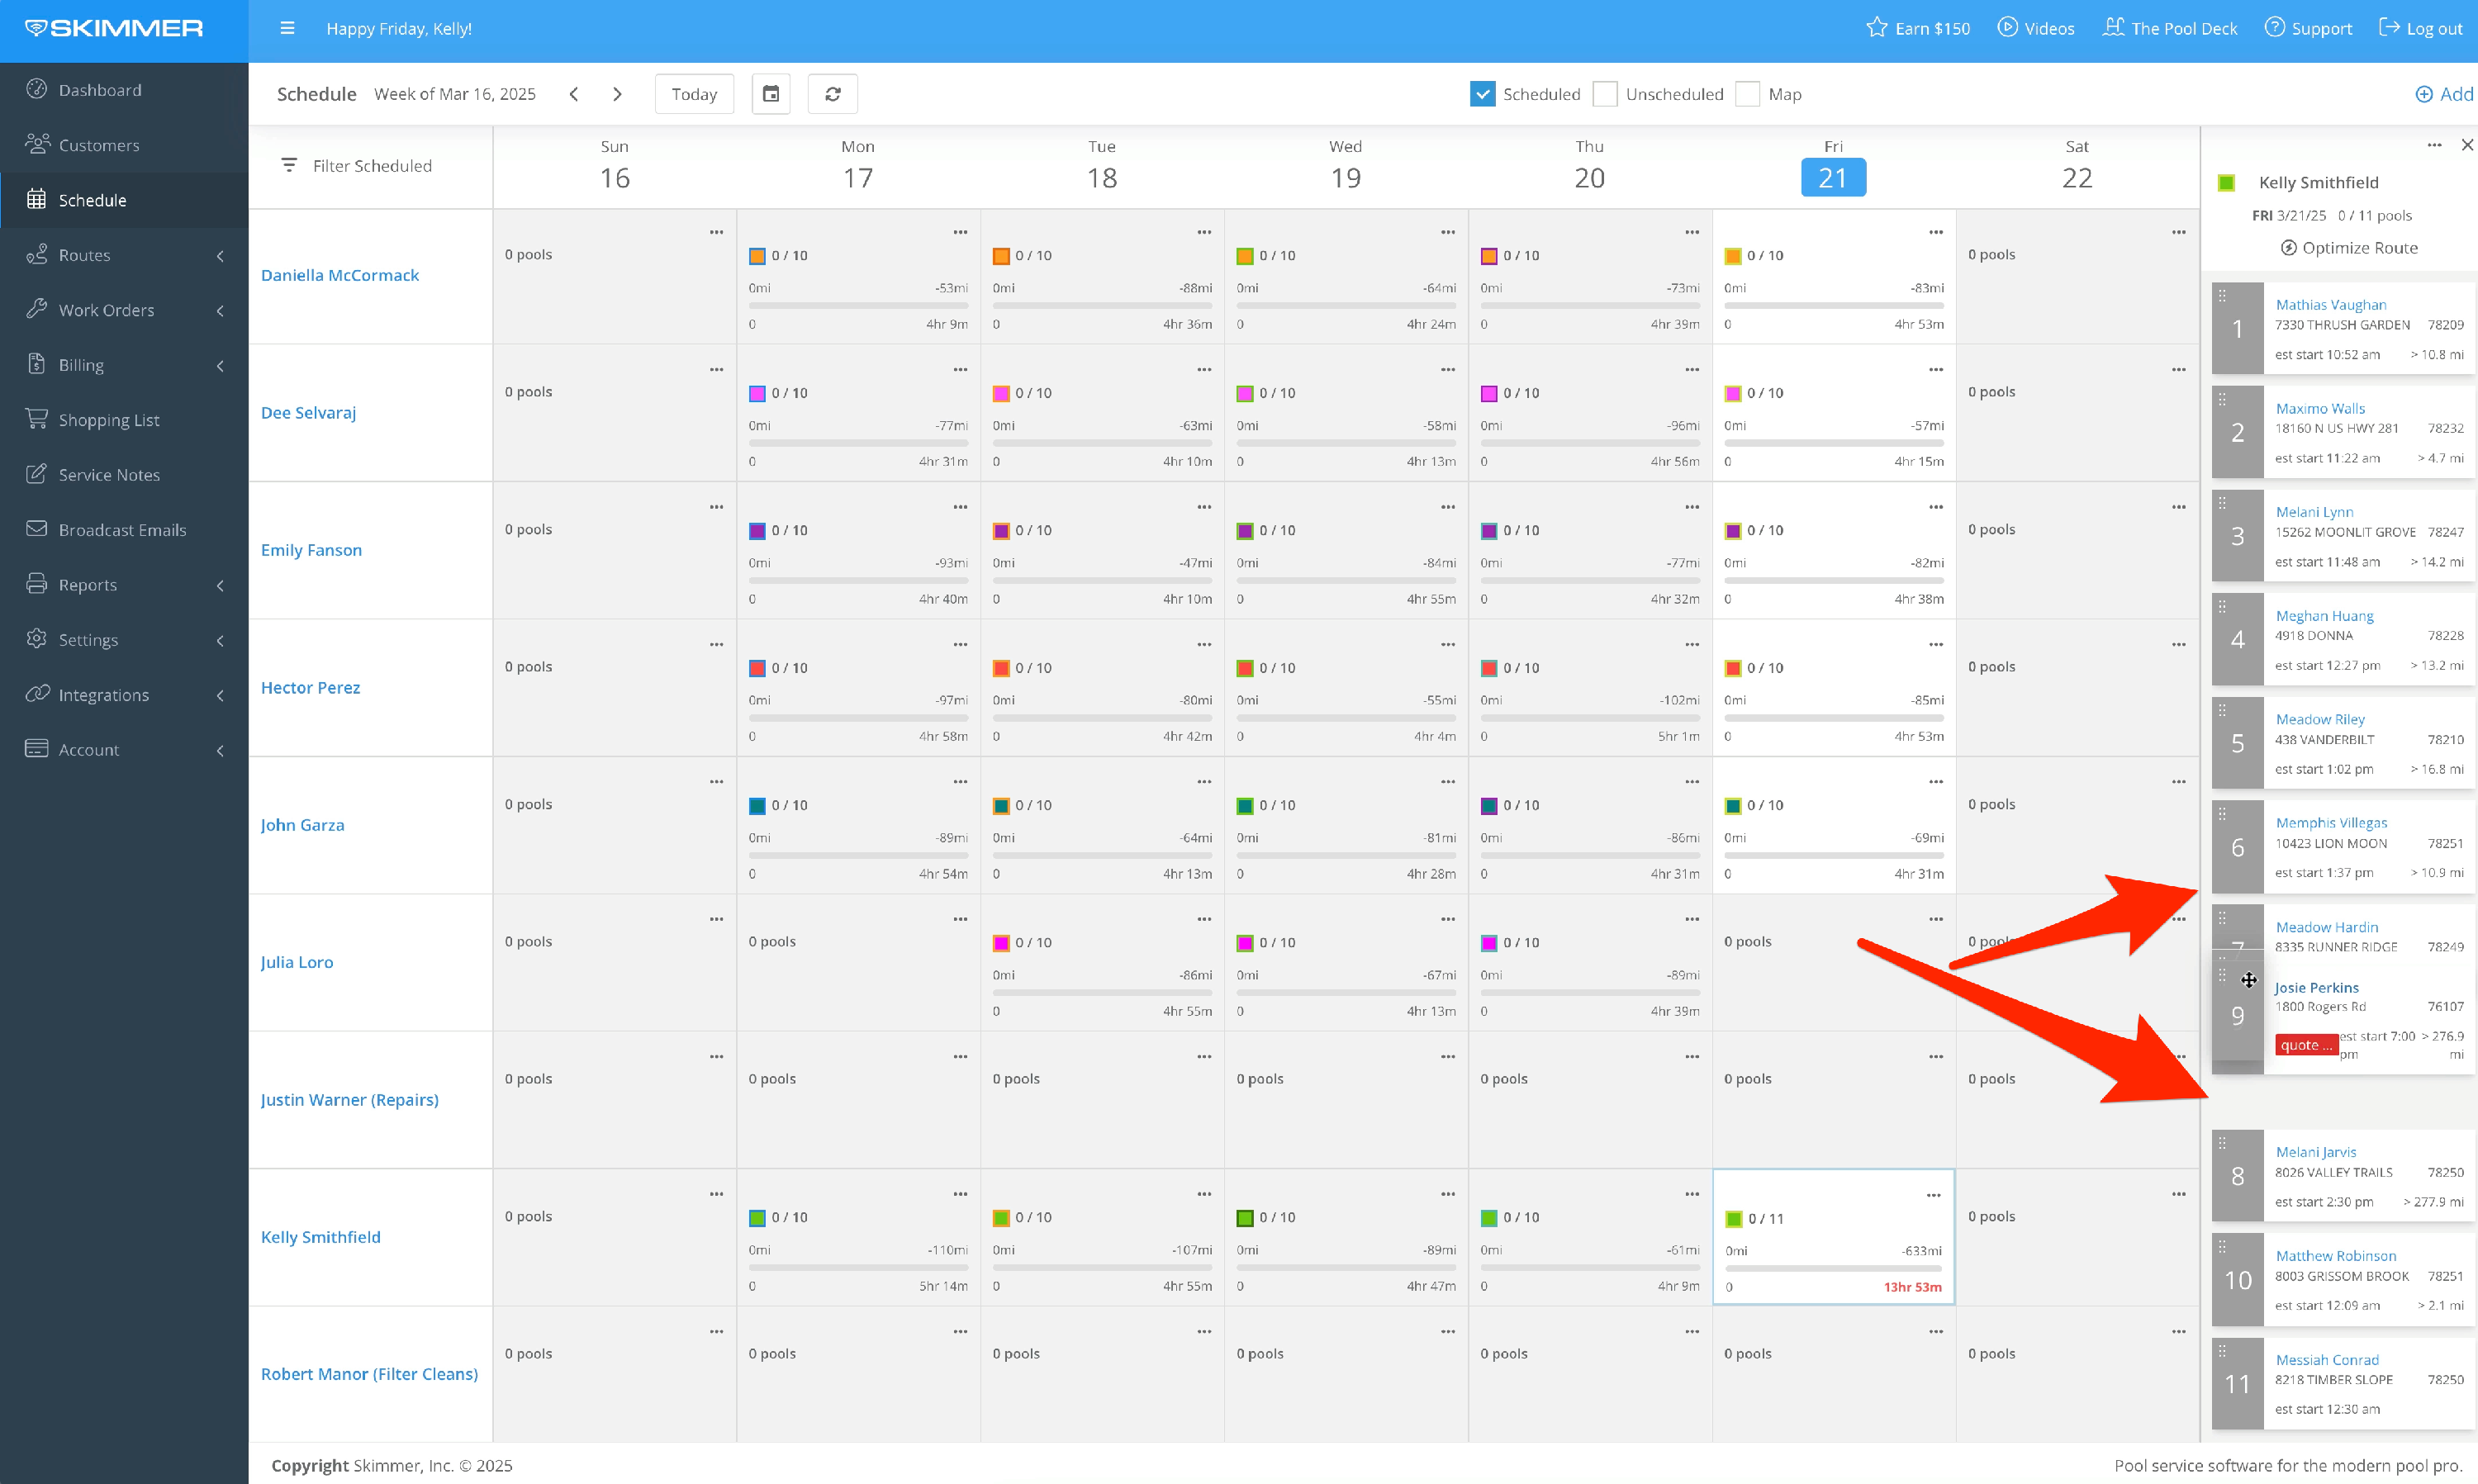
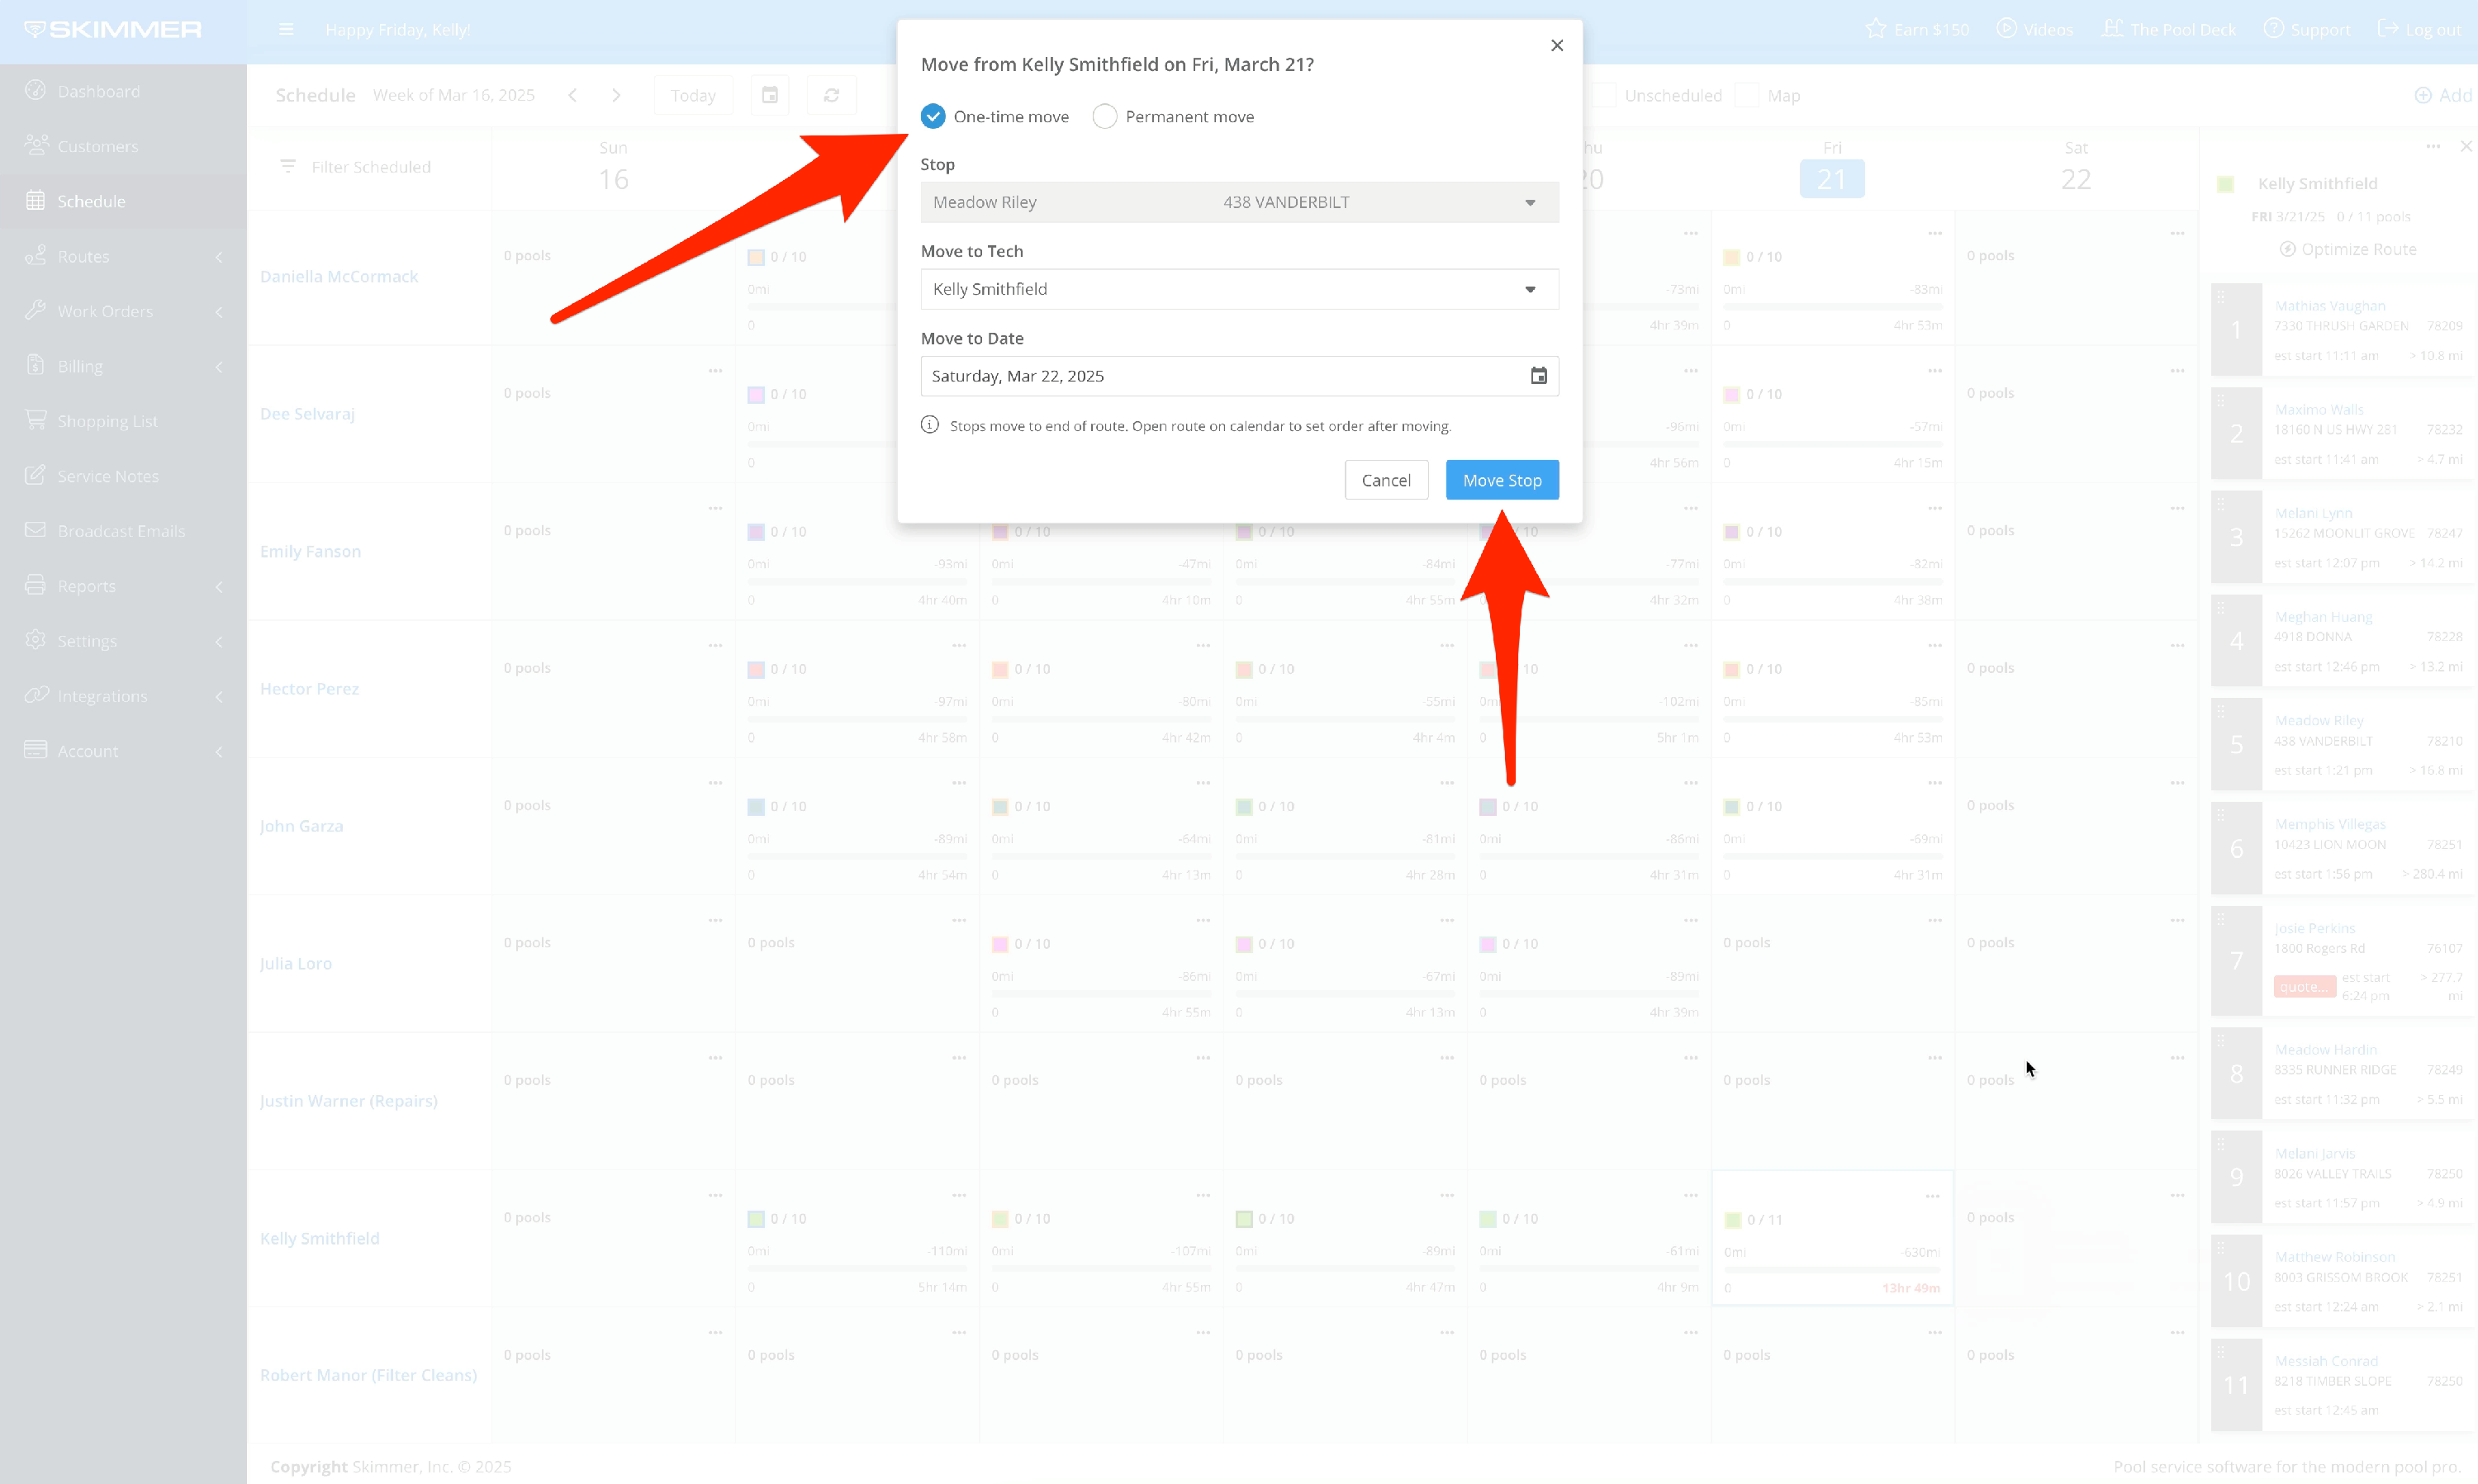
6. Route Detail offers another way to move work. Just click and hold the work item, drag it over to the technician and day you want, then release. A move box will appear asking you to confirm the move details. By default, it sets the move as one-time, but you can change it to a permanent move. When you’re ready, click "Move Stop" to complete the move.
To close Route Detail, simply click the X in the top right corner or click the Route Summary again to collapse it.

Last updated March 24, 2025.
___
Have questions? Skimmer Support is here for you.