

Watch the video or scroll down for step-by-step instructions.
Access Tiers: Scaling Up, Owning the Market
Step-by-step instructions . . .
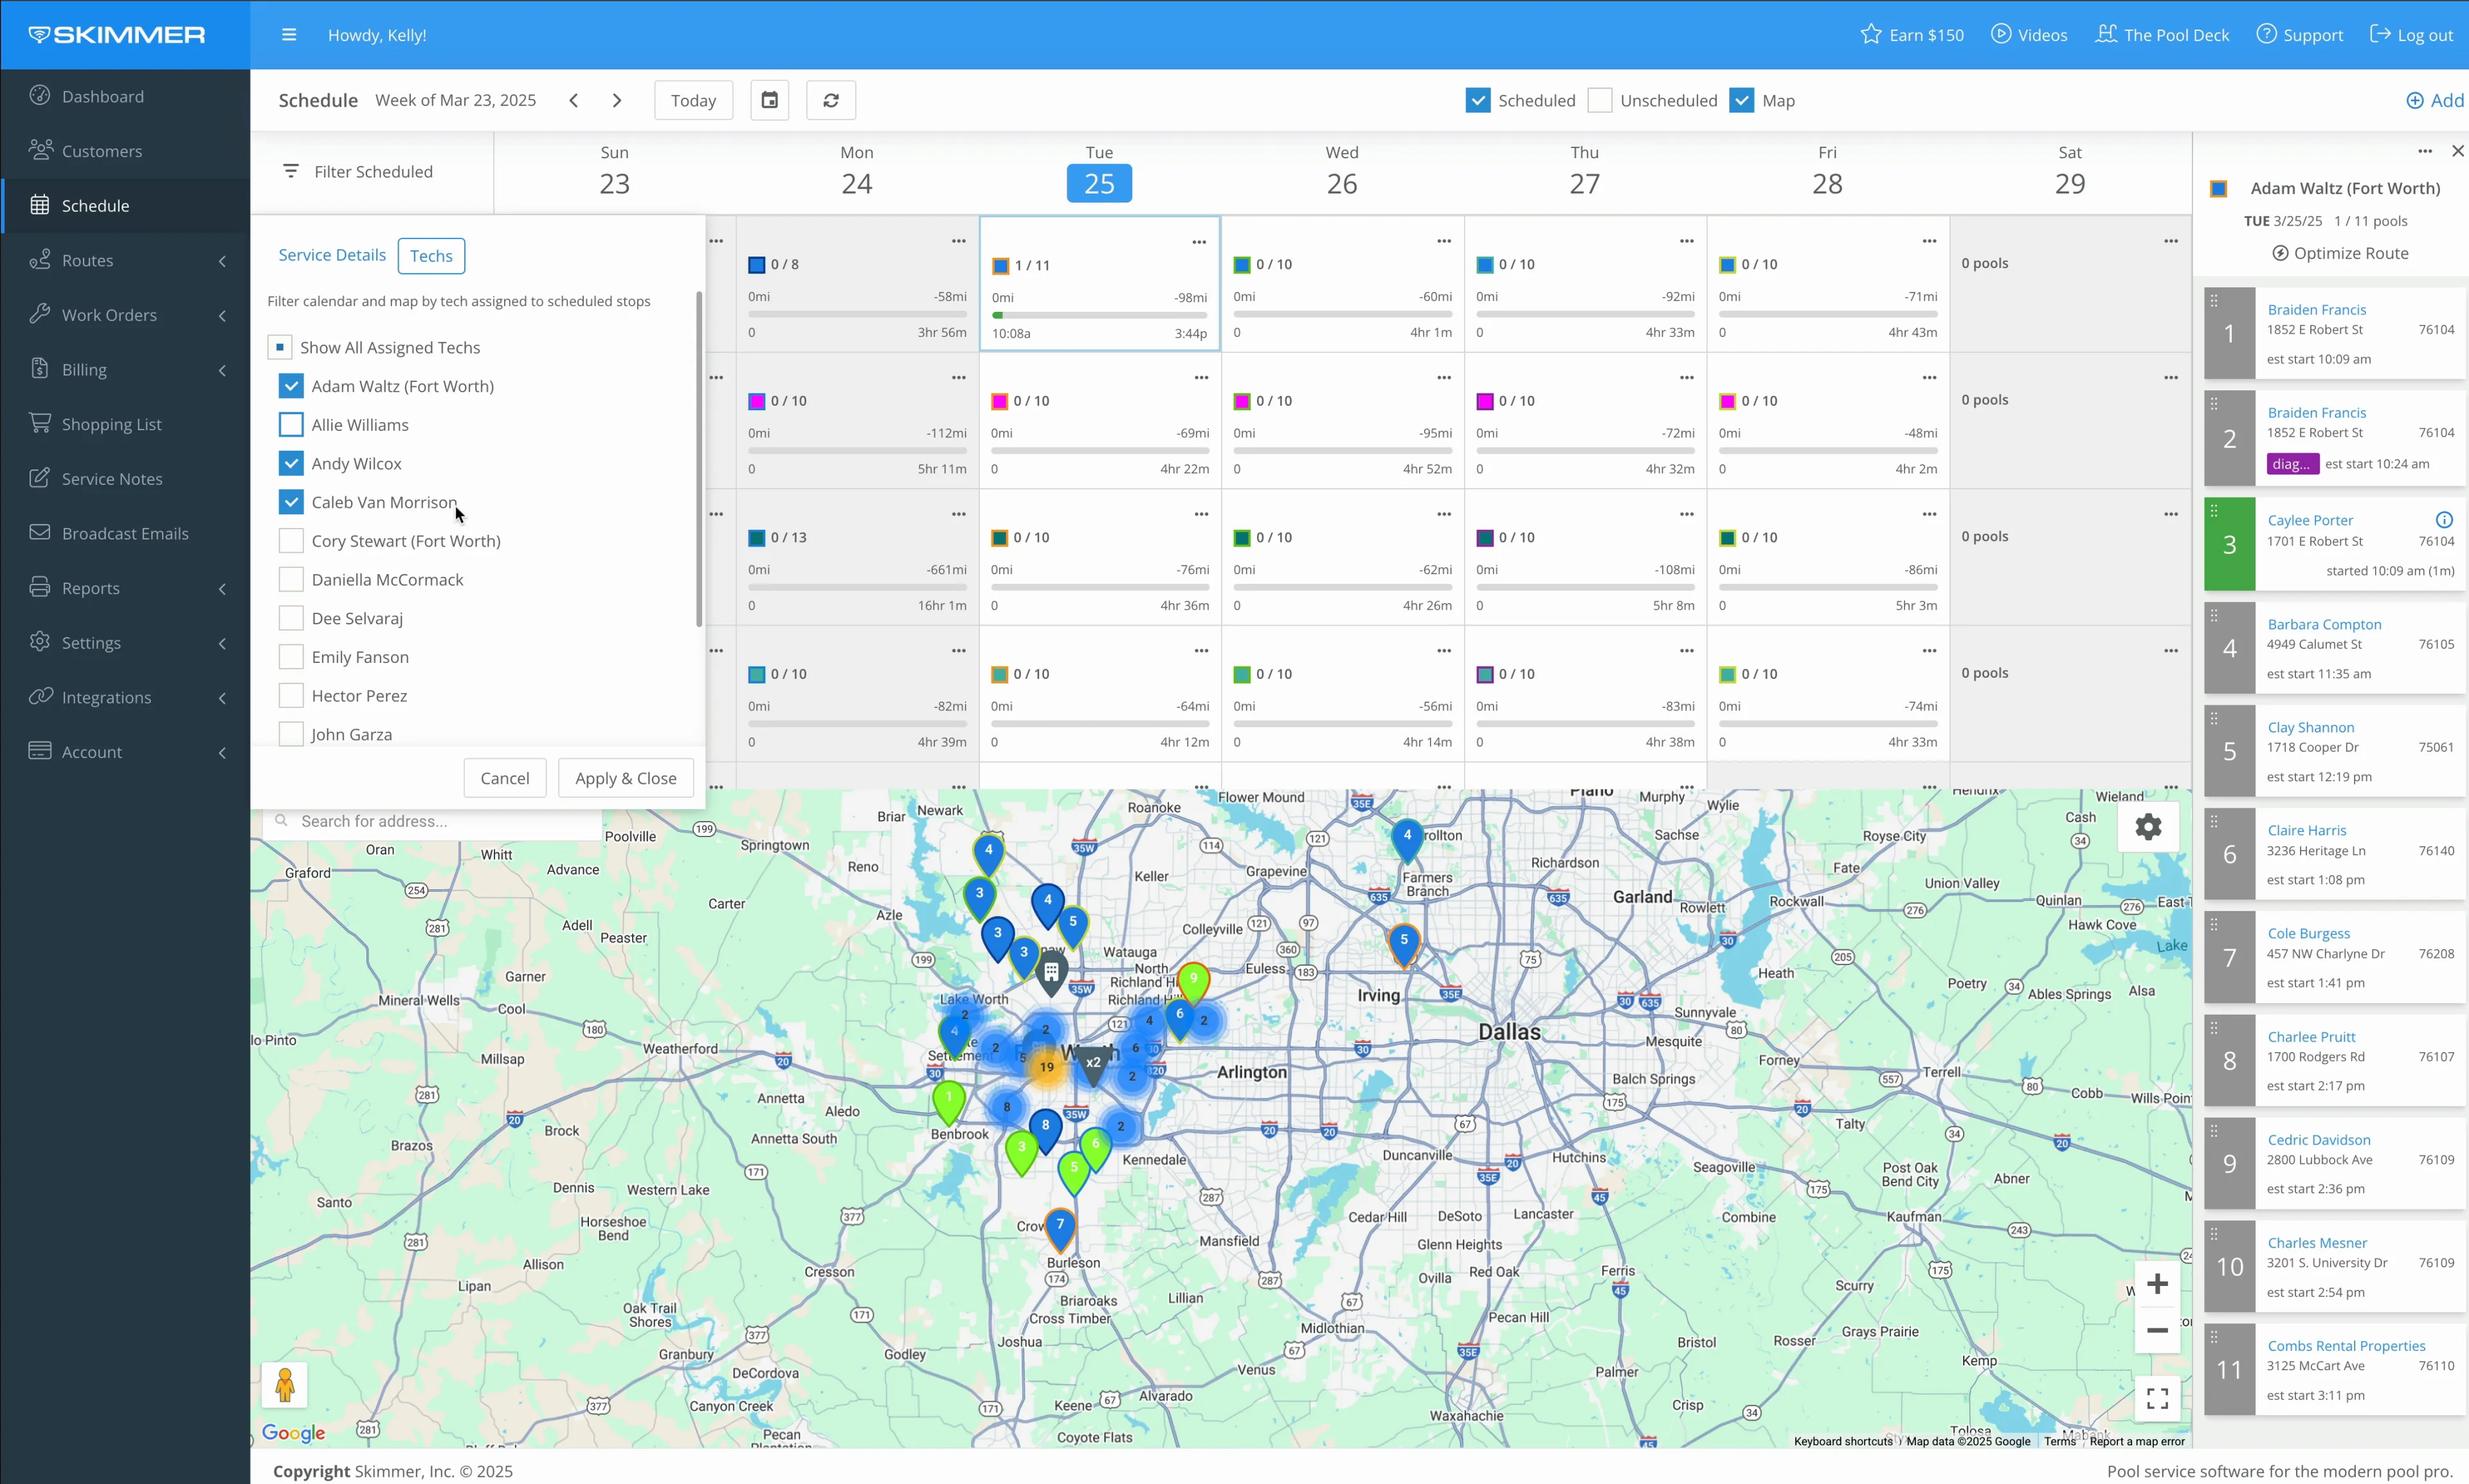
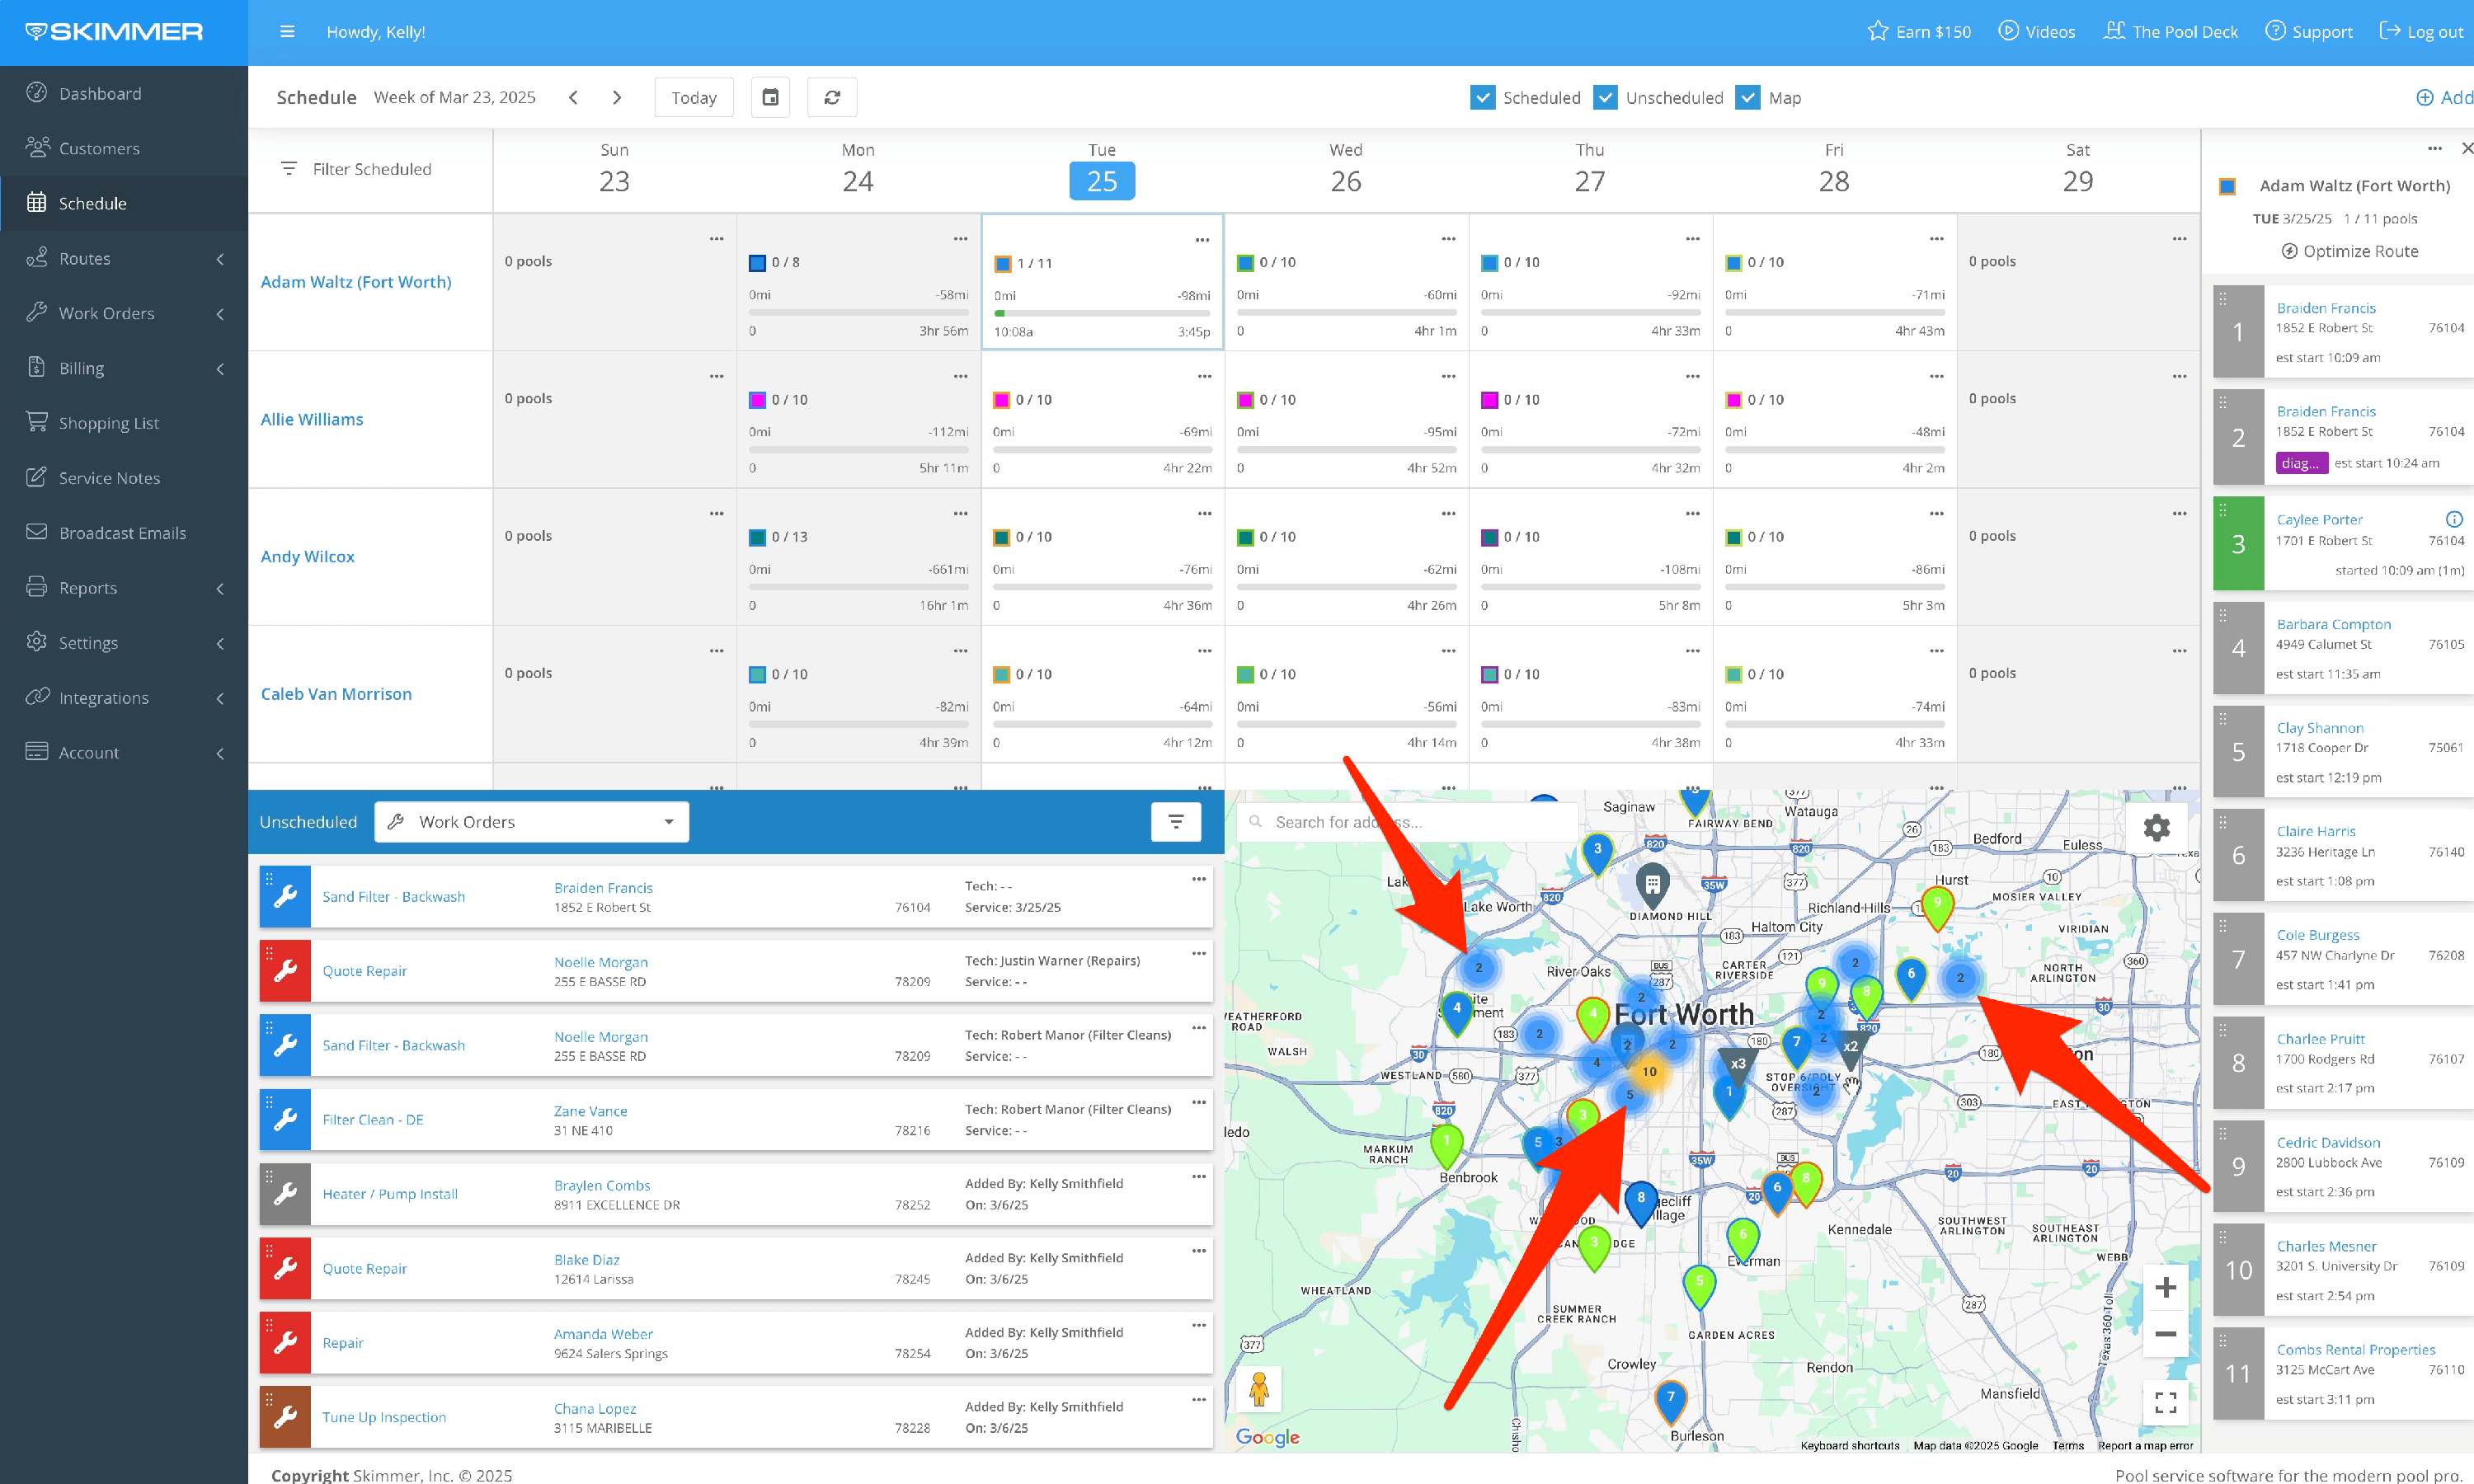
1. Using the Map
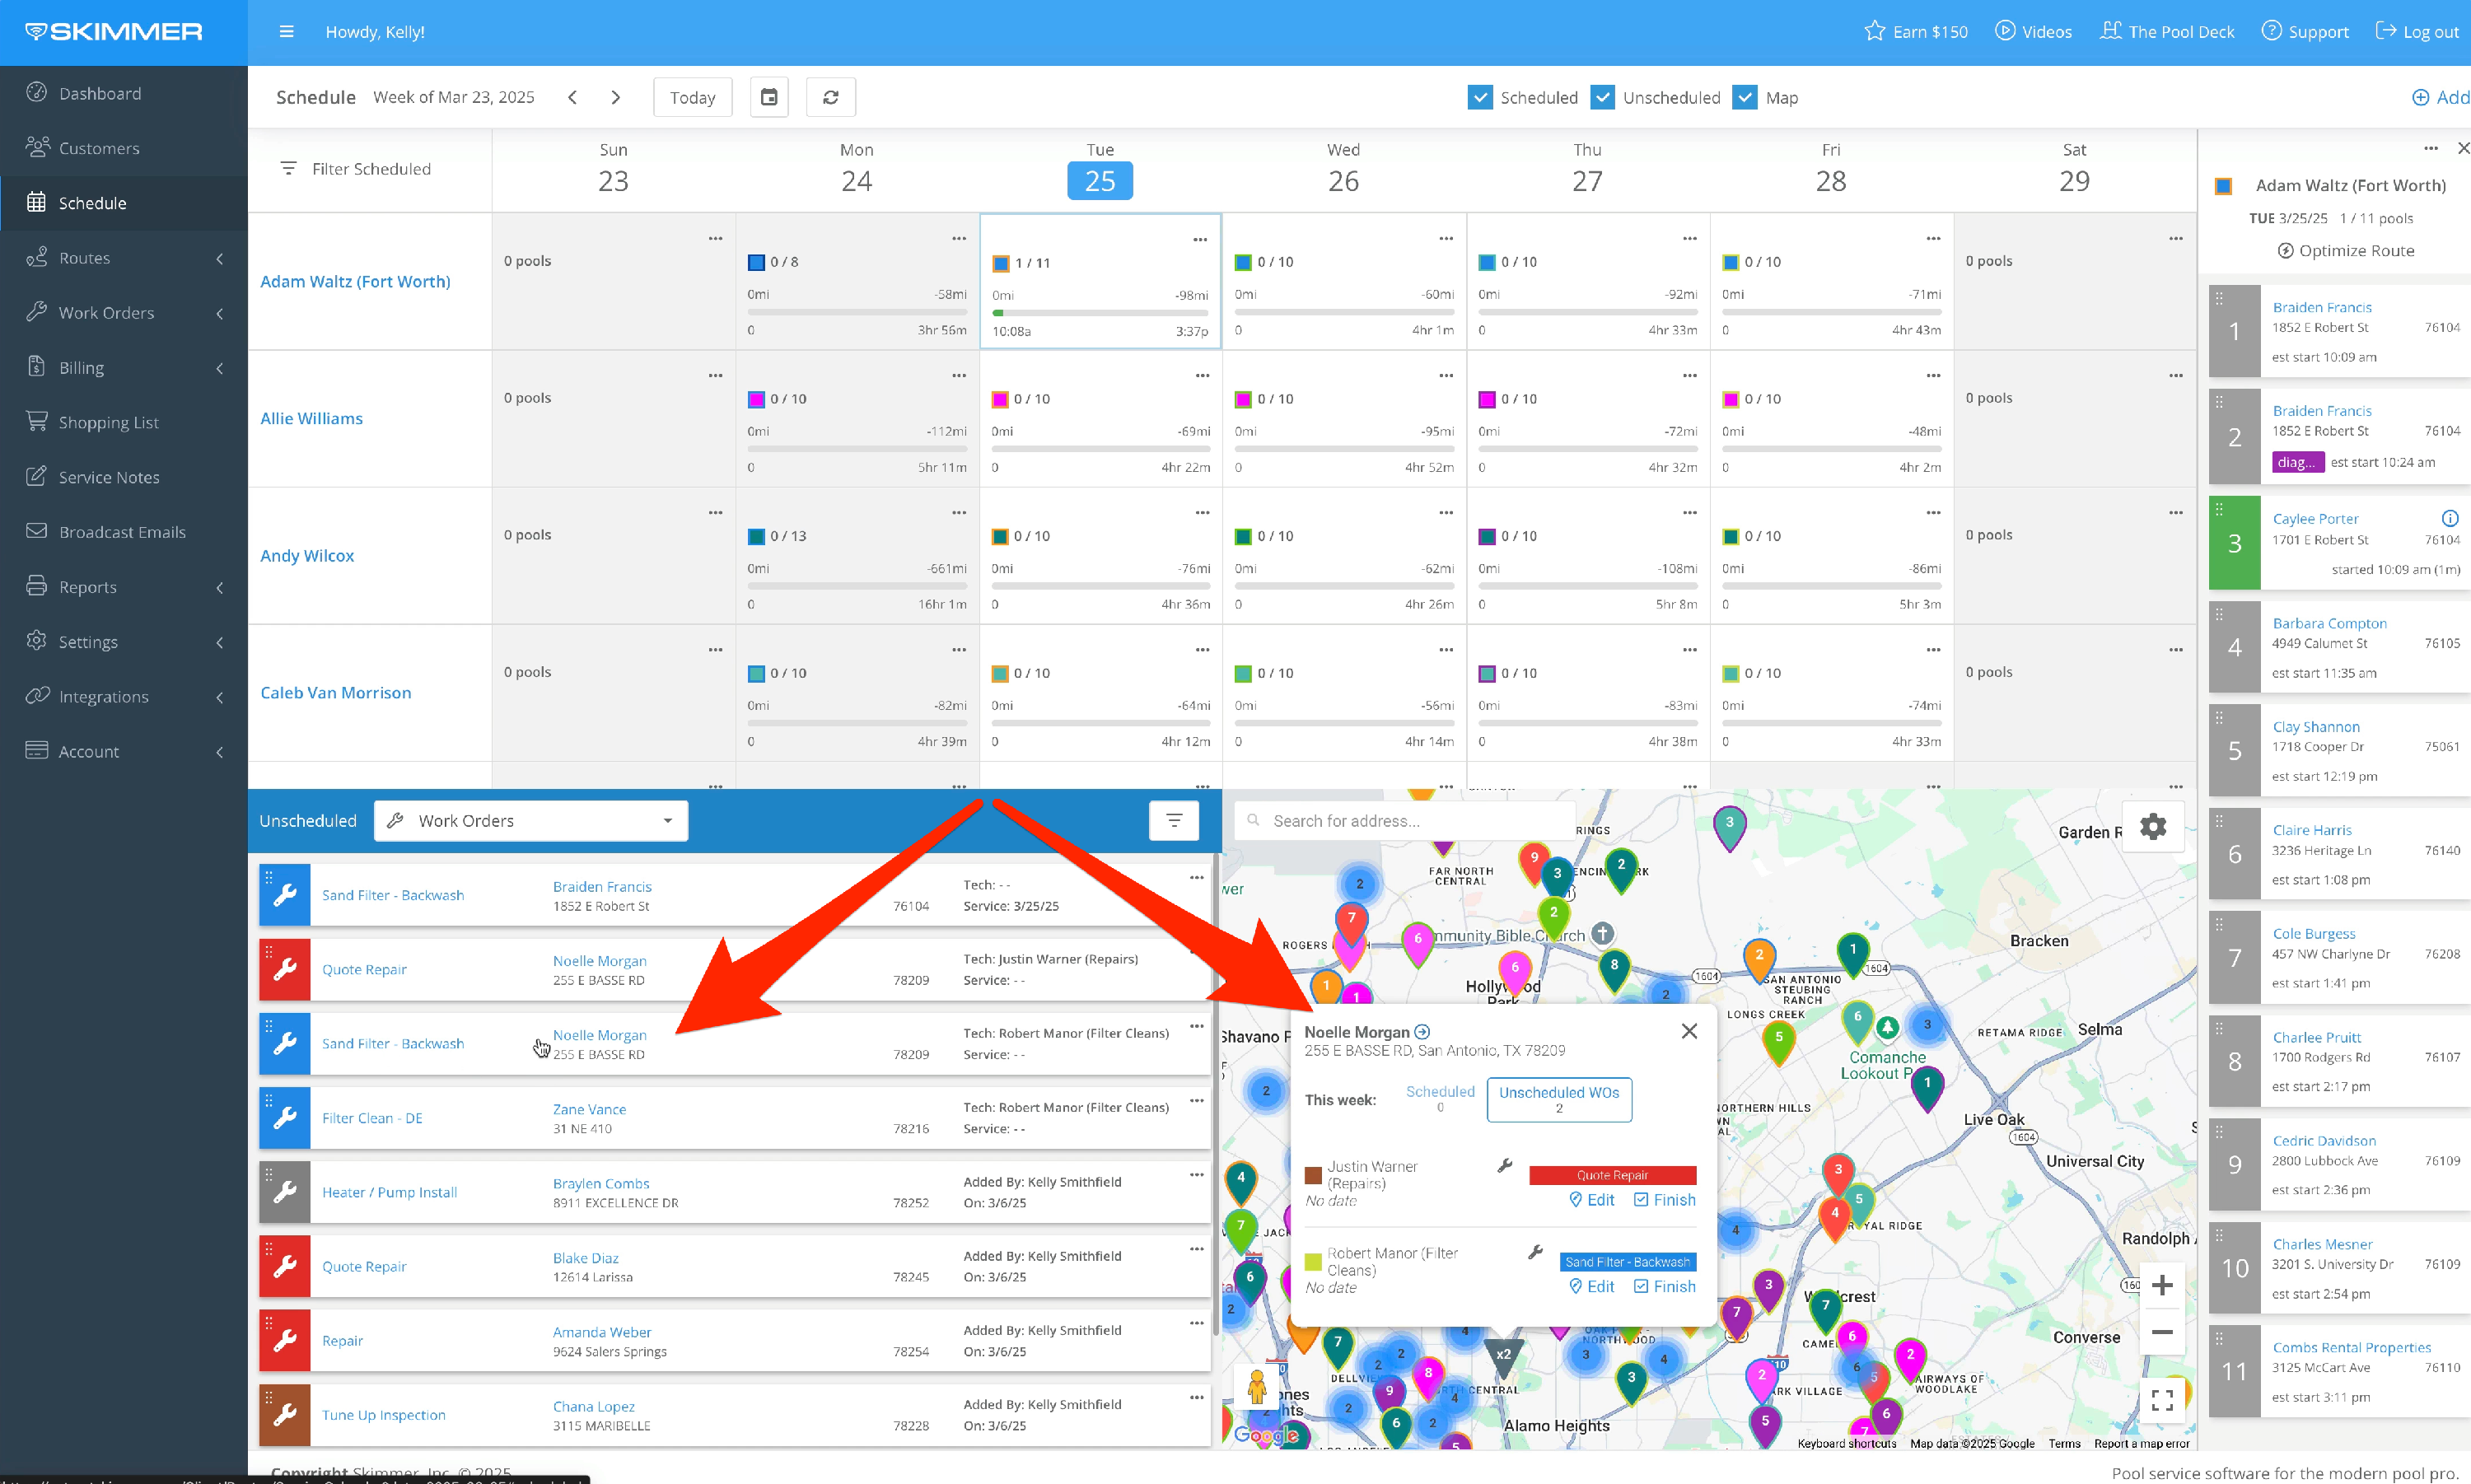
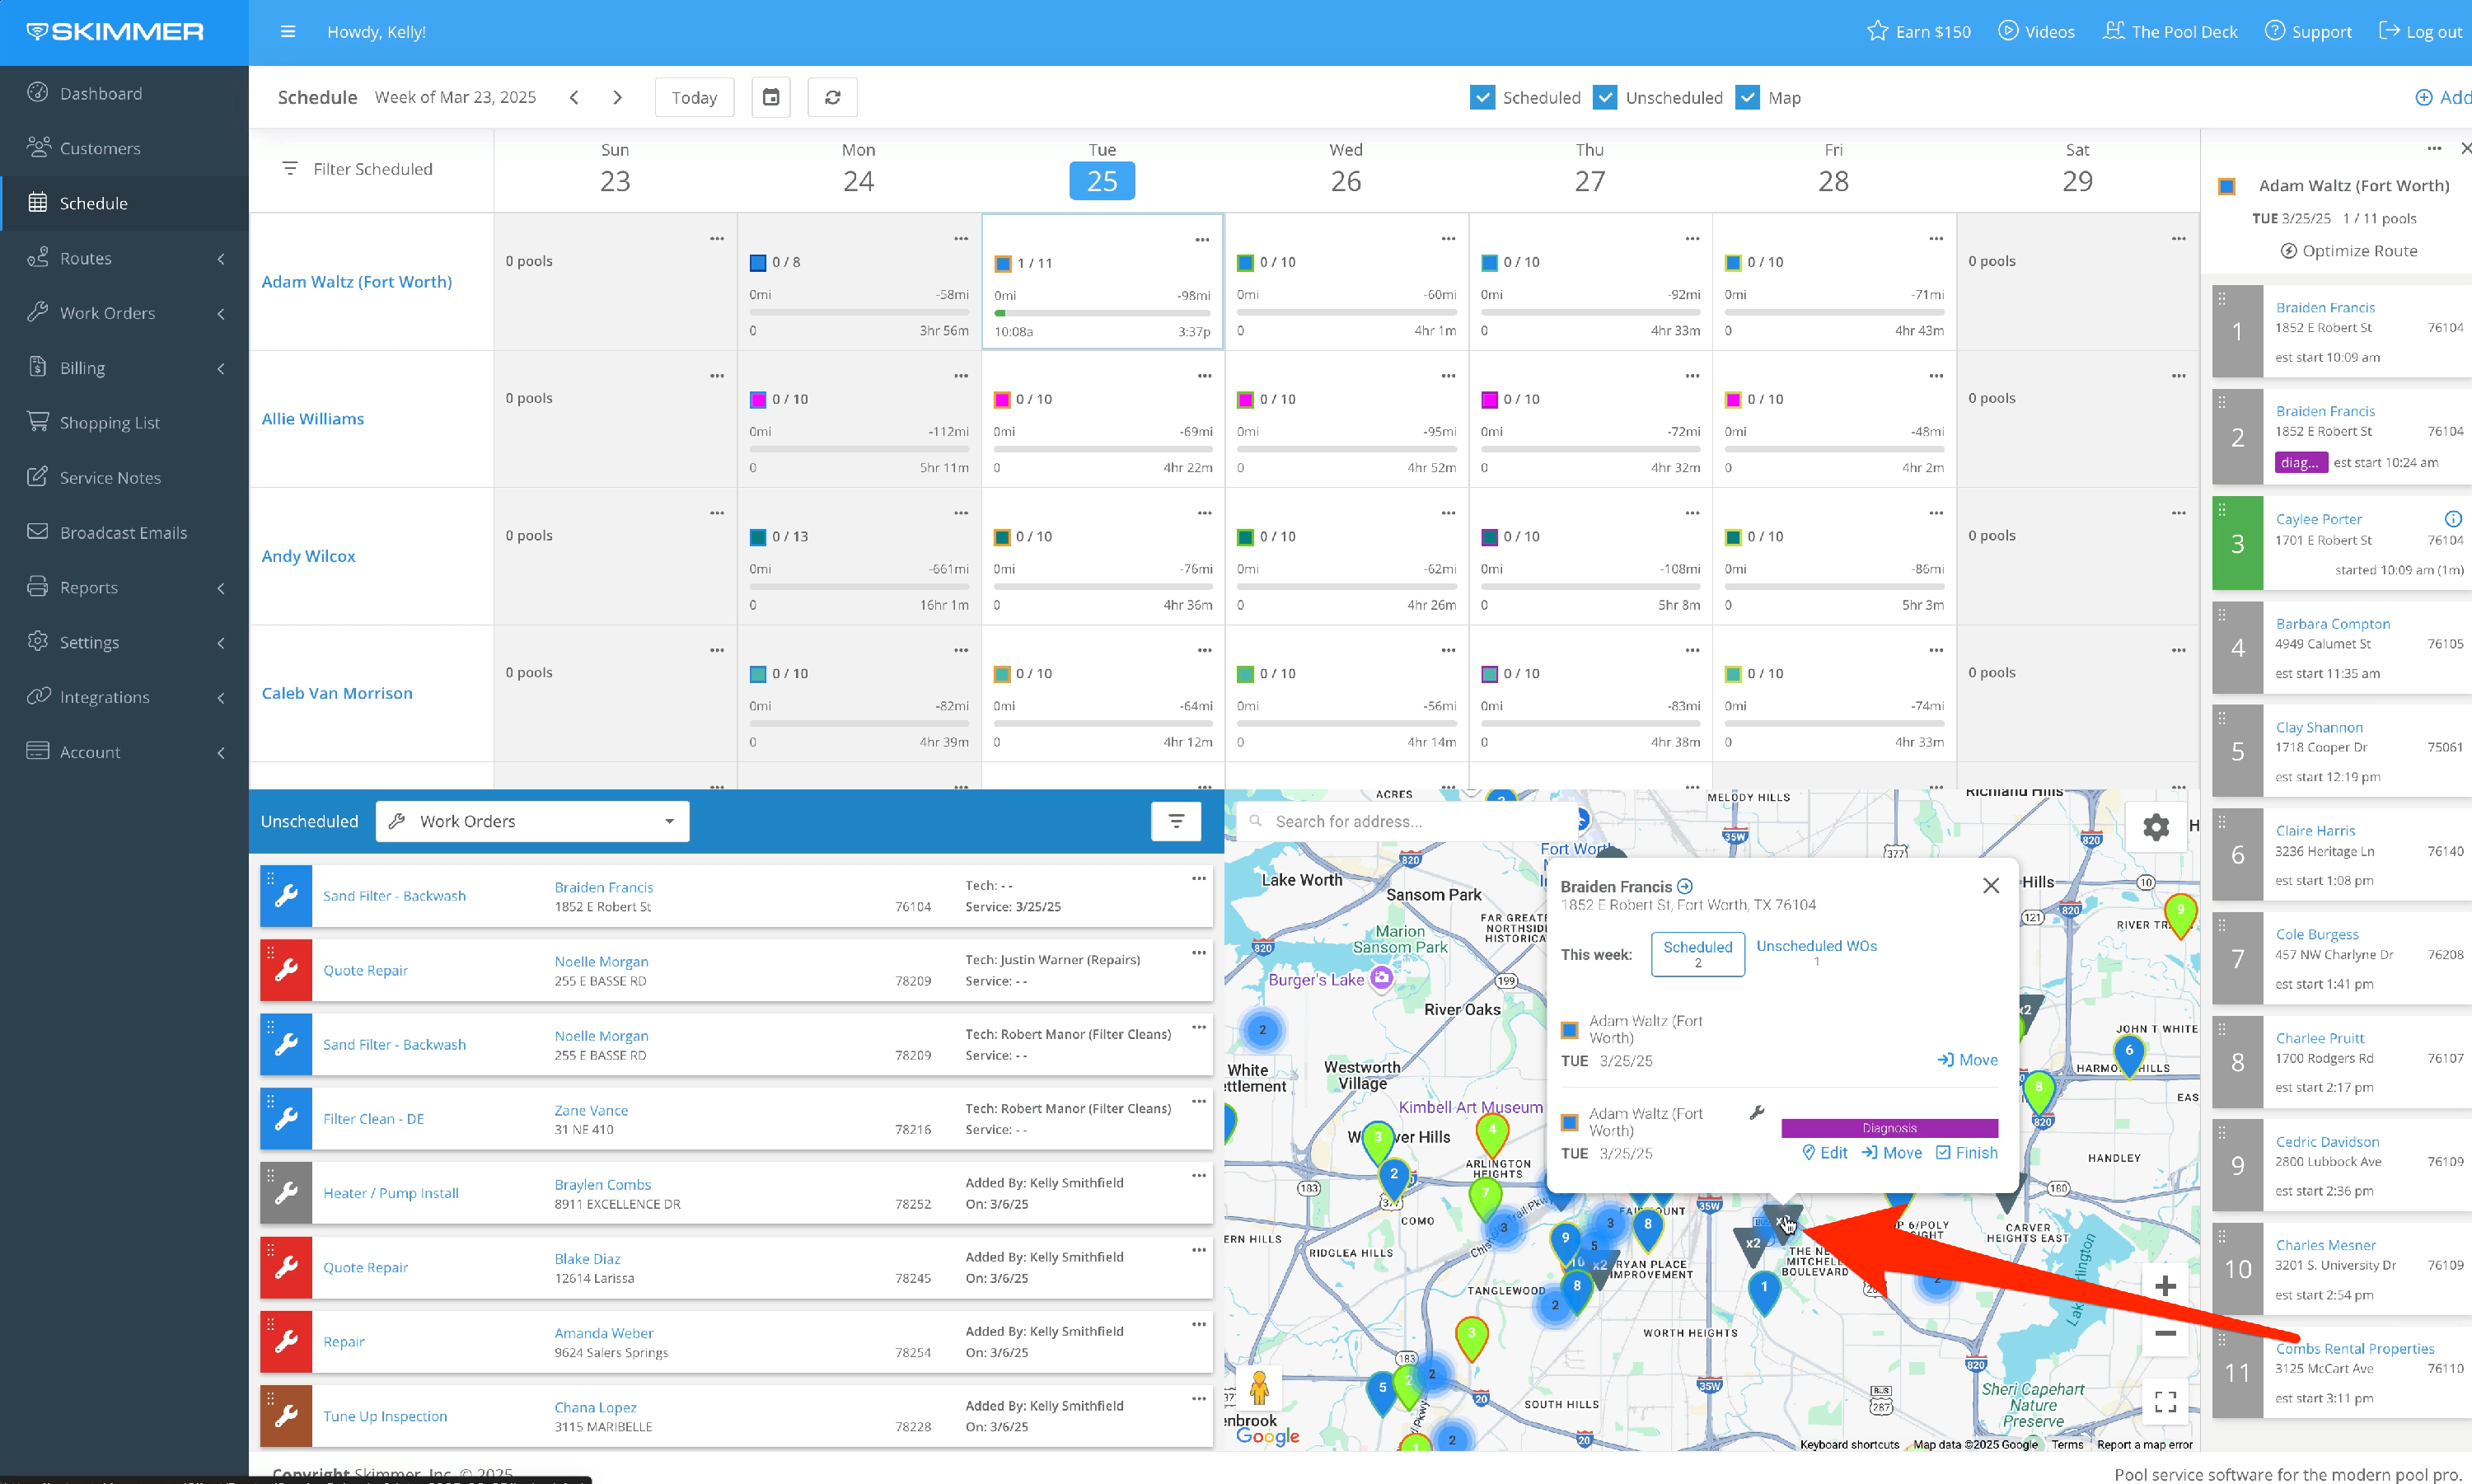
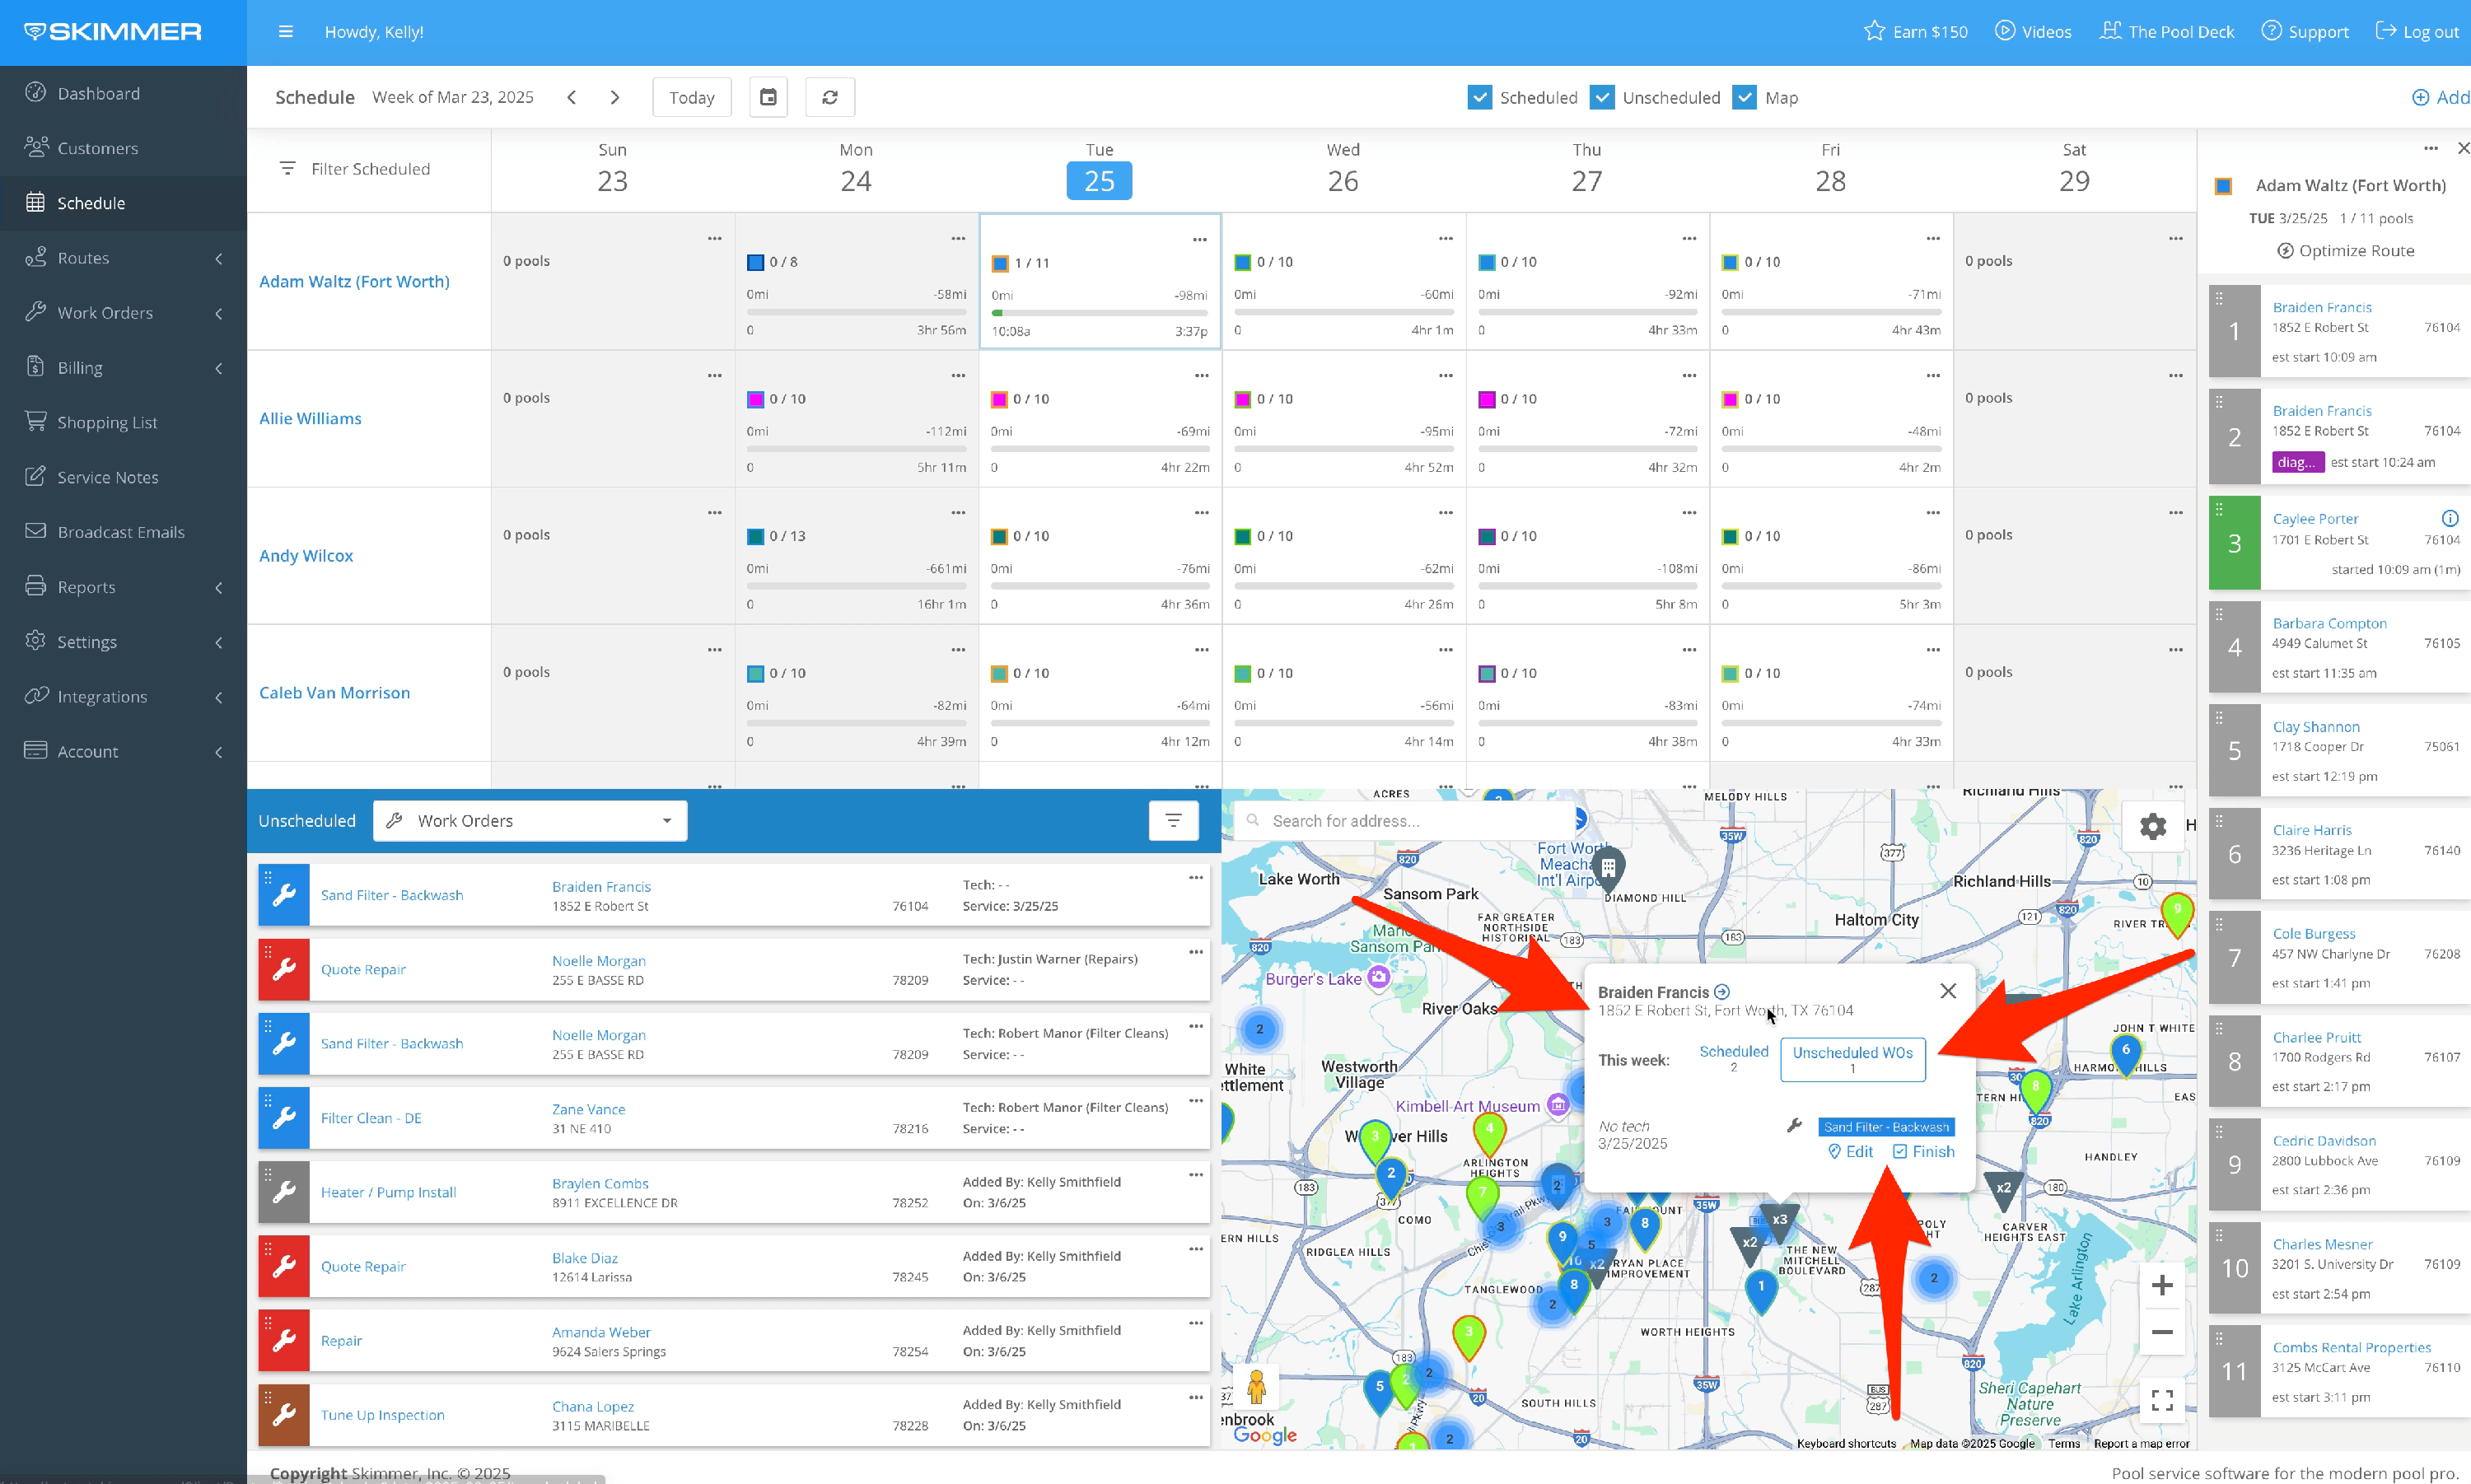
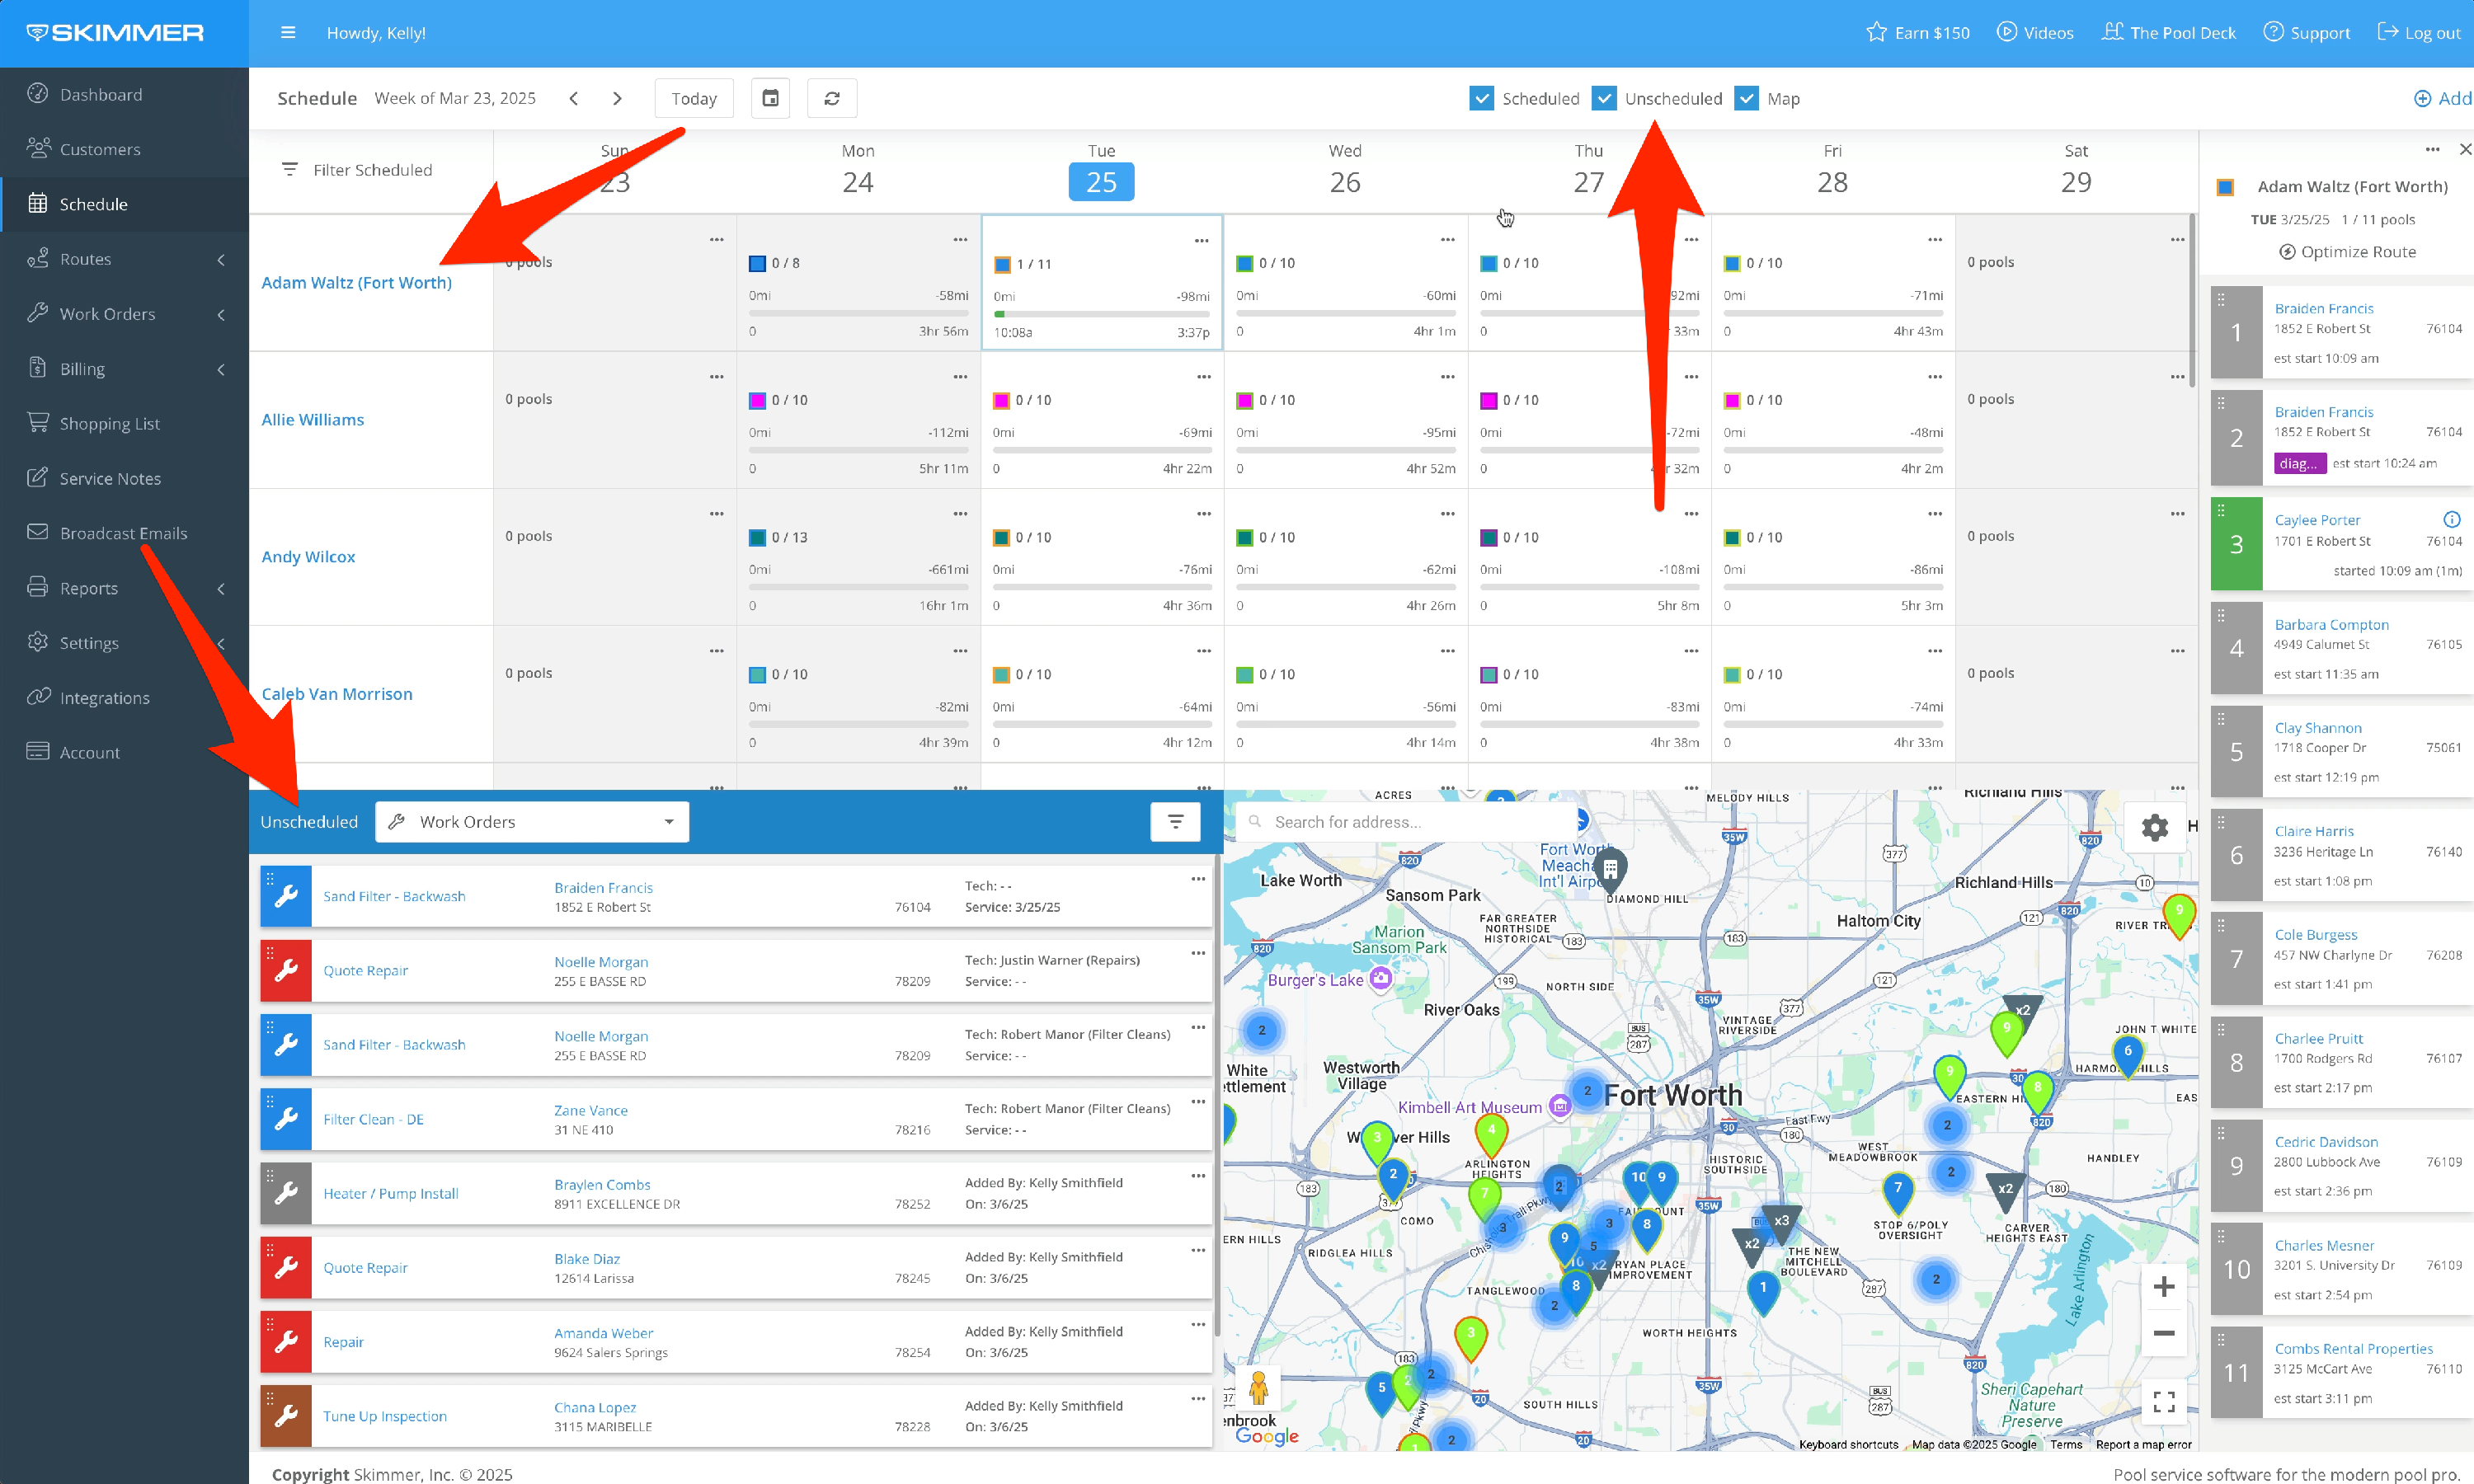
The Map is for managing your Schedule. It shows pins for both scheduled and unscheduled tasks. When you click an item in the Unscheduled Bin or a route stop in the Calendar, the map zooms in on that location and shows a details box.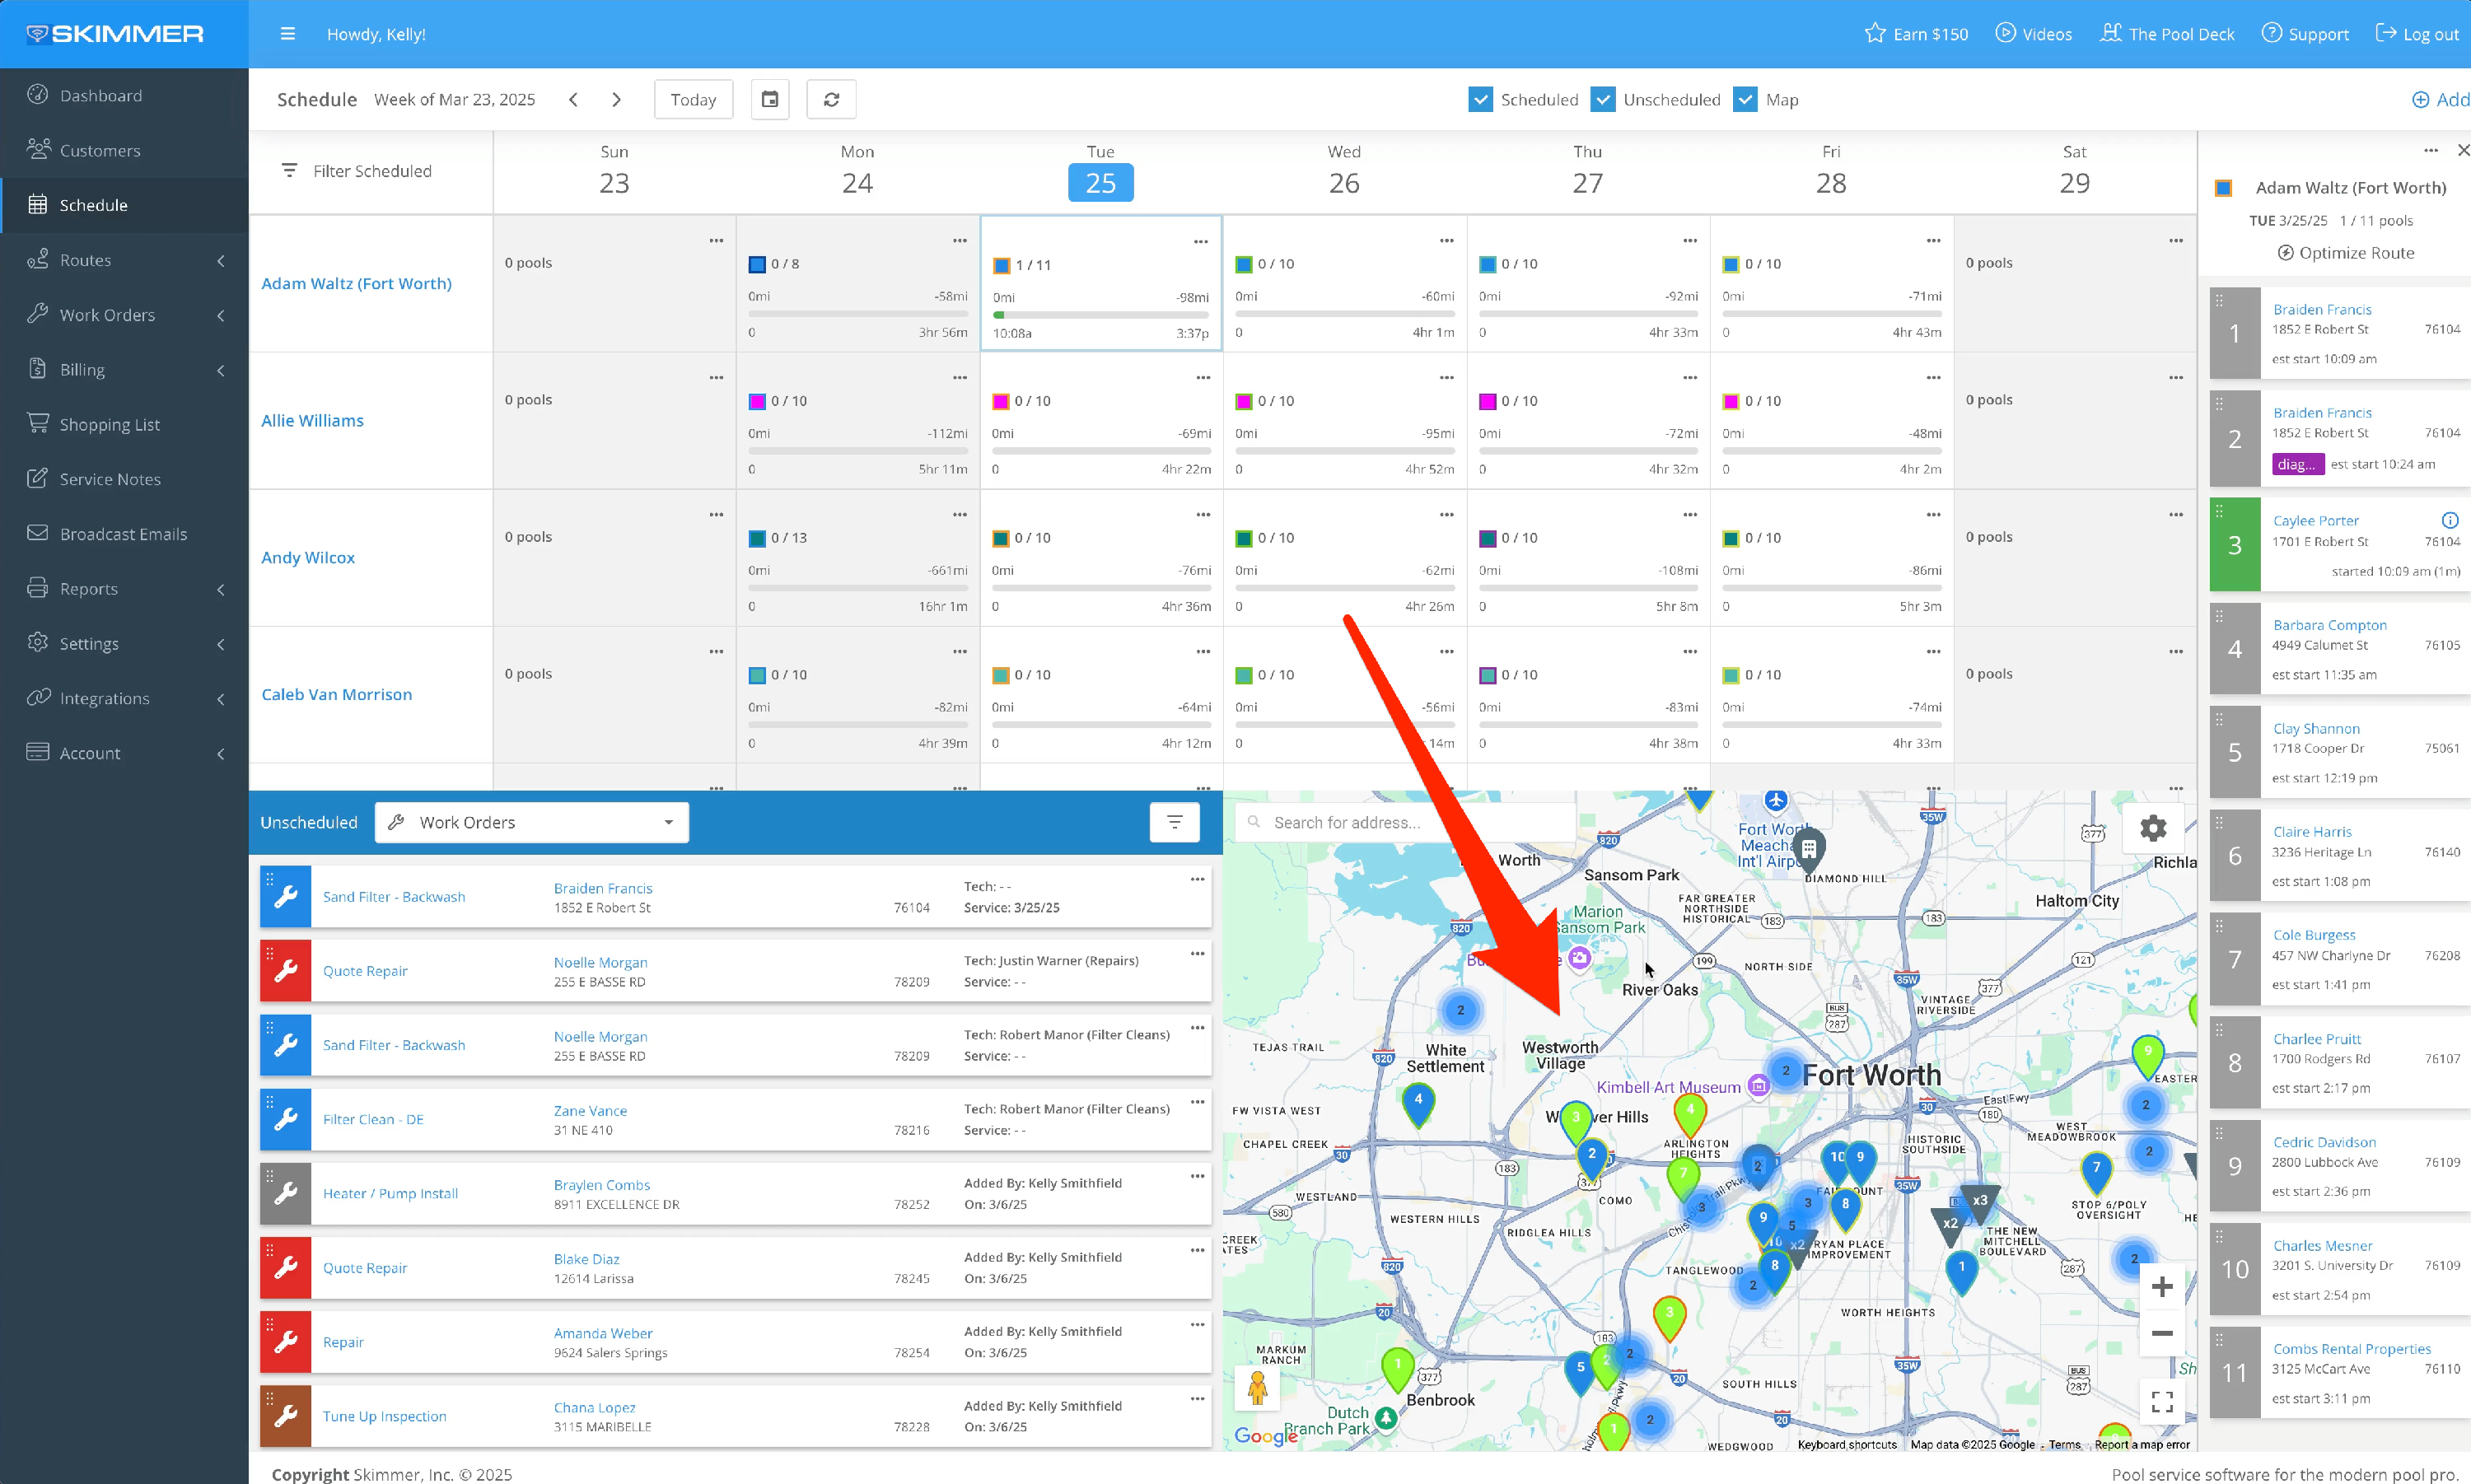
2. Viewing Pin Details
Click a pin on the map to open its details box. This box gives you information about the customer, location, and maintenance route assignments.
-
To change a route, click Move.
-
You can also see work orders for the week and reminders for any work orders that still need to be created. Click these to edit or finish the work orders.
-
For scheduled work orders, use the buttons to edit, move, or mark them as finished.
3. How the Map Works
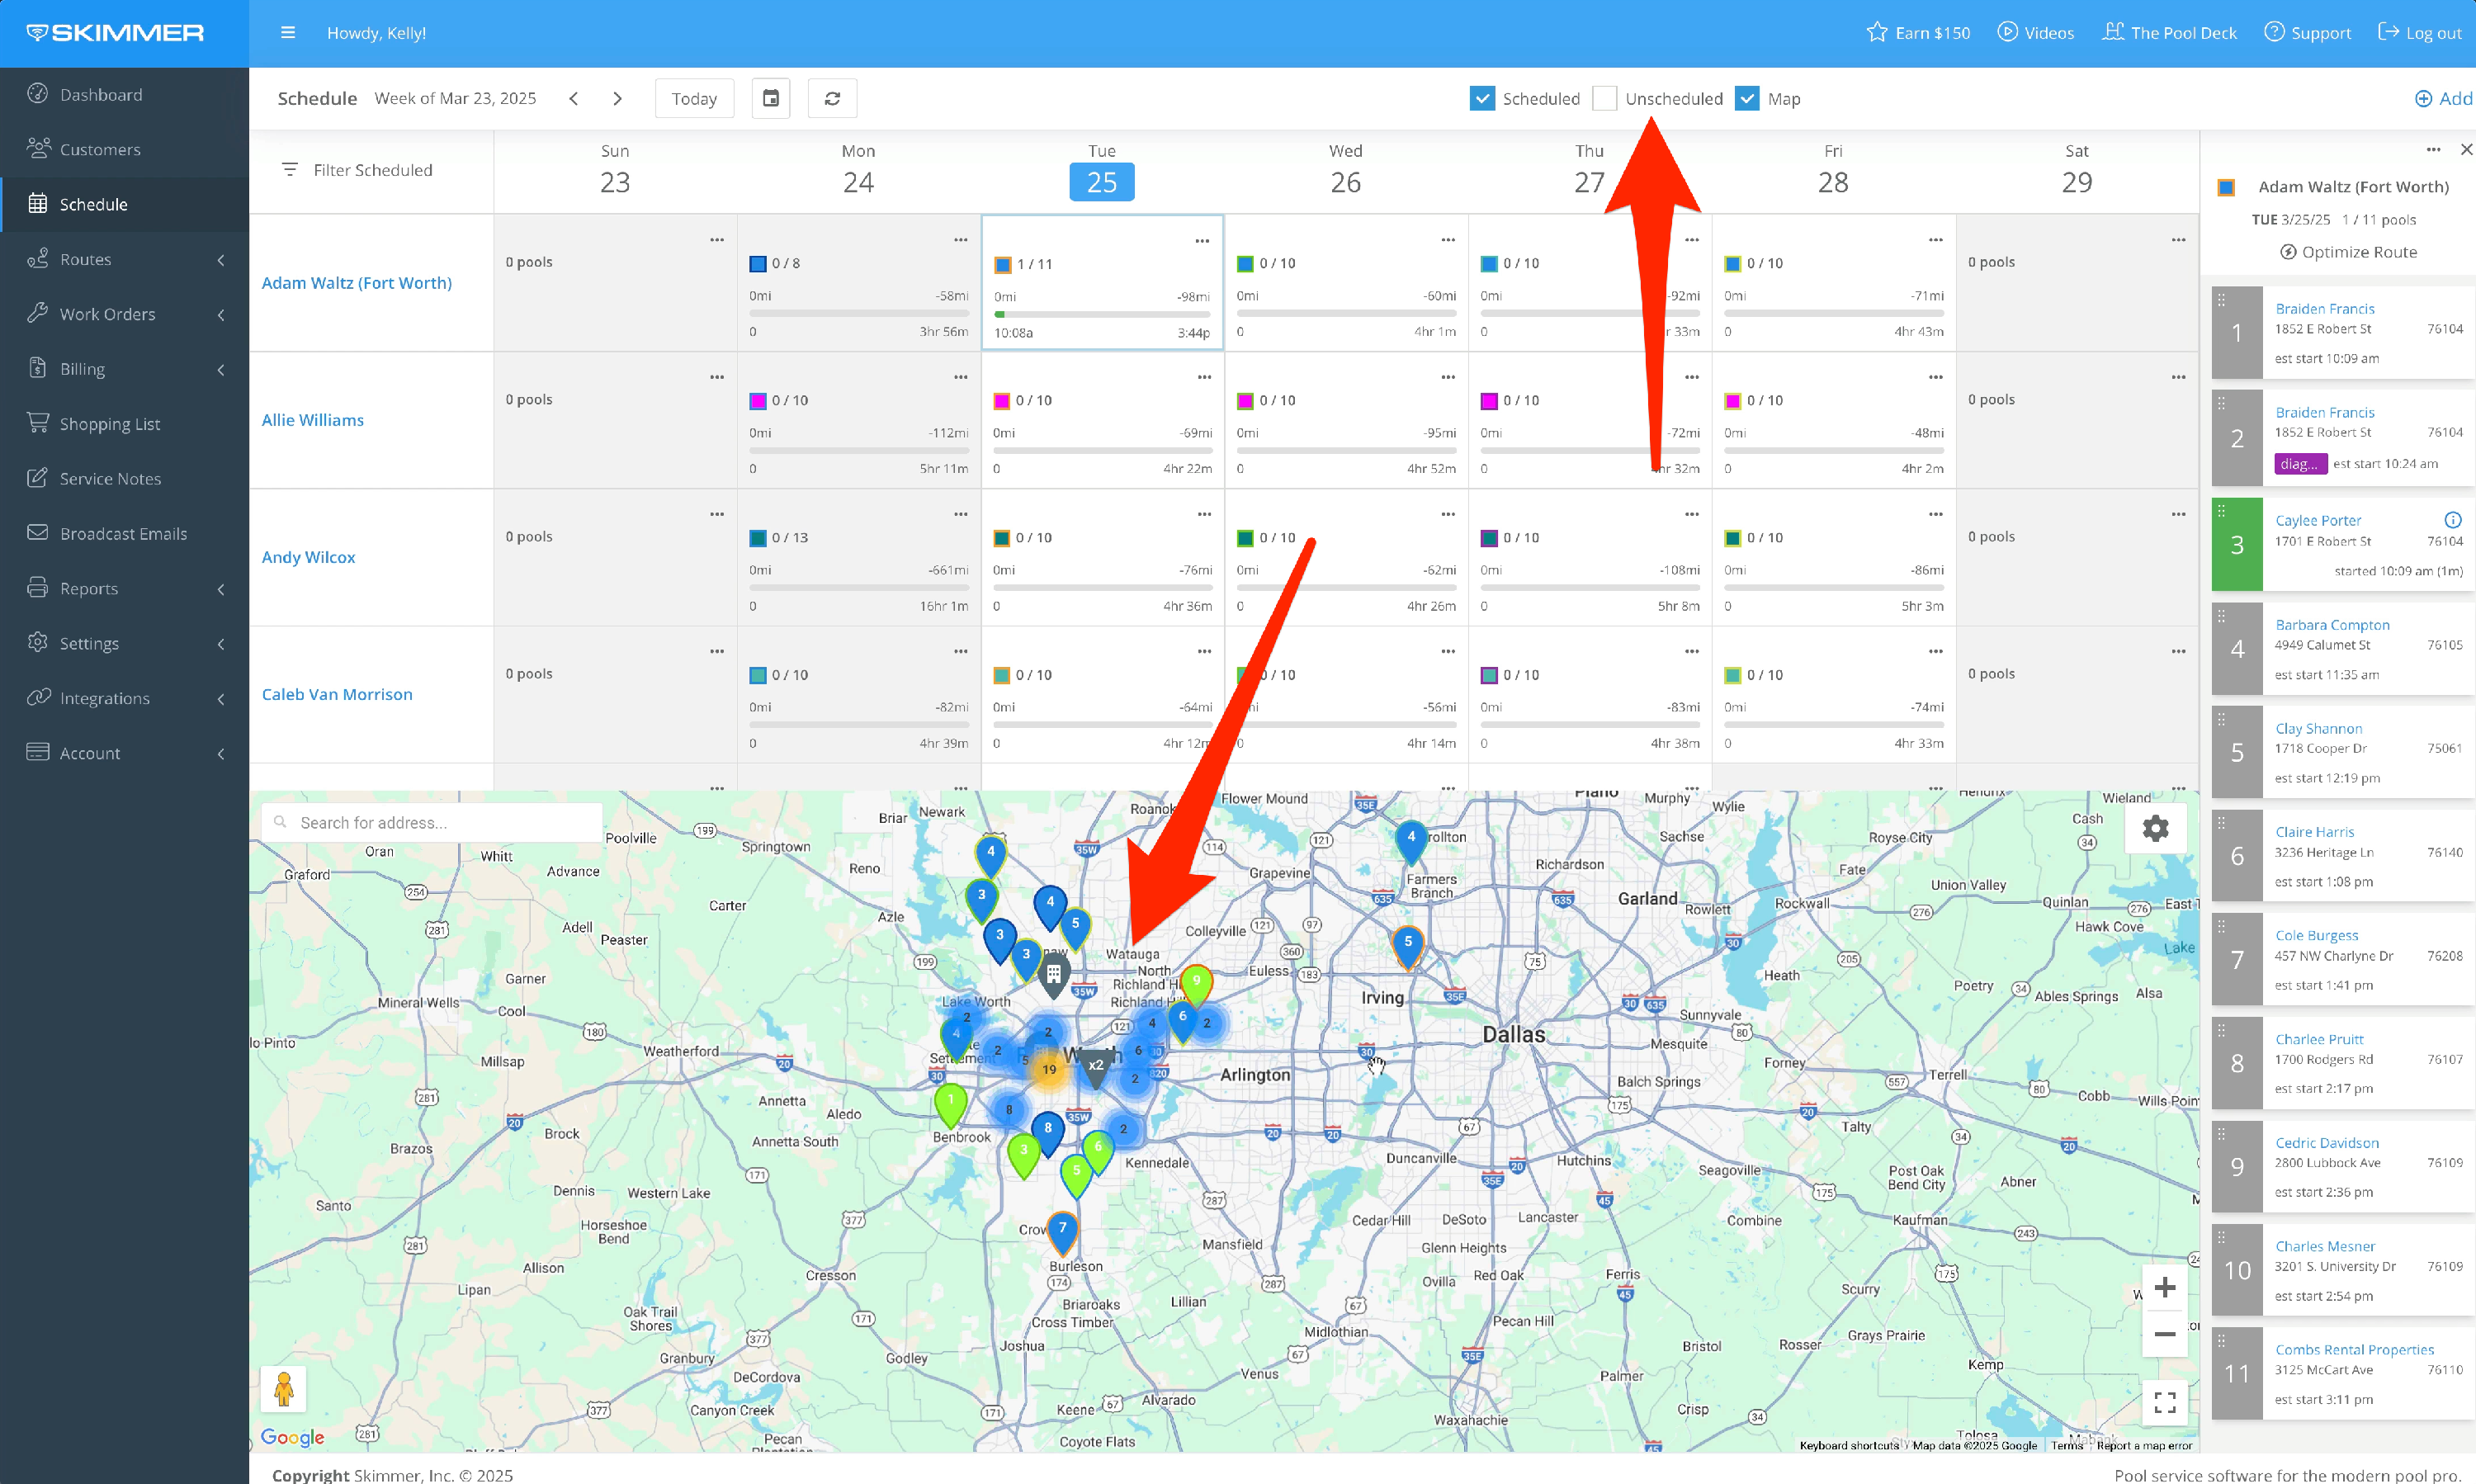
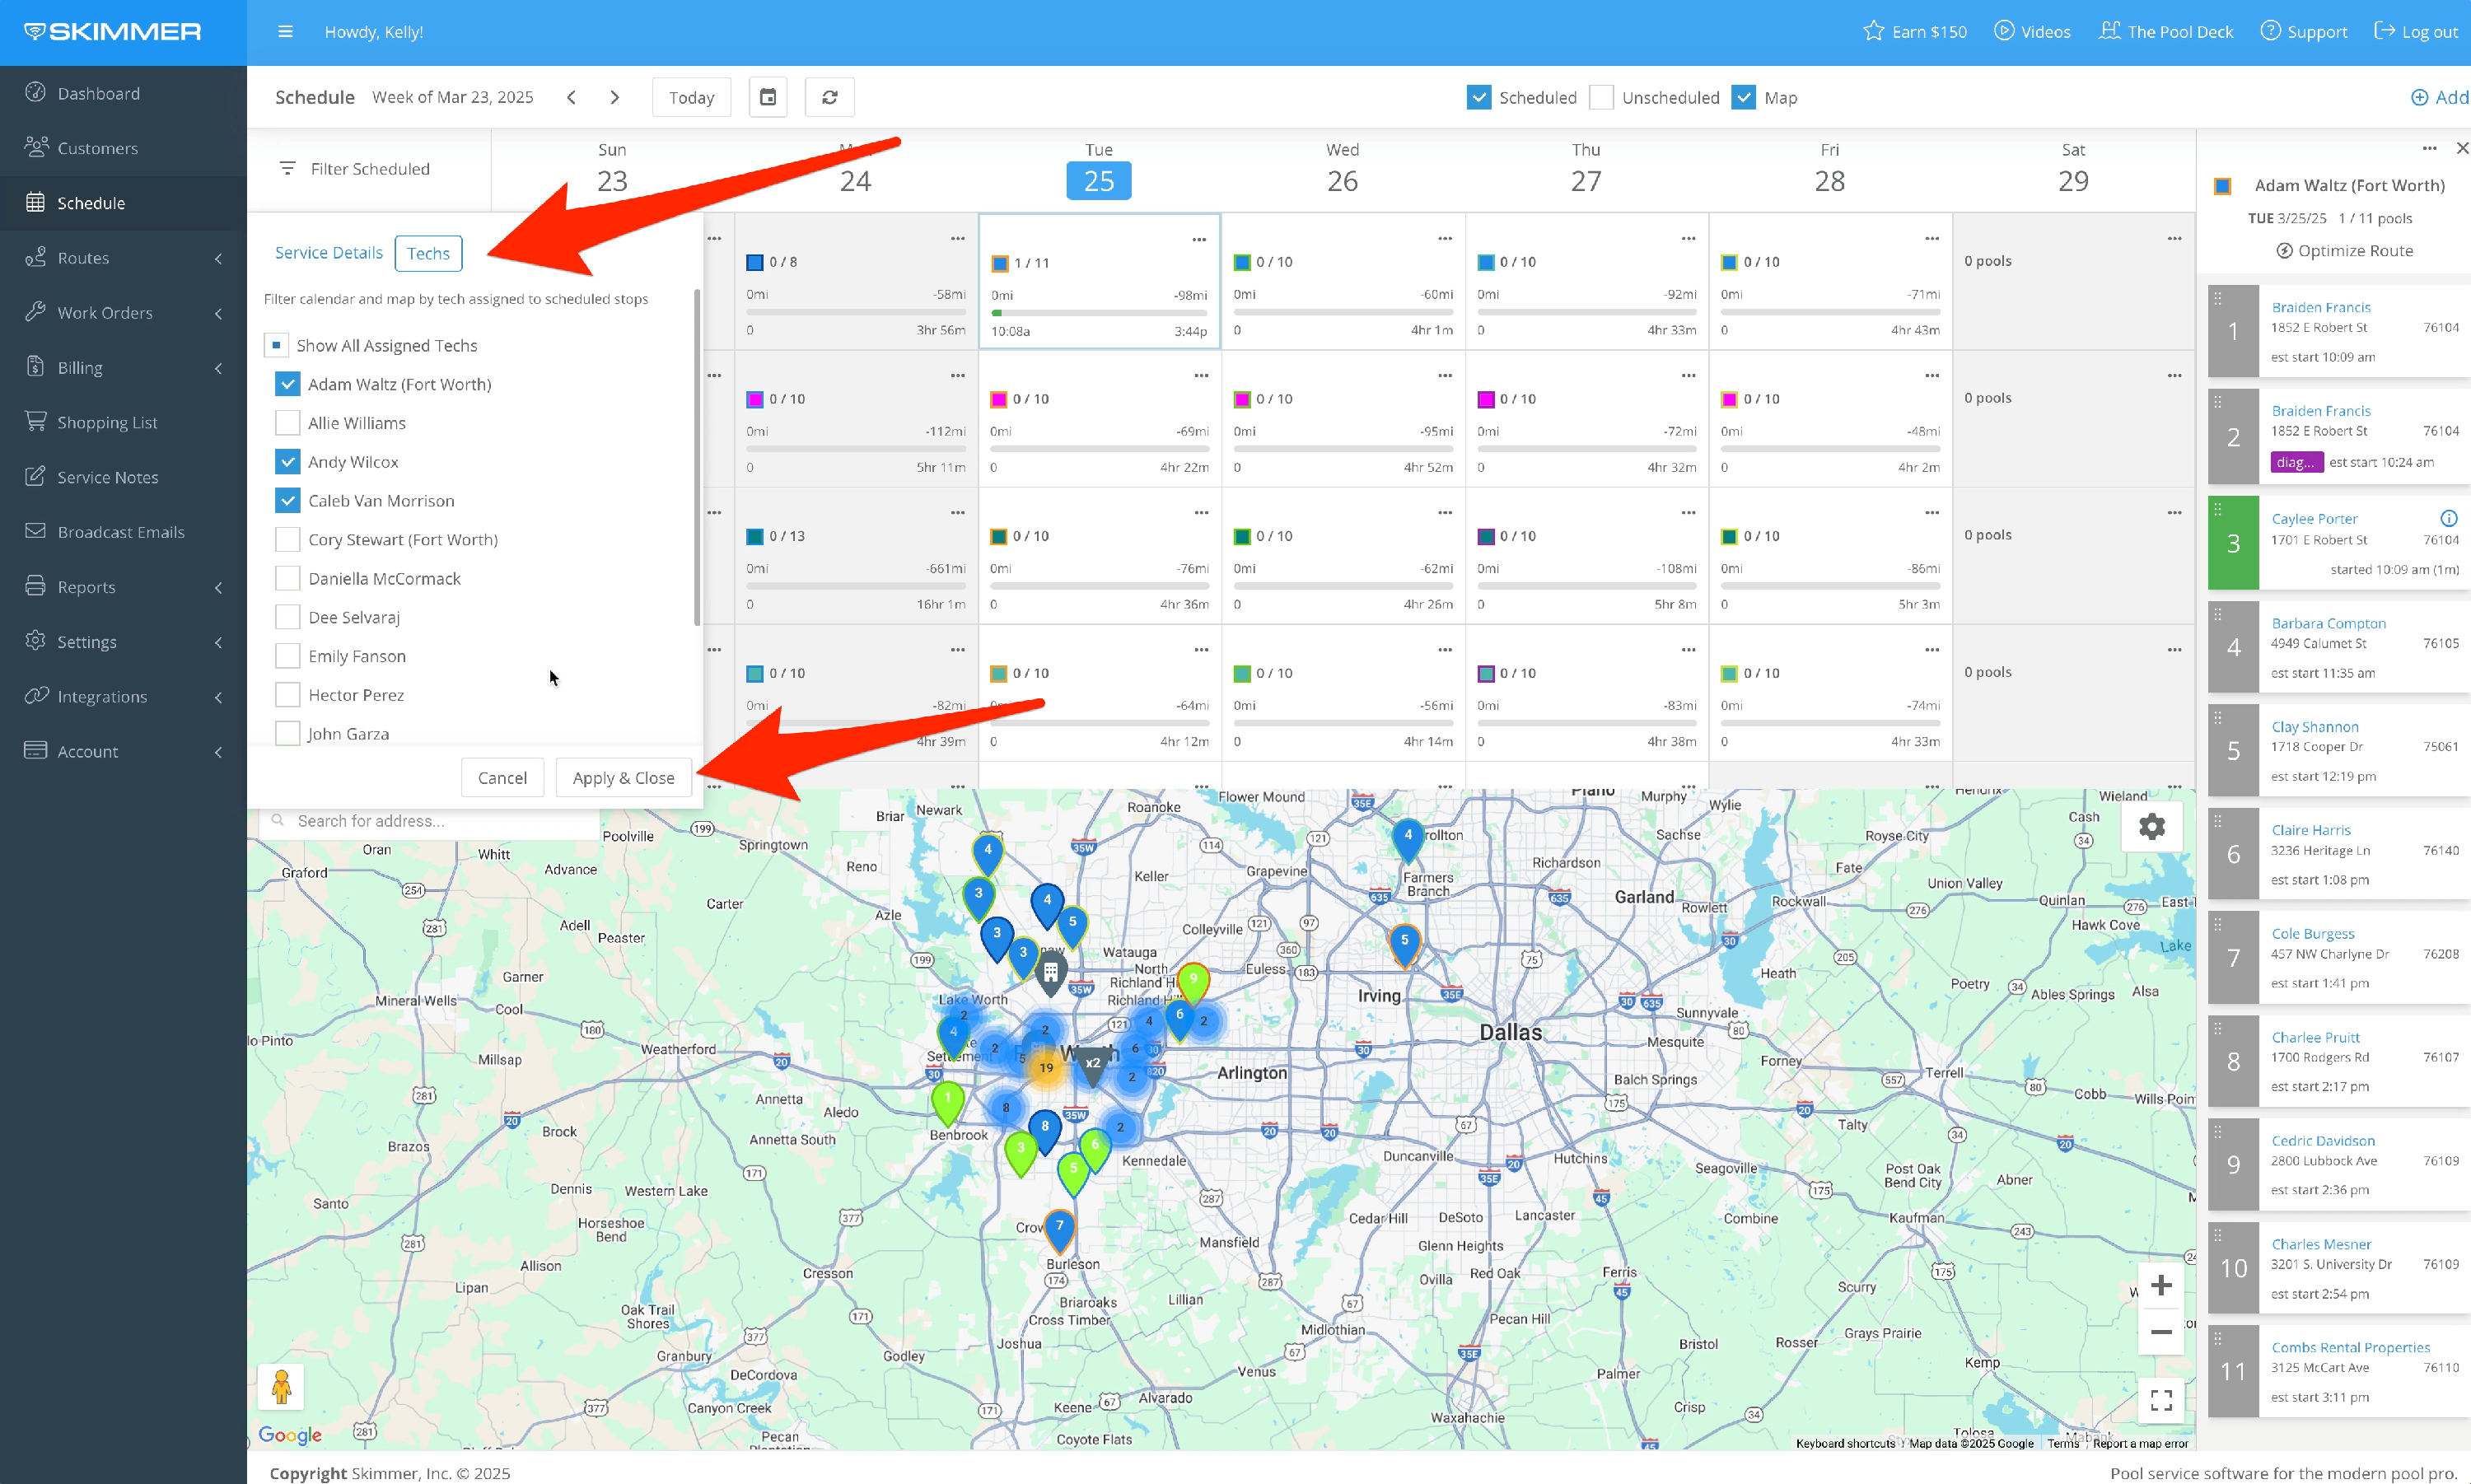
Everything on the Map comes from the Calendar and the Unscheduled Bin. The Map doesn’t have its own filters. This means if you hide part of the view in the Calendar or Unscheduled Bin, those pins will disappear from the Map too.
4. Pin Shapes and What They Mean
-
Scheduled/Finished Work:
These appear as teardrop shapes. Their colors show the assigned technician and day, and a number shows the job’s order. A checkmark inside the pin means the work is finished. -
Unscheduled Work/Reminders/Unassigned Customers:
These appear as diamond shapes. For work orders and reminders, the color shows the type. Unassigned customers always have a red diamond. Once scheduled, they change to a teardrop with a color indicating the technician and day. -
Multiple Events:
If several events occur at the same location in the current time frame, you’ll see a gray triangle. The number in the triangle shows how many events there are.
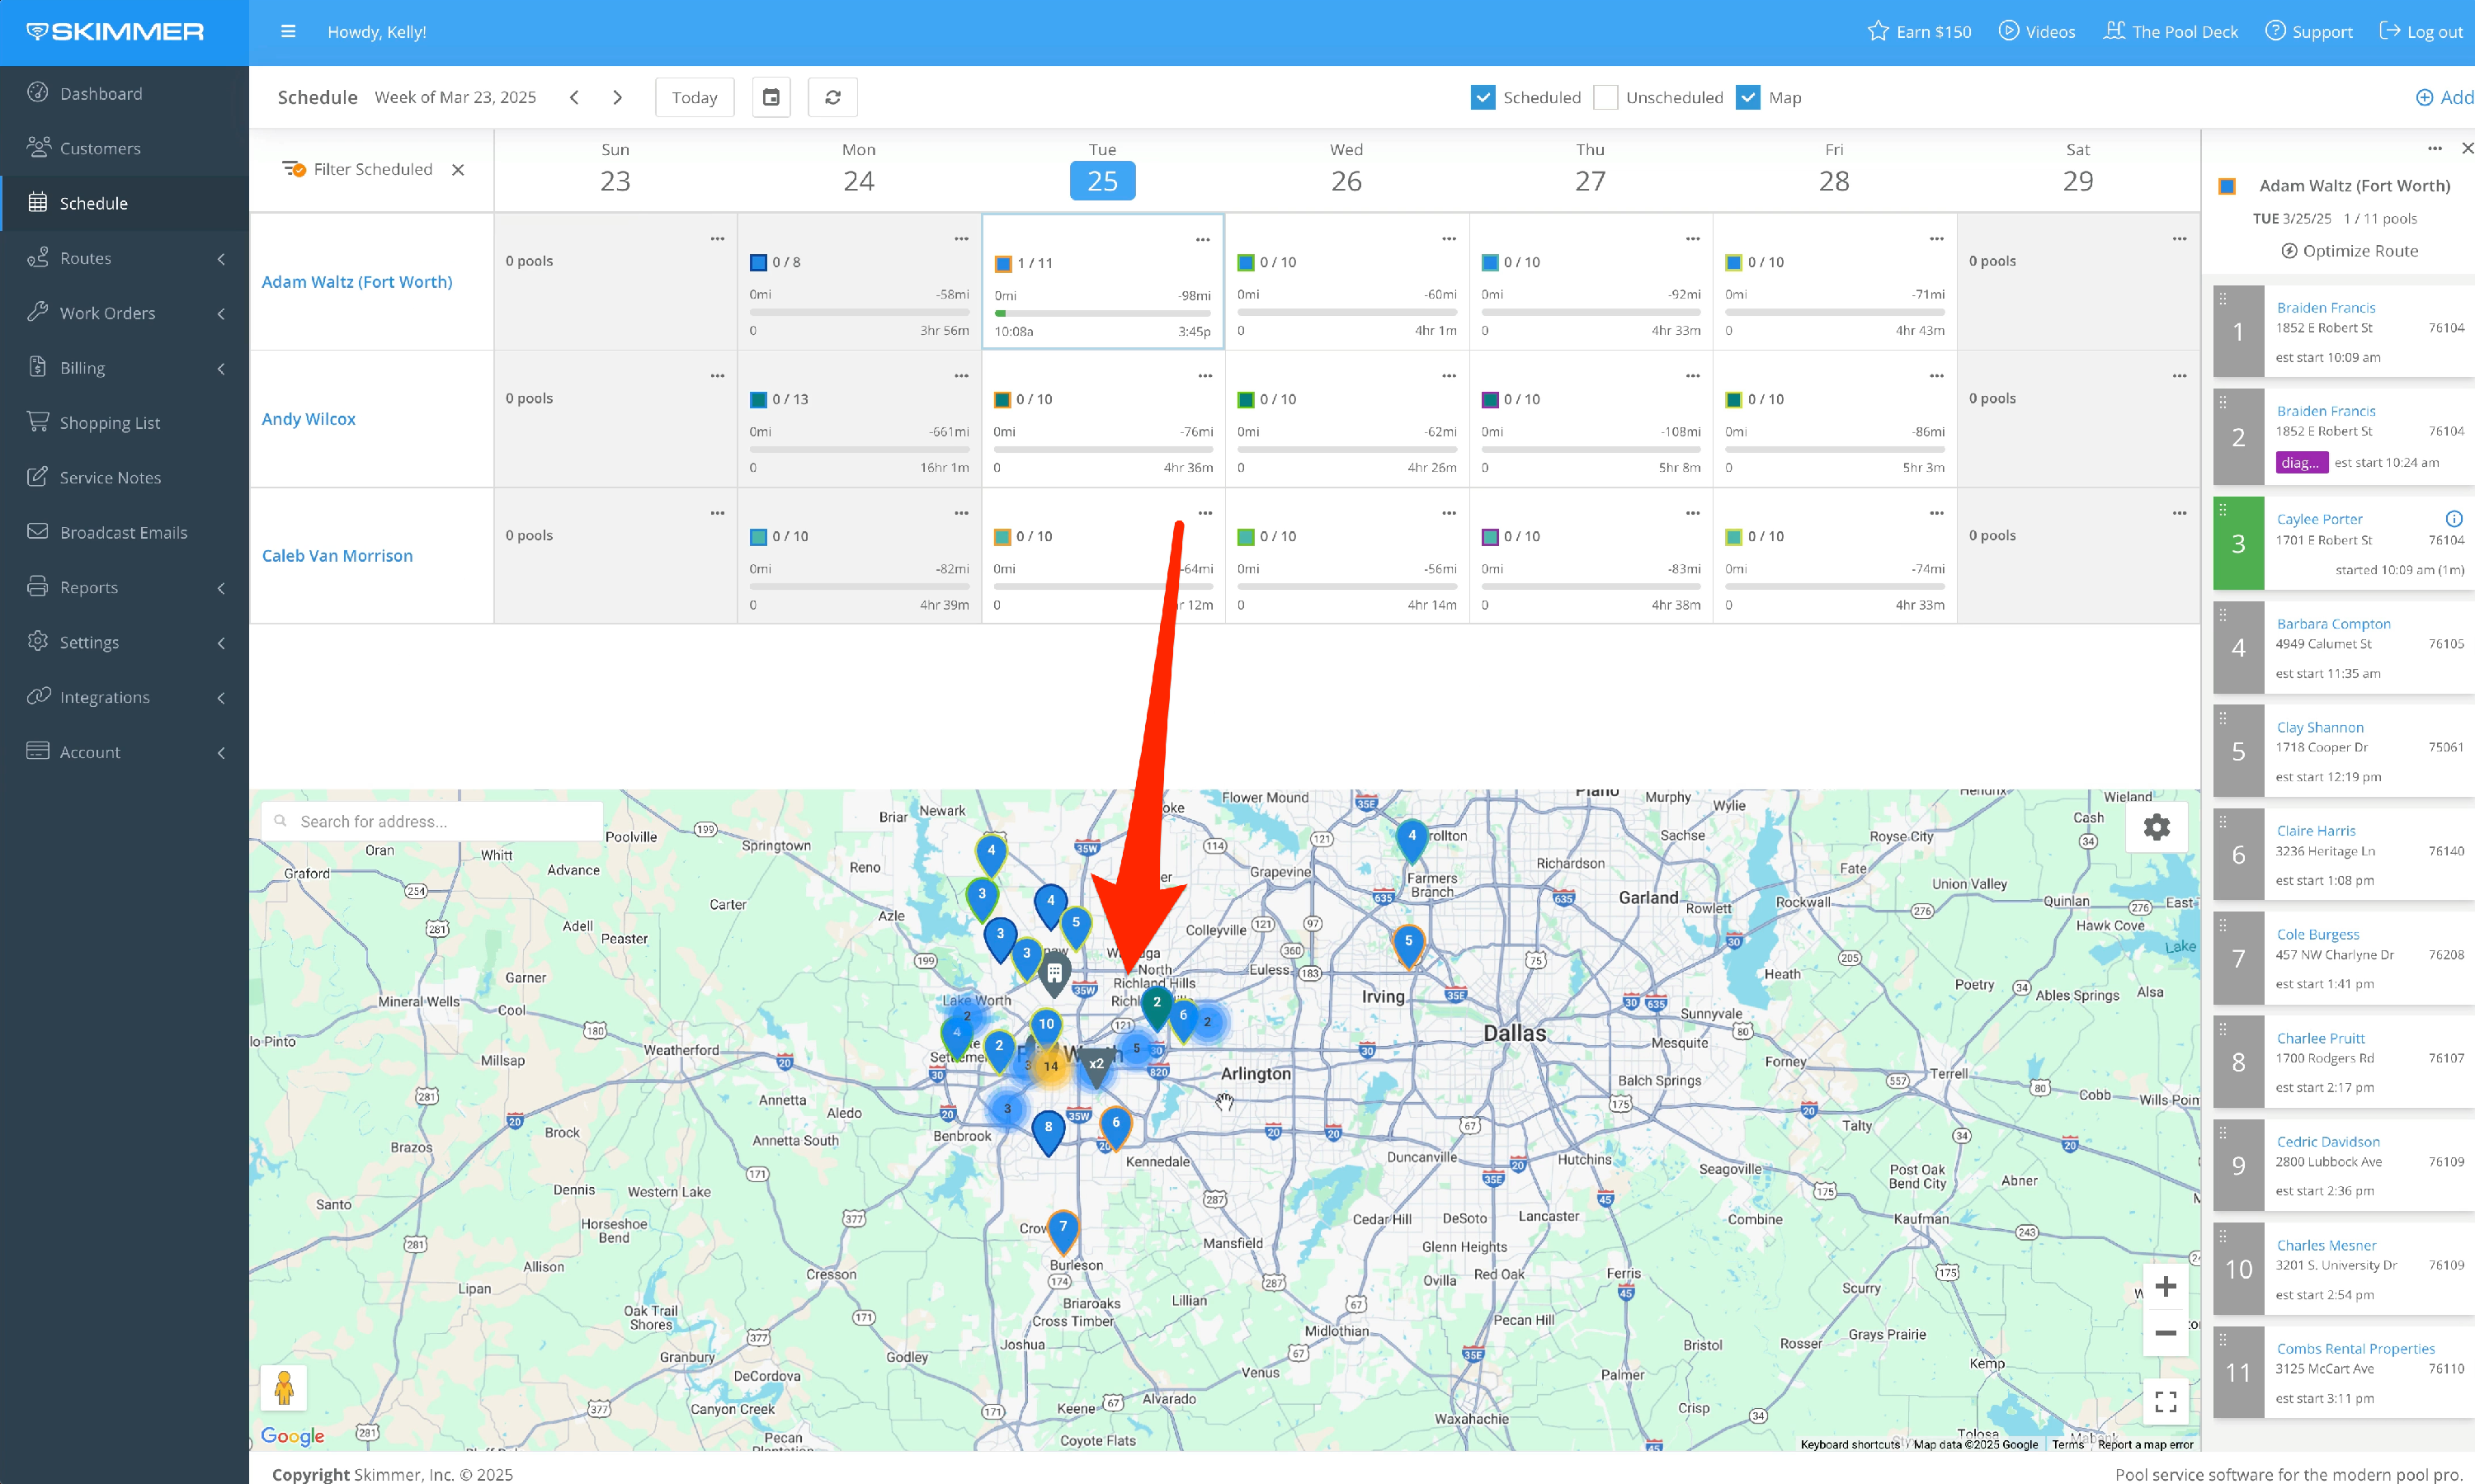
5. Zooming and Clustering
When many tasks are close together, the pins combine into a circle with a number in the center as you zoom out, keeping the map uncluttered. Zooming in breaks the circle back into individual pins.

Last updated March 25, 2025.