
To learn how create and approve quotes with the Skimmer app, see the video below. Or scroll past the video to view our step-by-step text instructions.
Tiers: Scaling Up and Skimmer for Enterprise
Step-by-step instructions
1. To start, on the website under Roles and Permissions, grant mobile rights to view and build quotes and obtain customer approval in the app. Admin and Owner roles automatically have access, but for others you’ll need to grant these rights. We show you how to manage permissions in other tutorials.
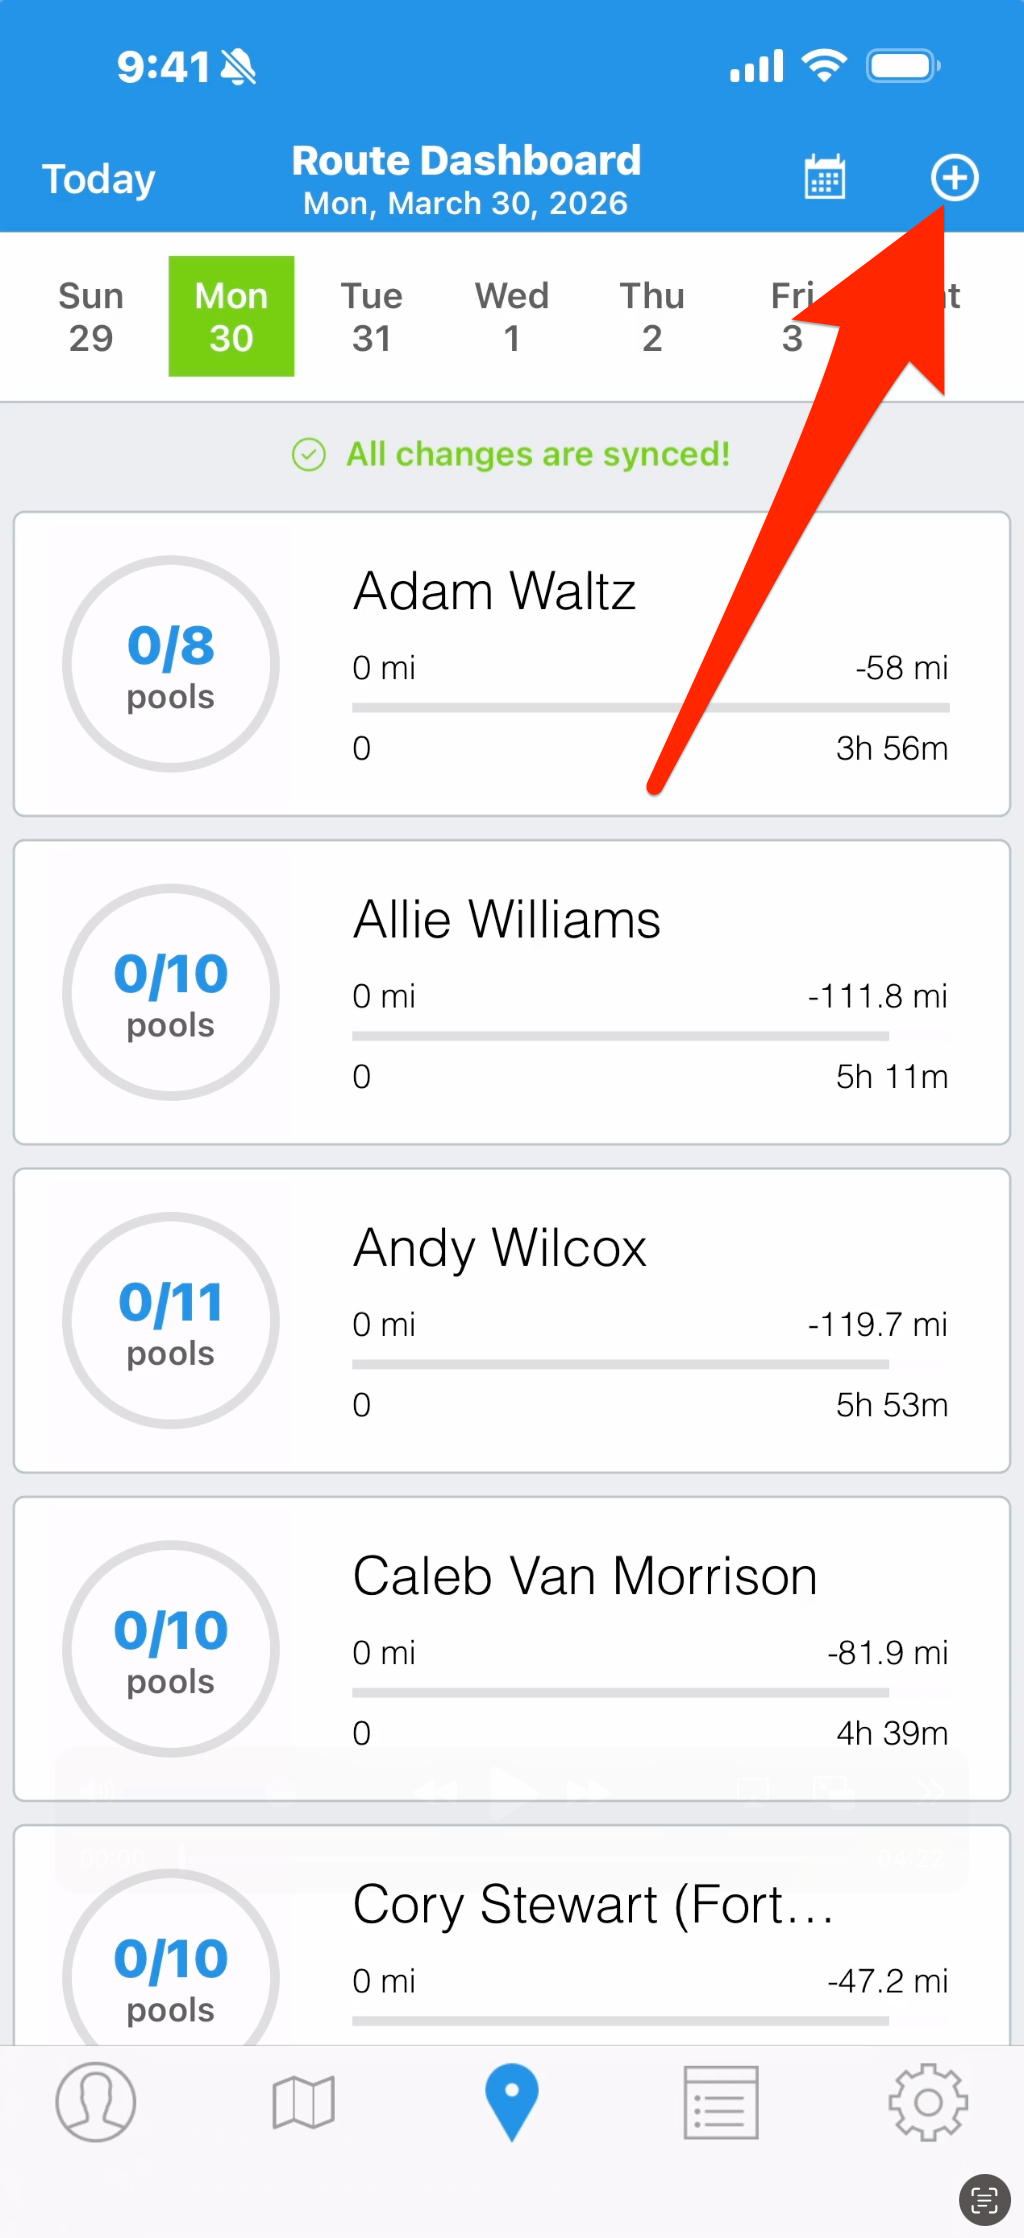
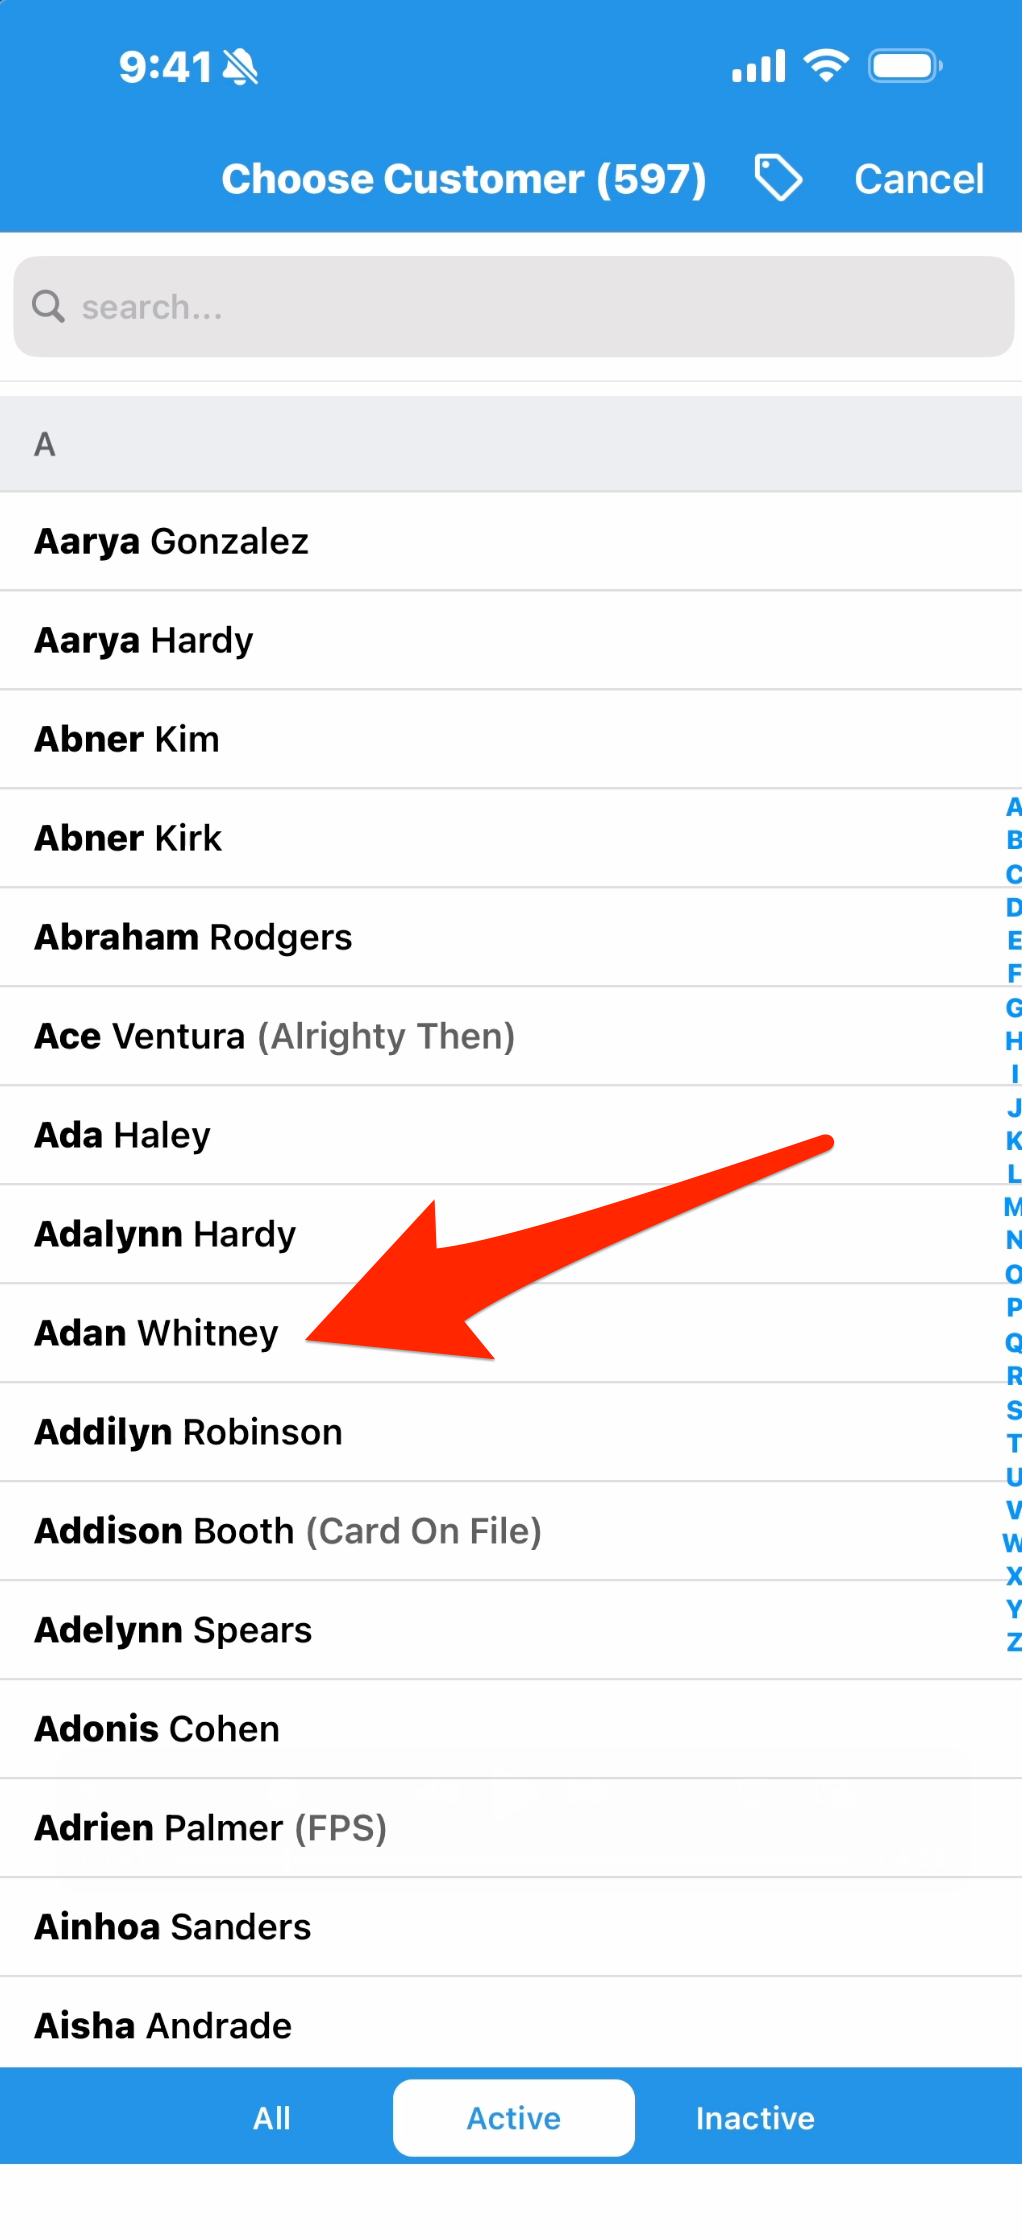
On the app, you can create a quote from more than one place, and the first is on the route dashboard. Tap the Plus icon and choose Quote. Select a customer.
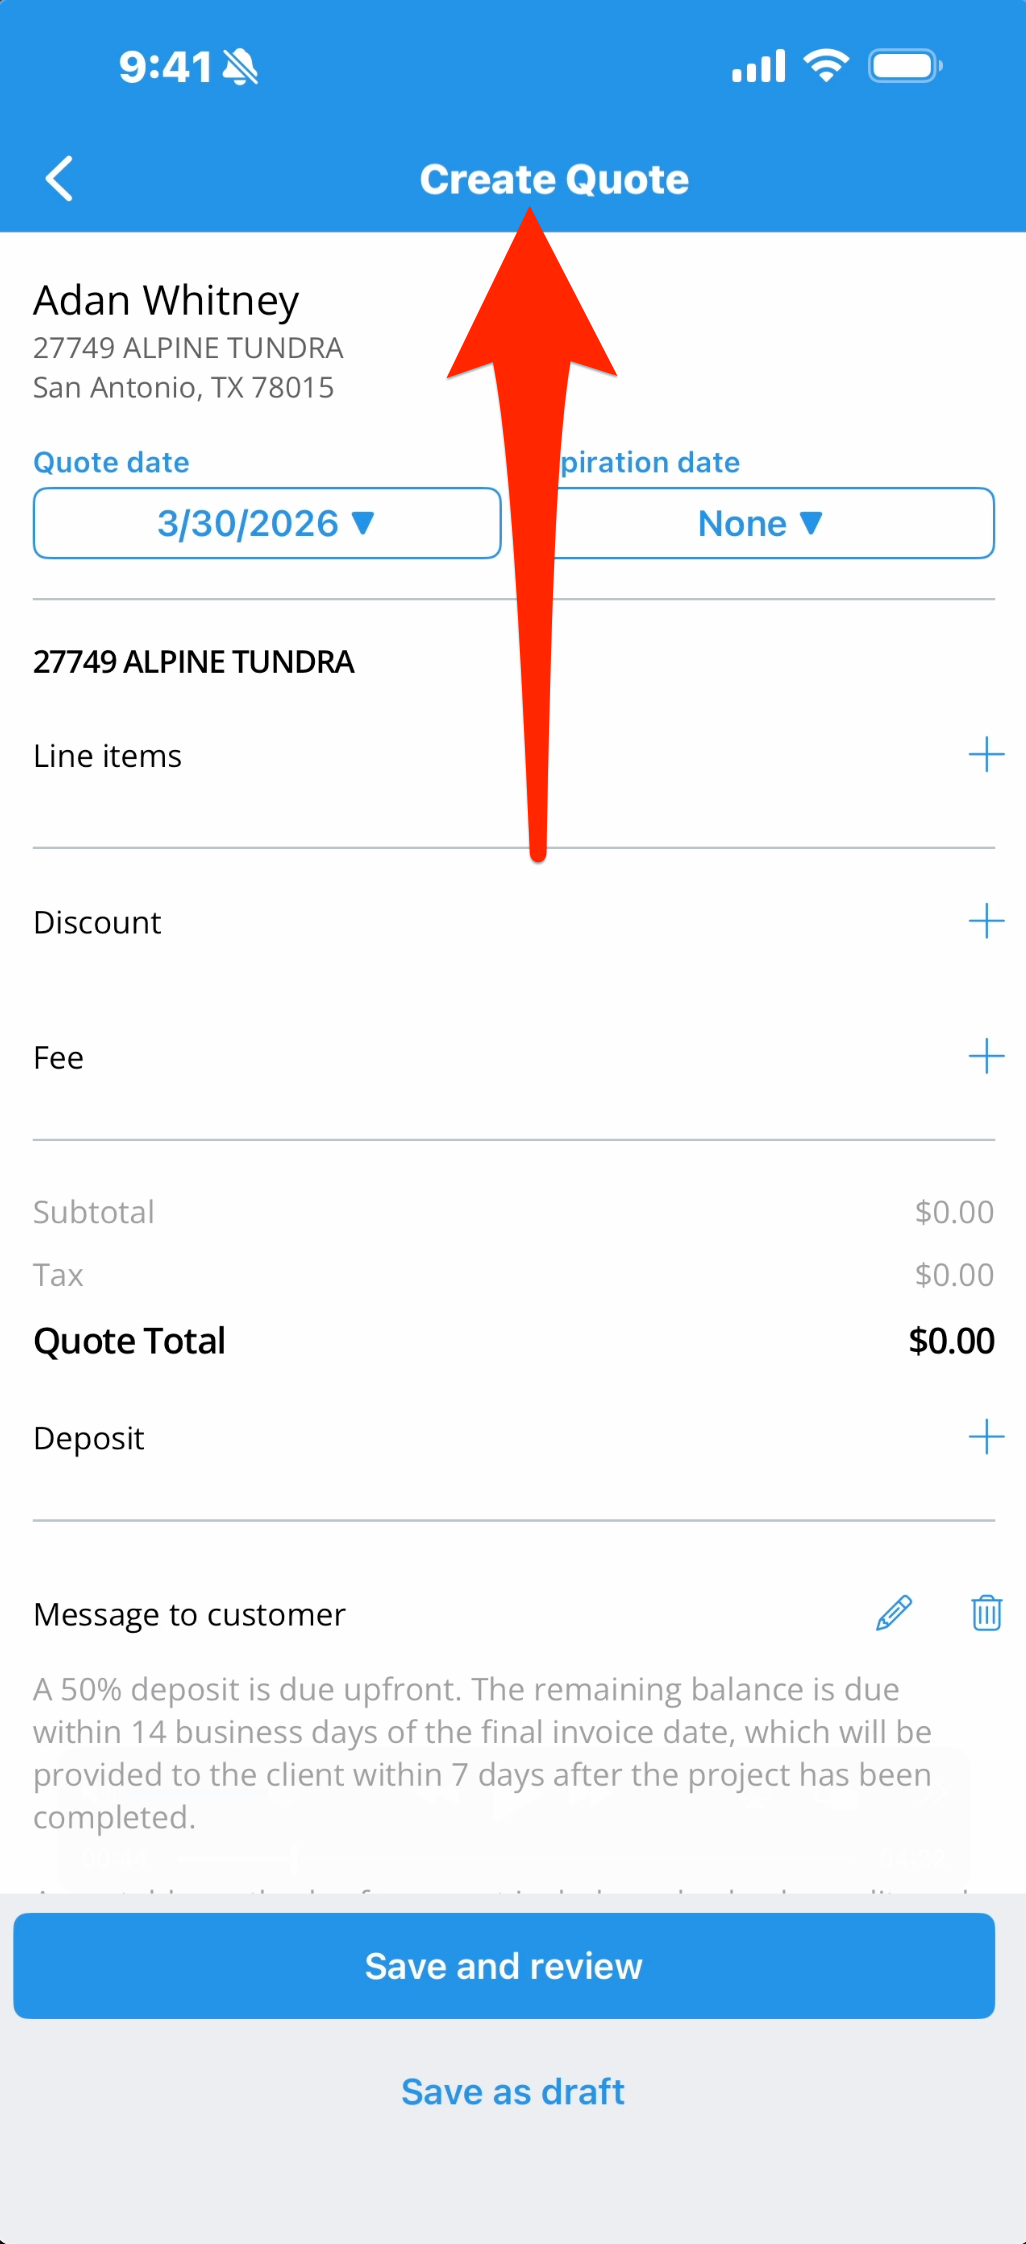
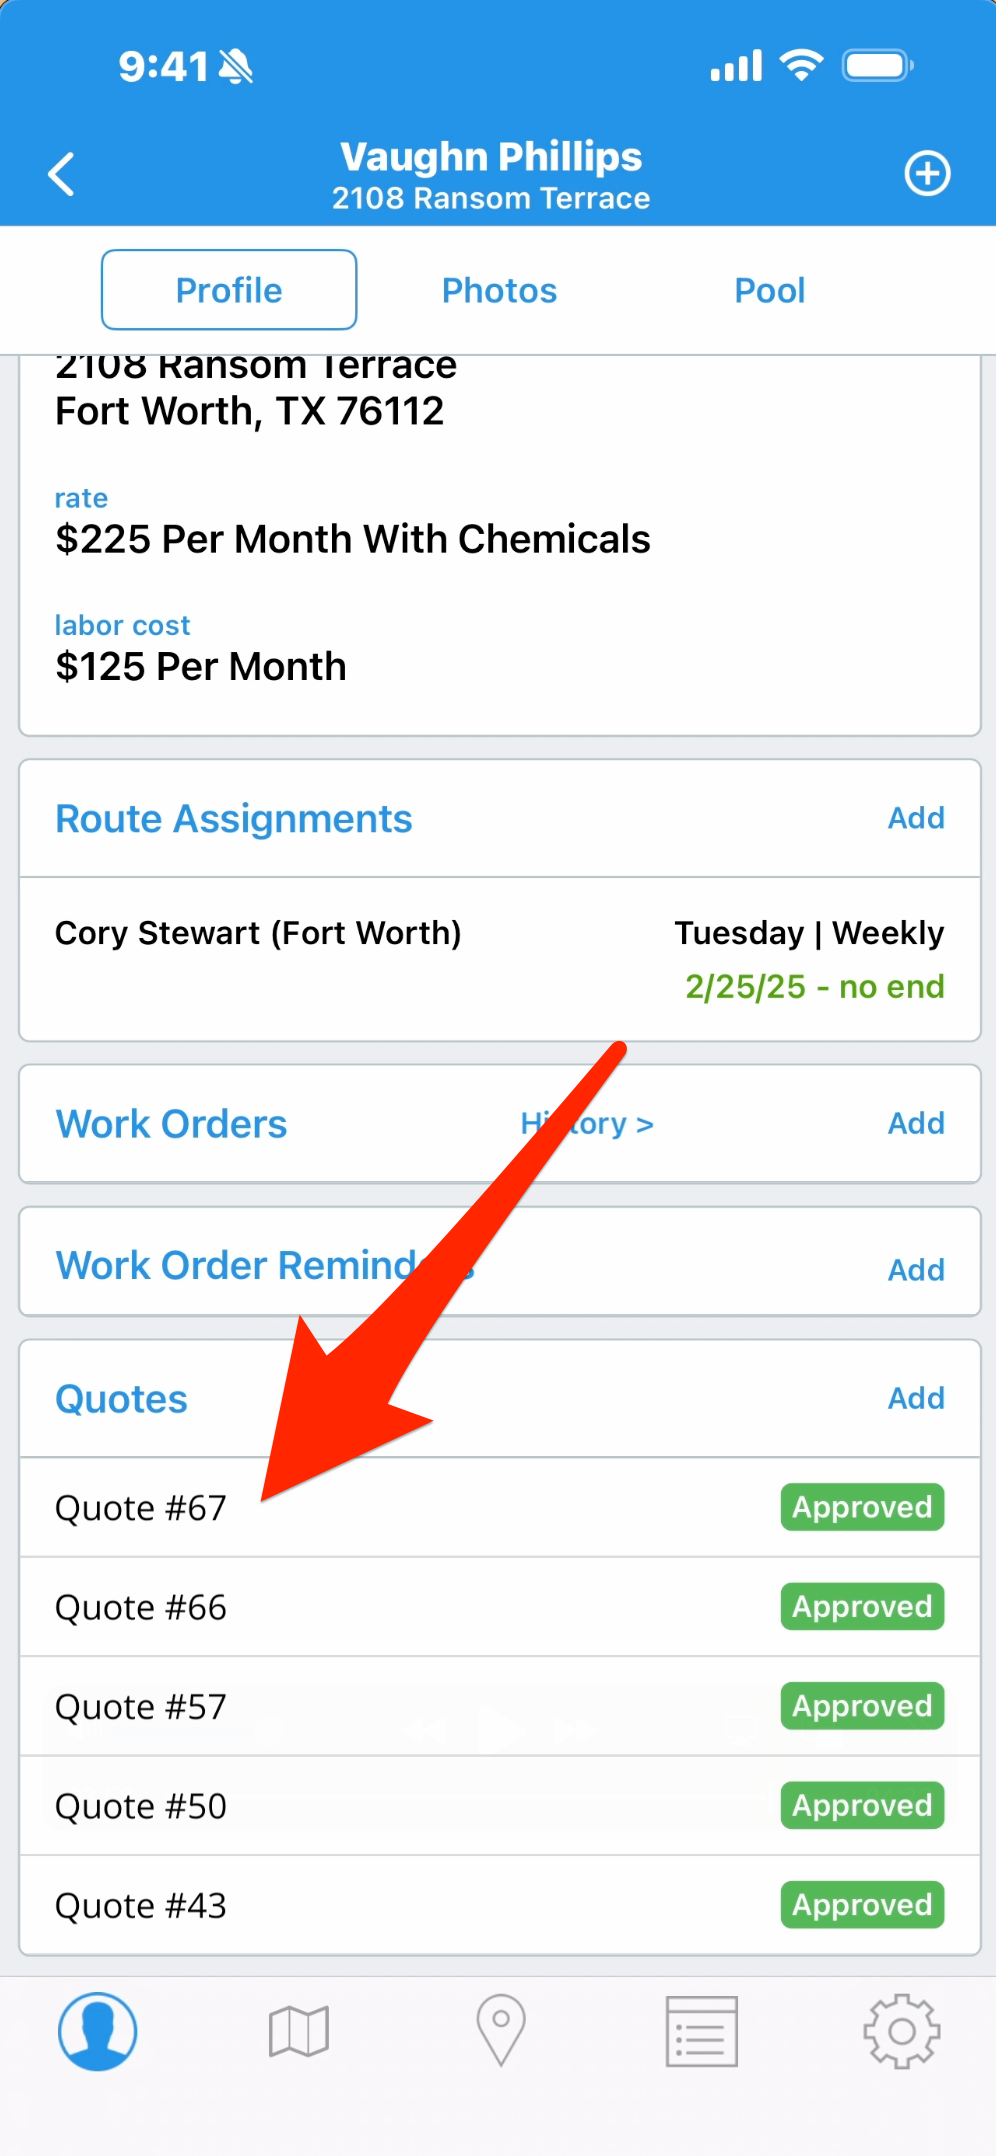
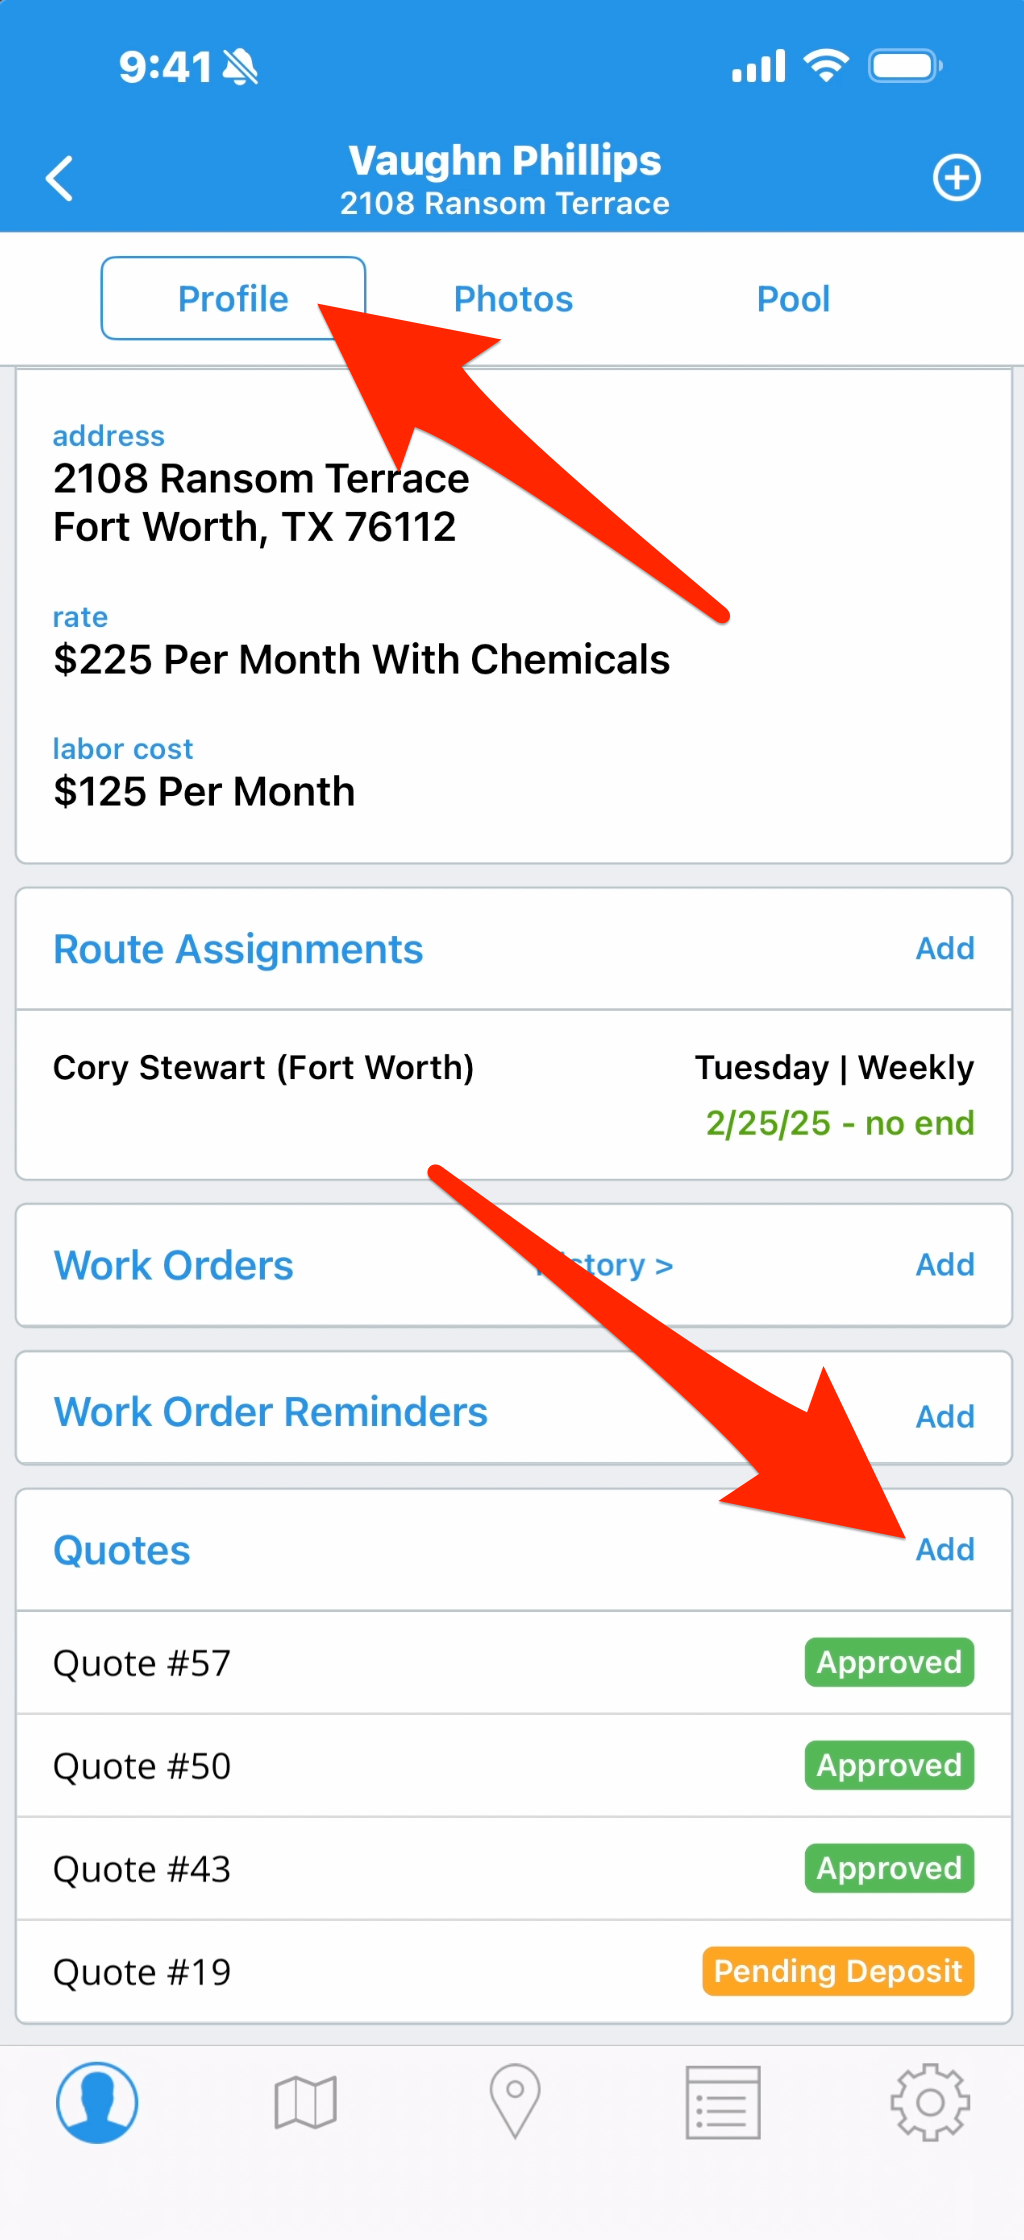
2. You can also go to a customer profile and find the Quotes box, where you’ll see current quotes and their status. To create a new one, tap Add, and because we’ve already chosen this customer’s profile it will take you to create the quote. The quote date defaults to the current date, but you can change it, and you can set an expiration date but you’re not required to.
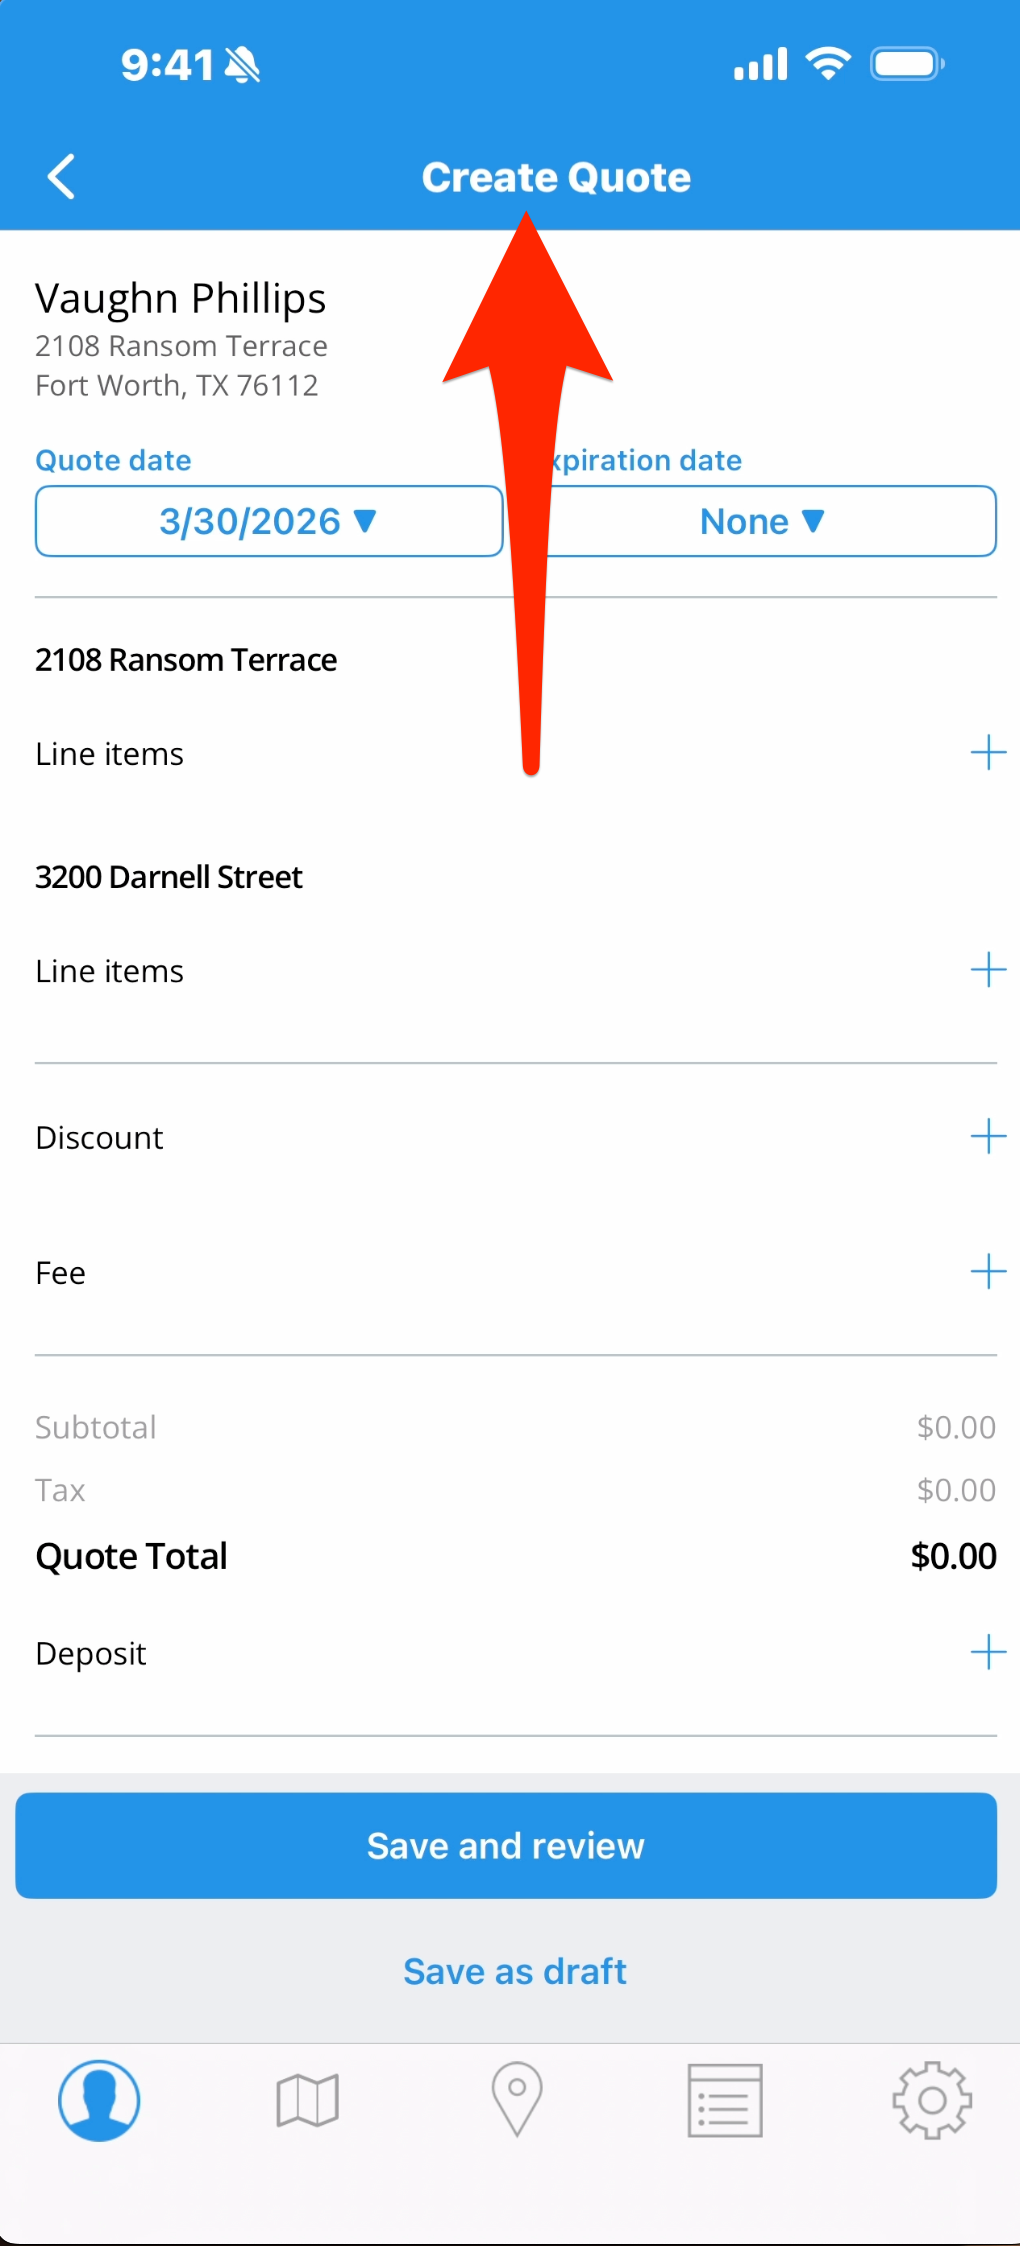
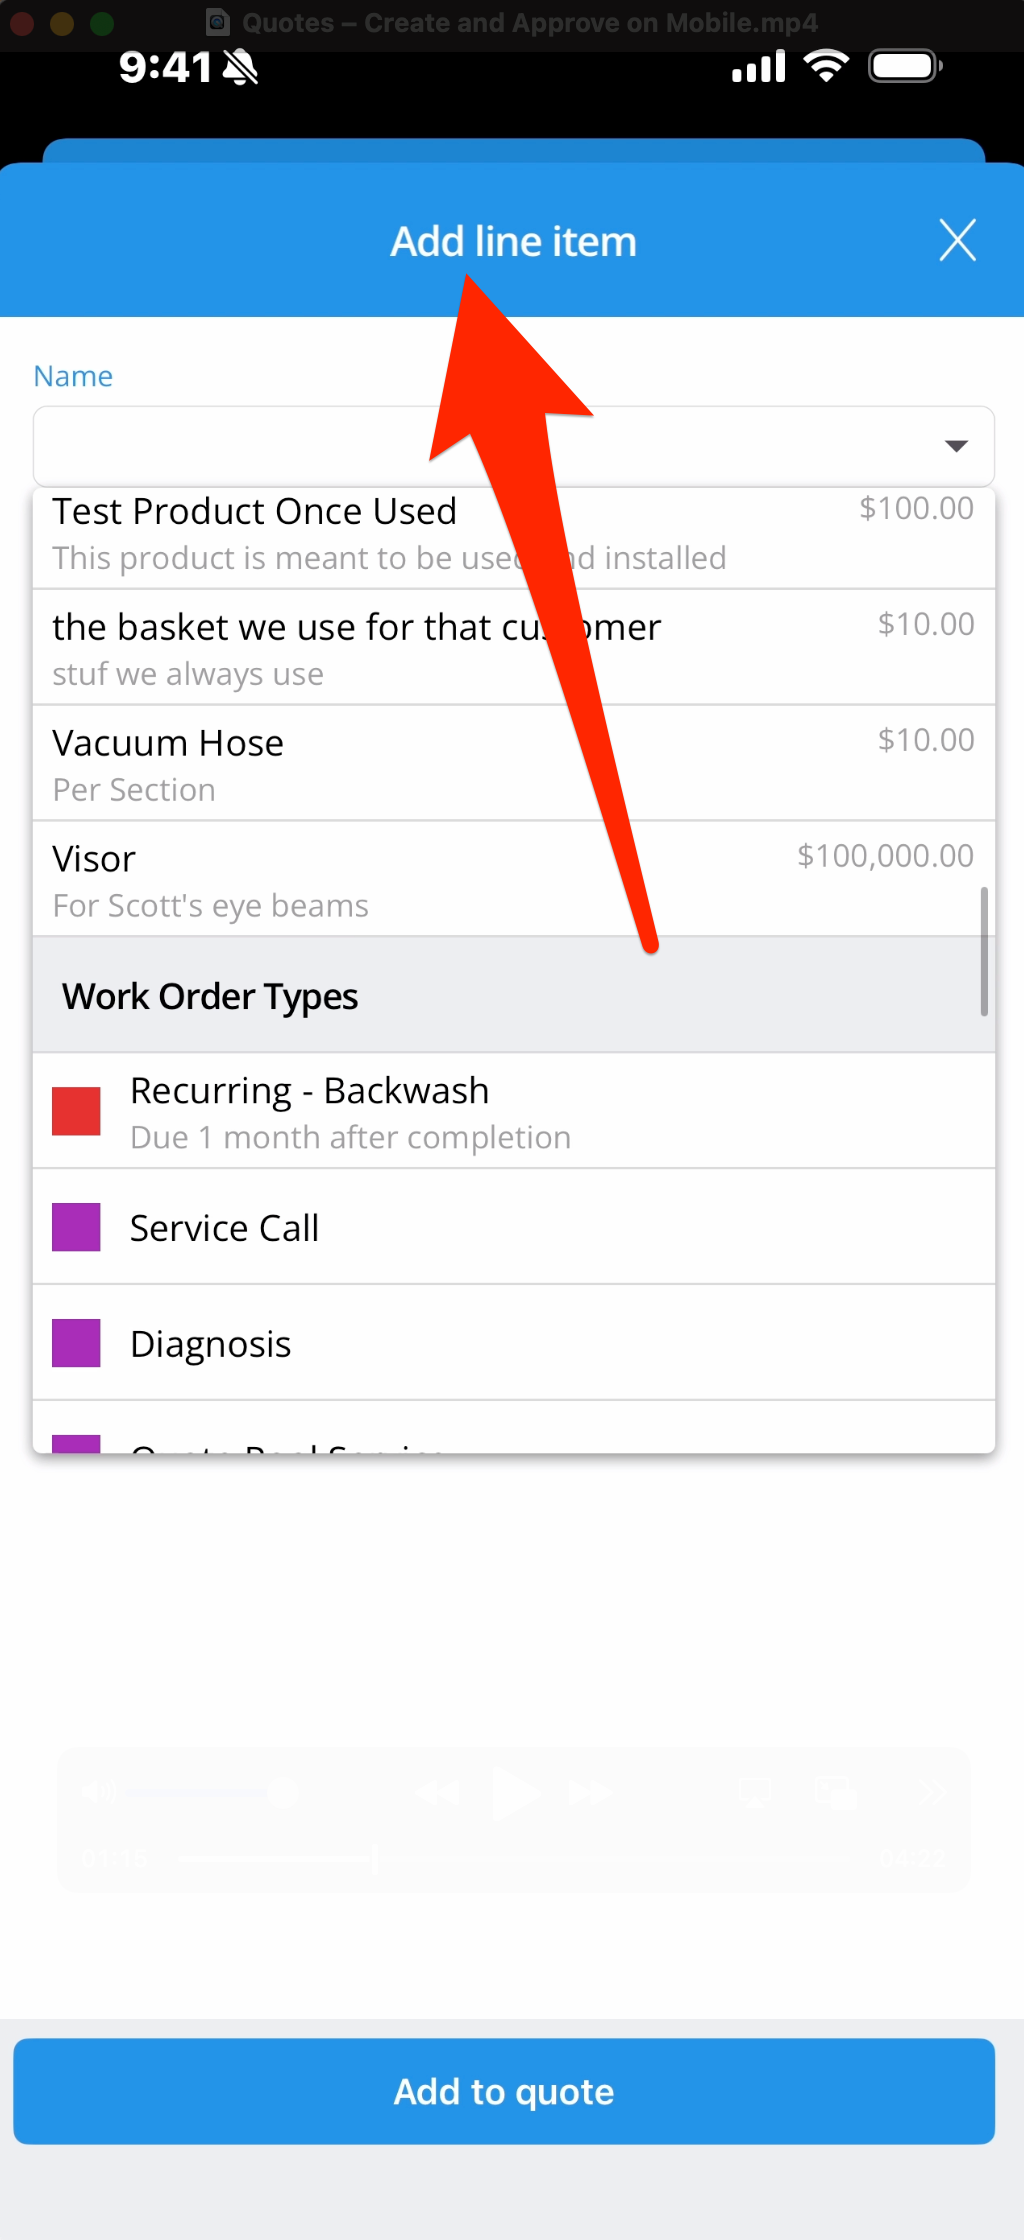
3. Choose at least one line item. The Name box gives access to Products and Work Order Types, or you can type anything you like in the box.
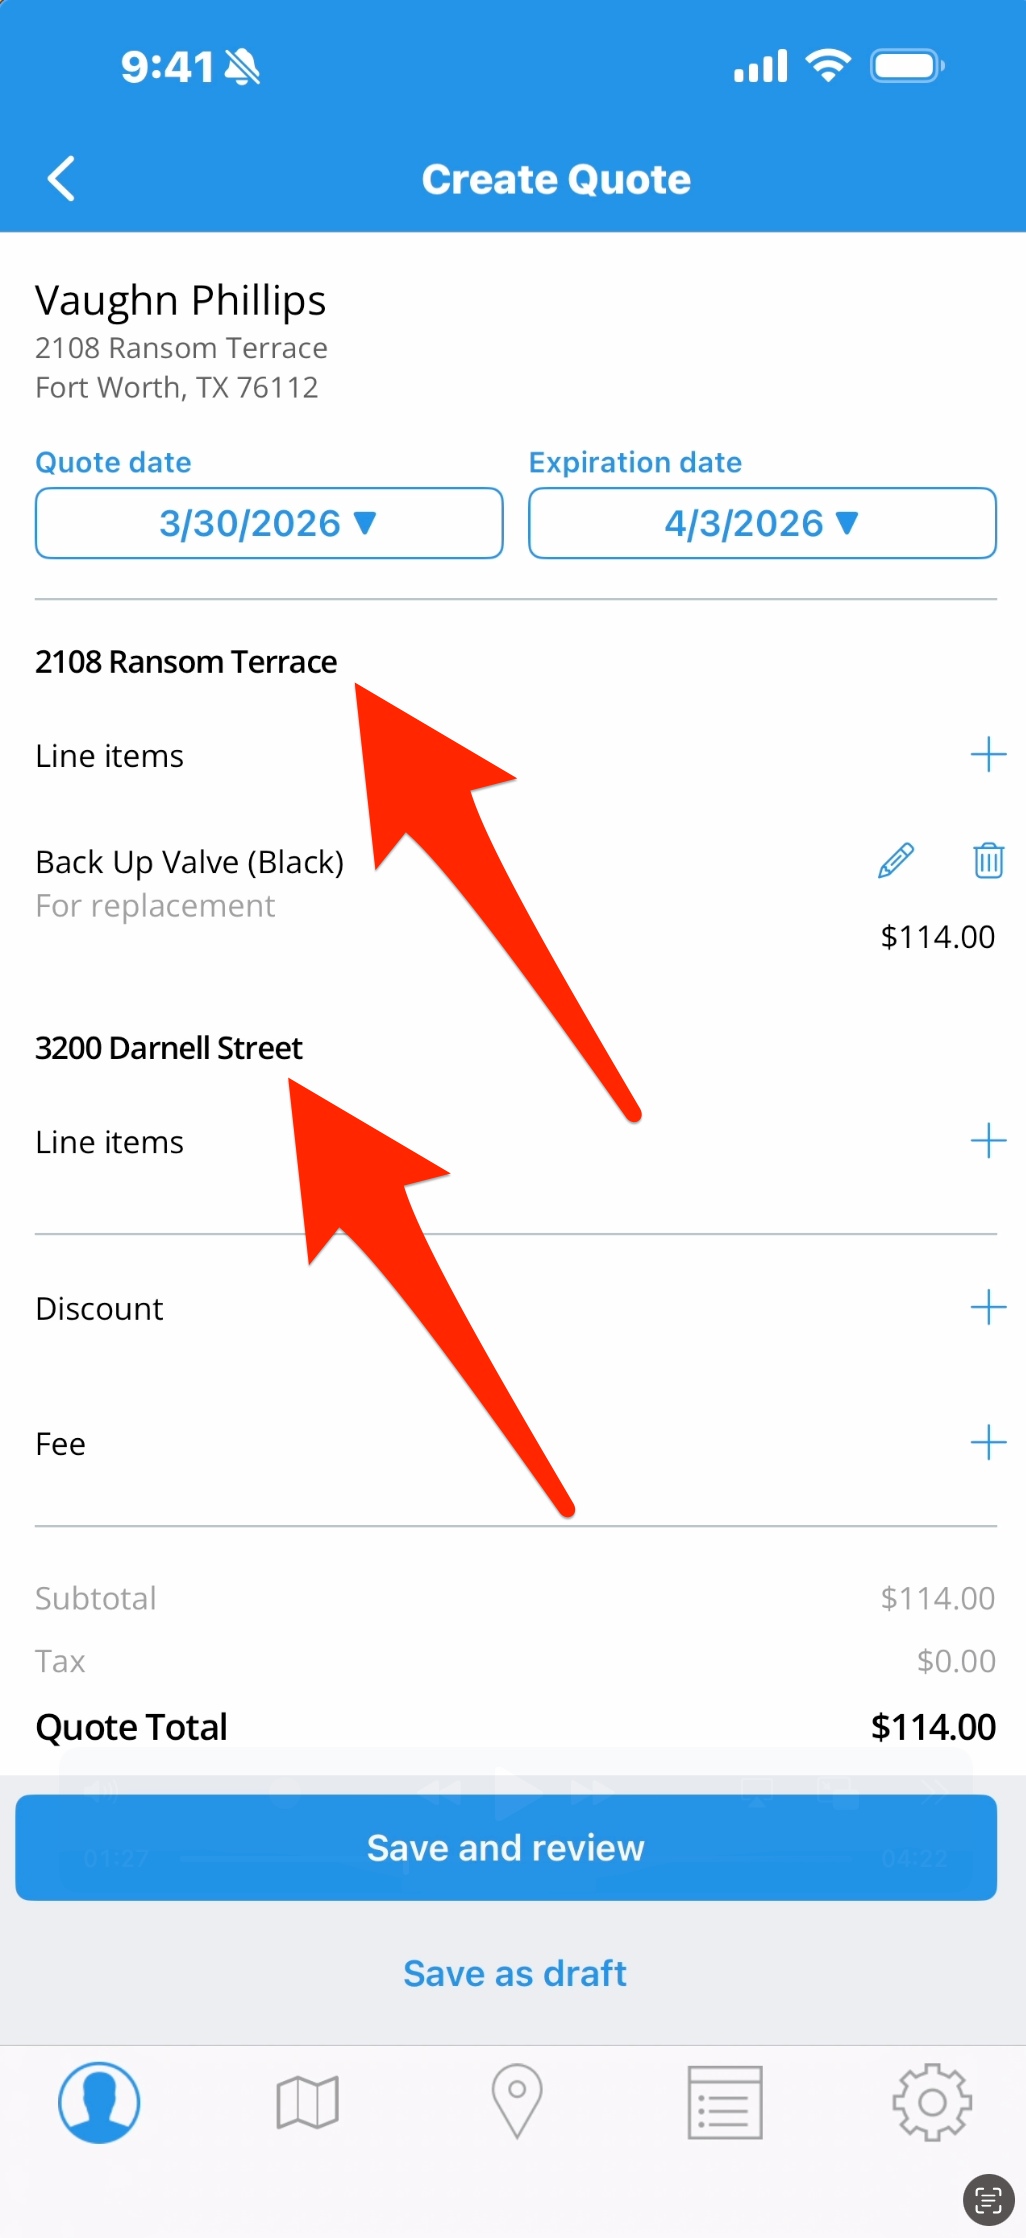
If the customer has multiple service locations, they will all be here automatically. Each location appears as its own section with its own Add Line Item buttons, so you’ll tap the button for the specific locations you’re working with for this quote. When you add a line item, it applies to that one specific location. For any locations not involved in this quote, leave them blank and they’ll be automatically excluded.
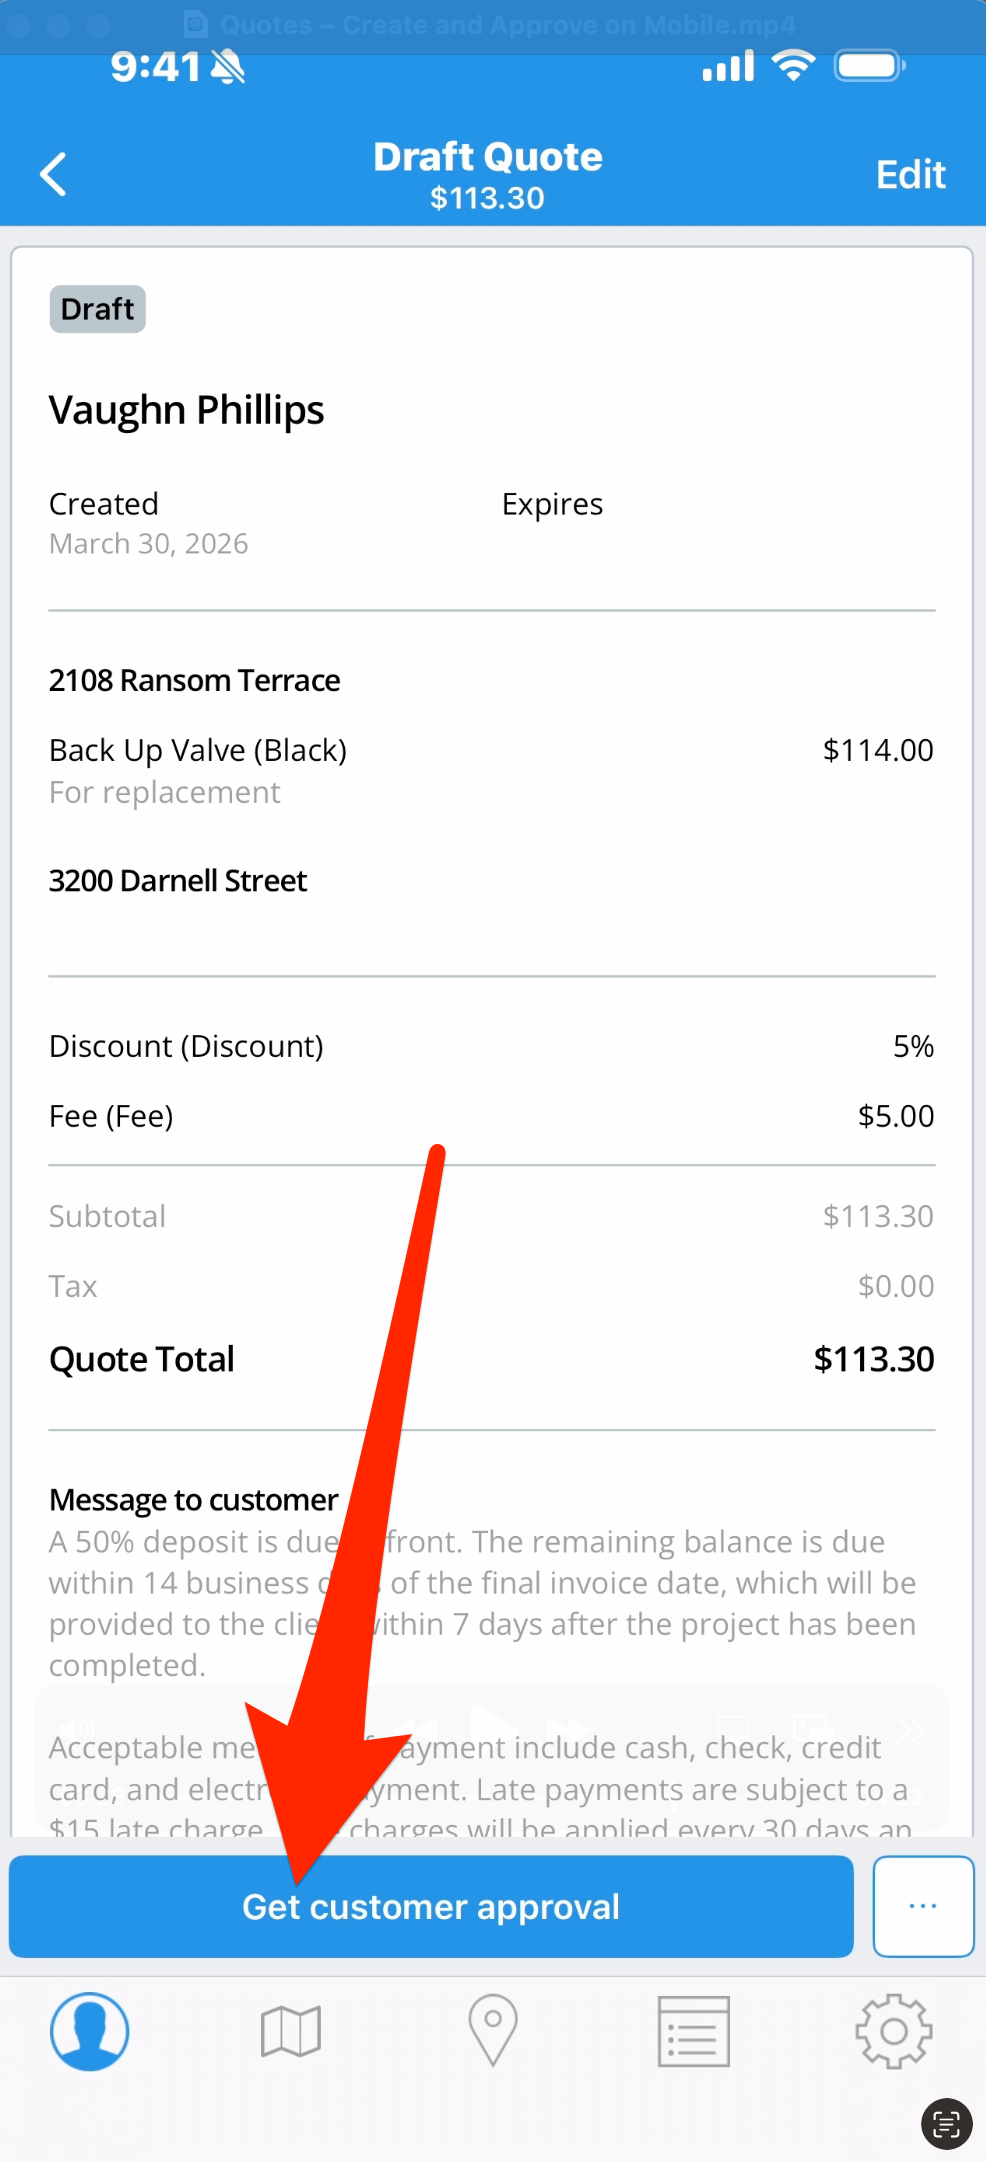
4. Indicate if there’s going to be a discount, a fee, or a required deposit. Then you can include a message to the customer. If you’ve already set up a default message, it will appear here.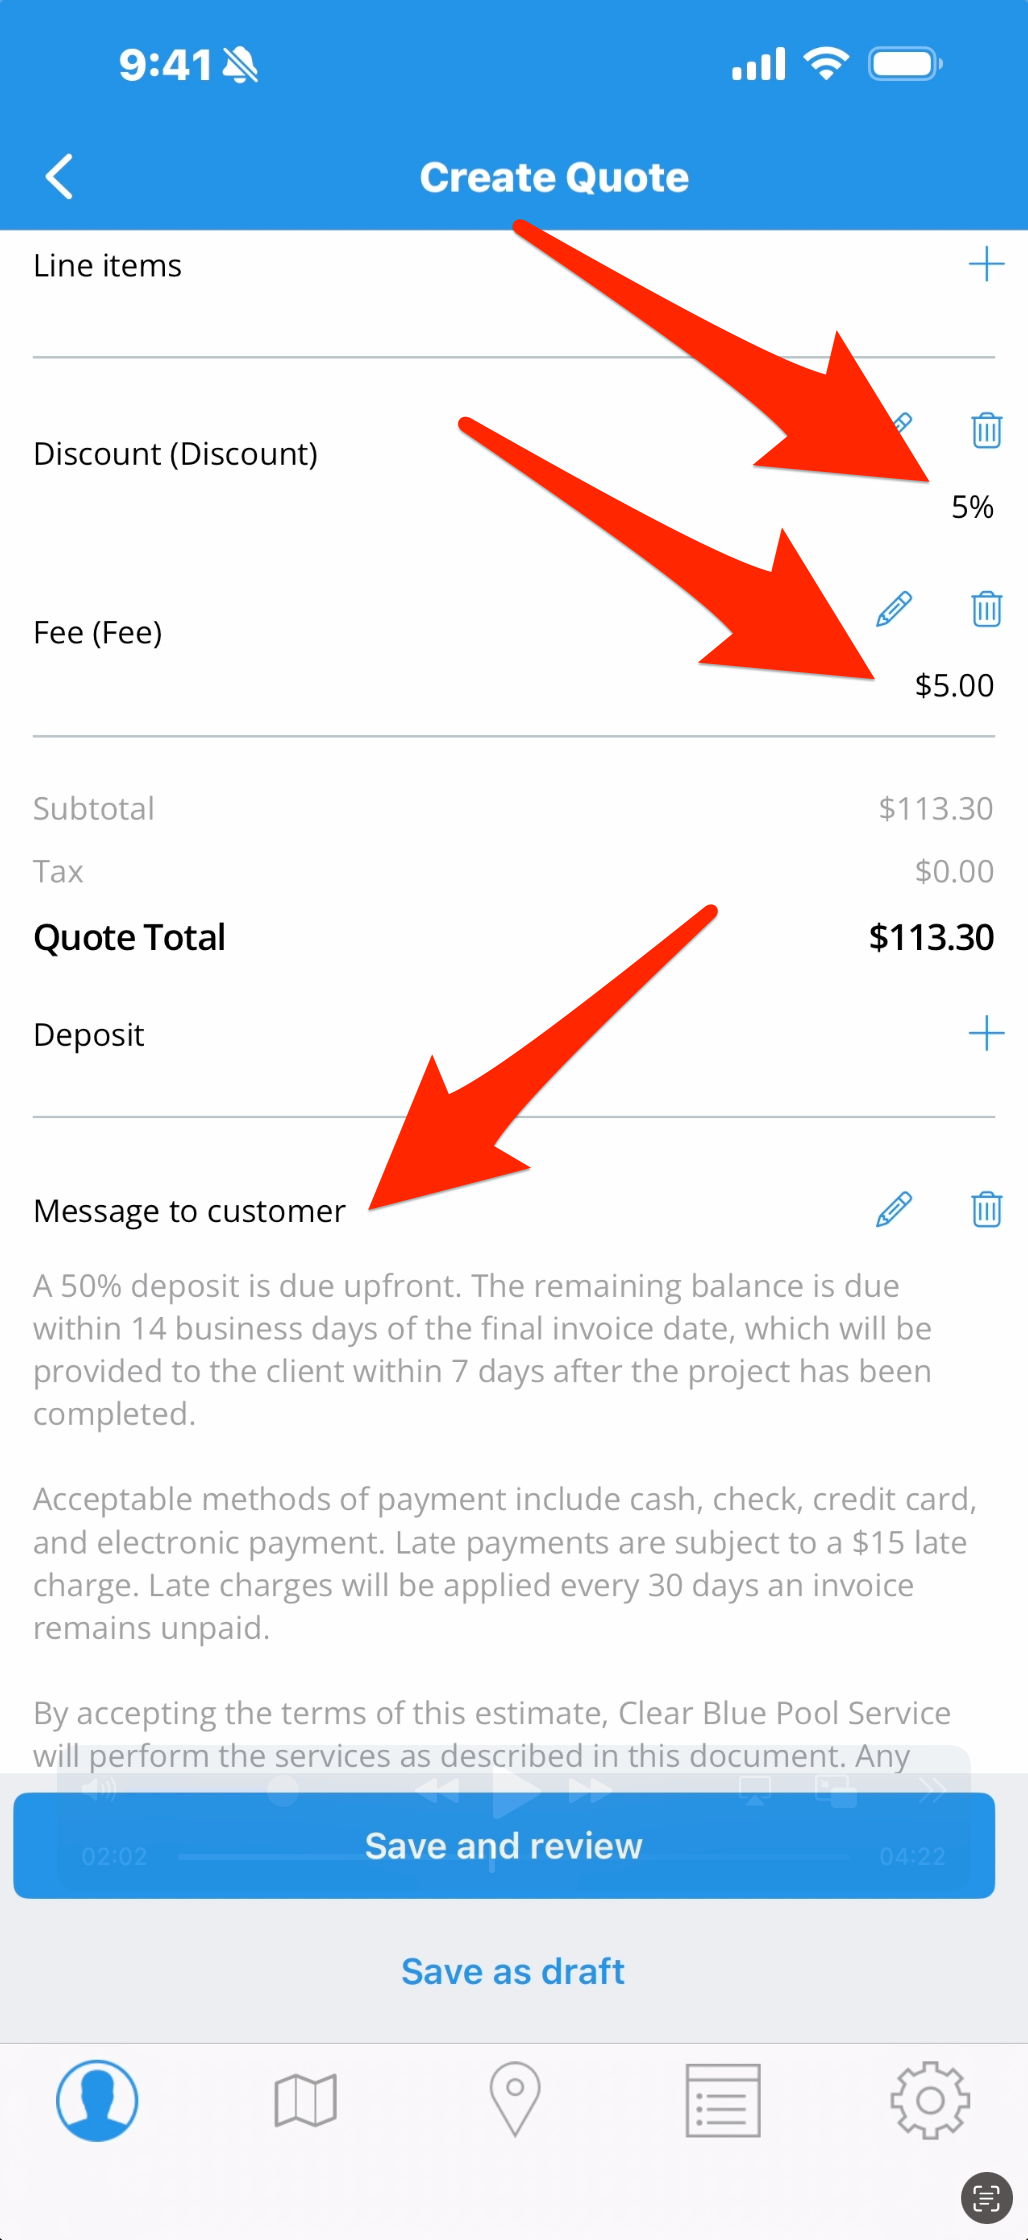
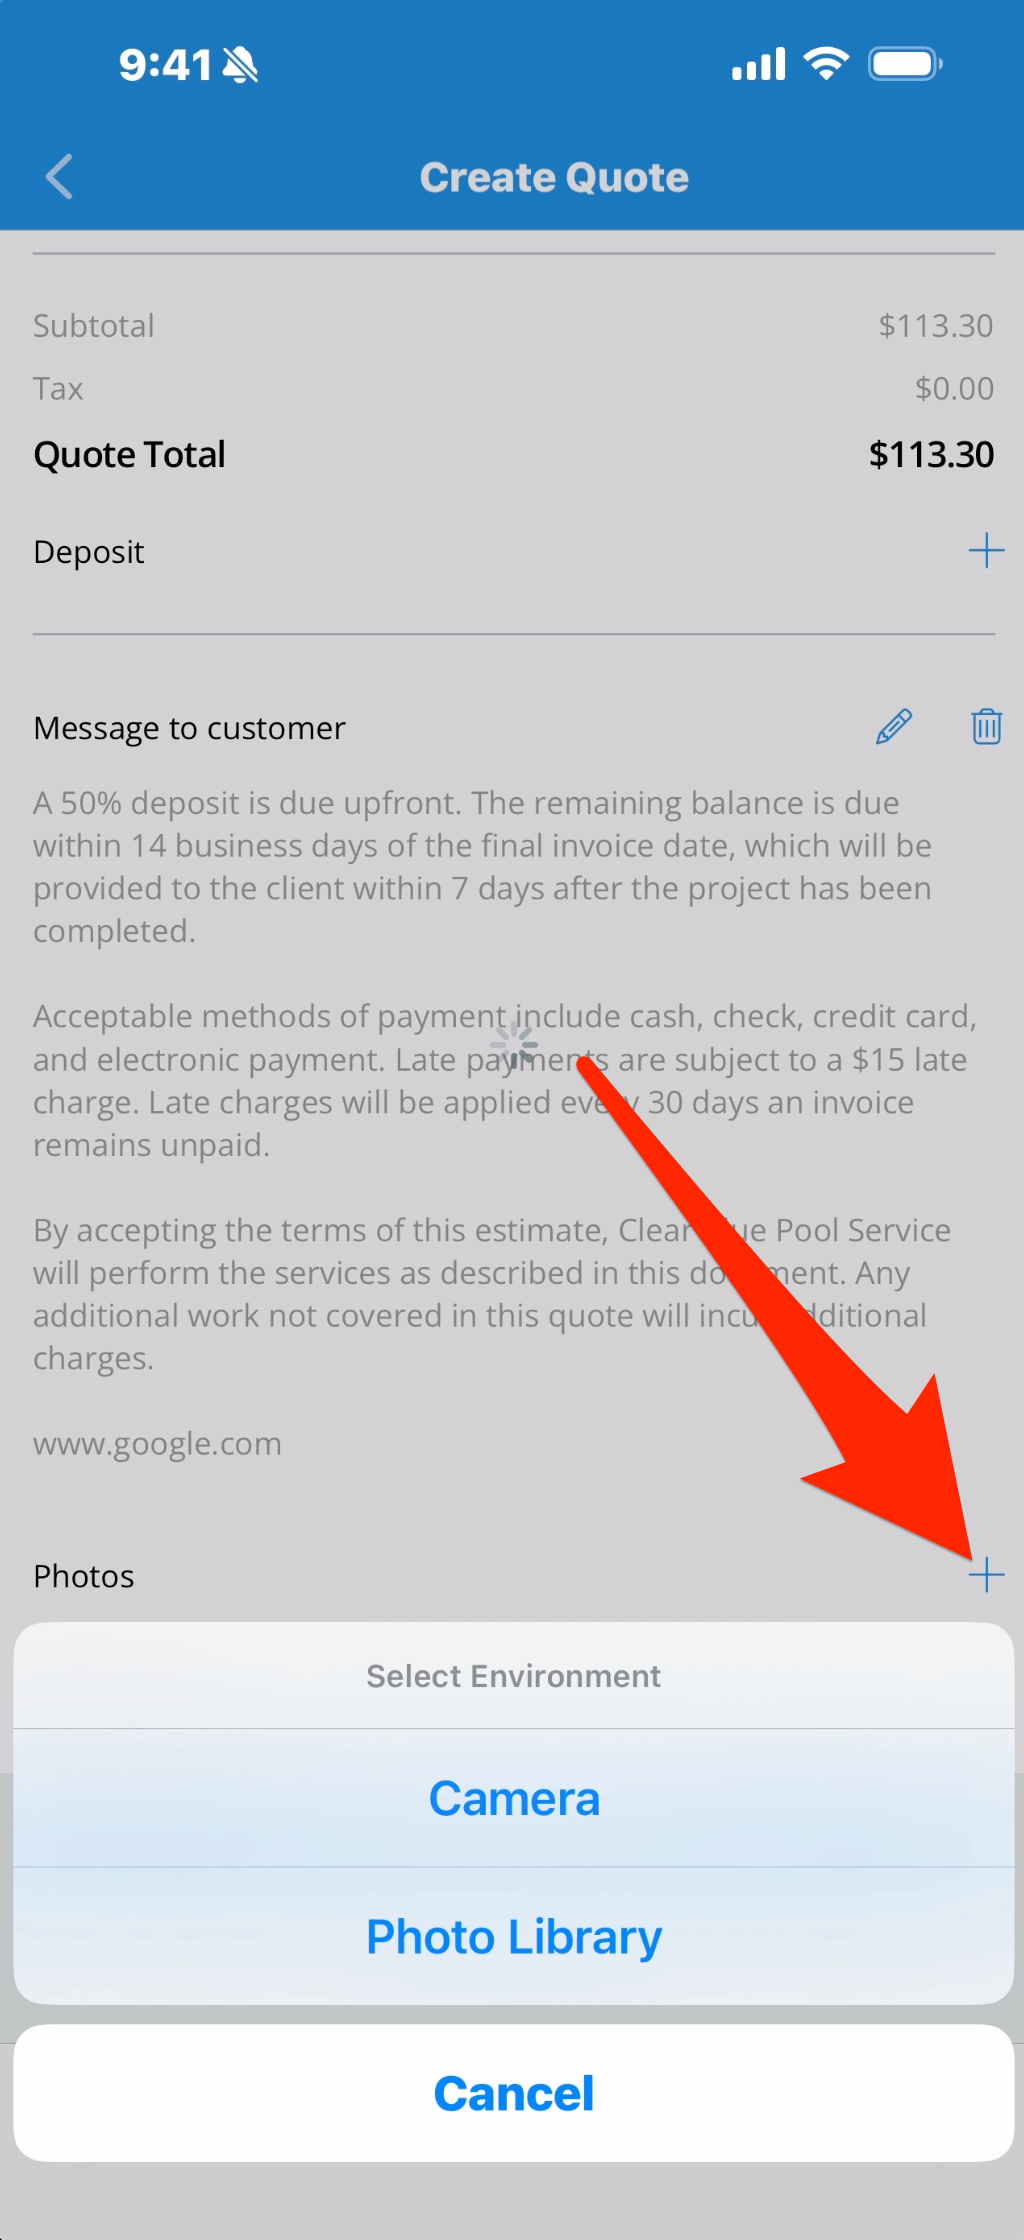
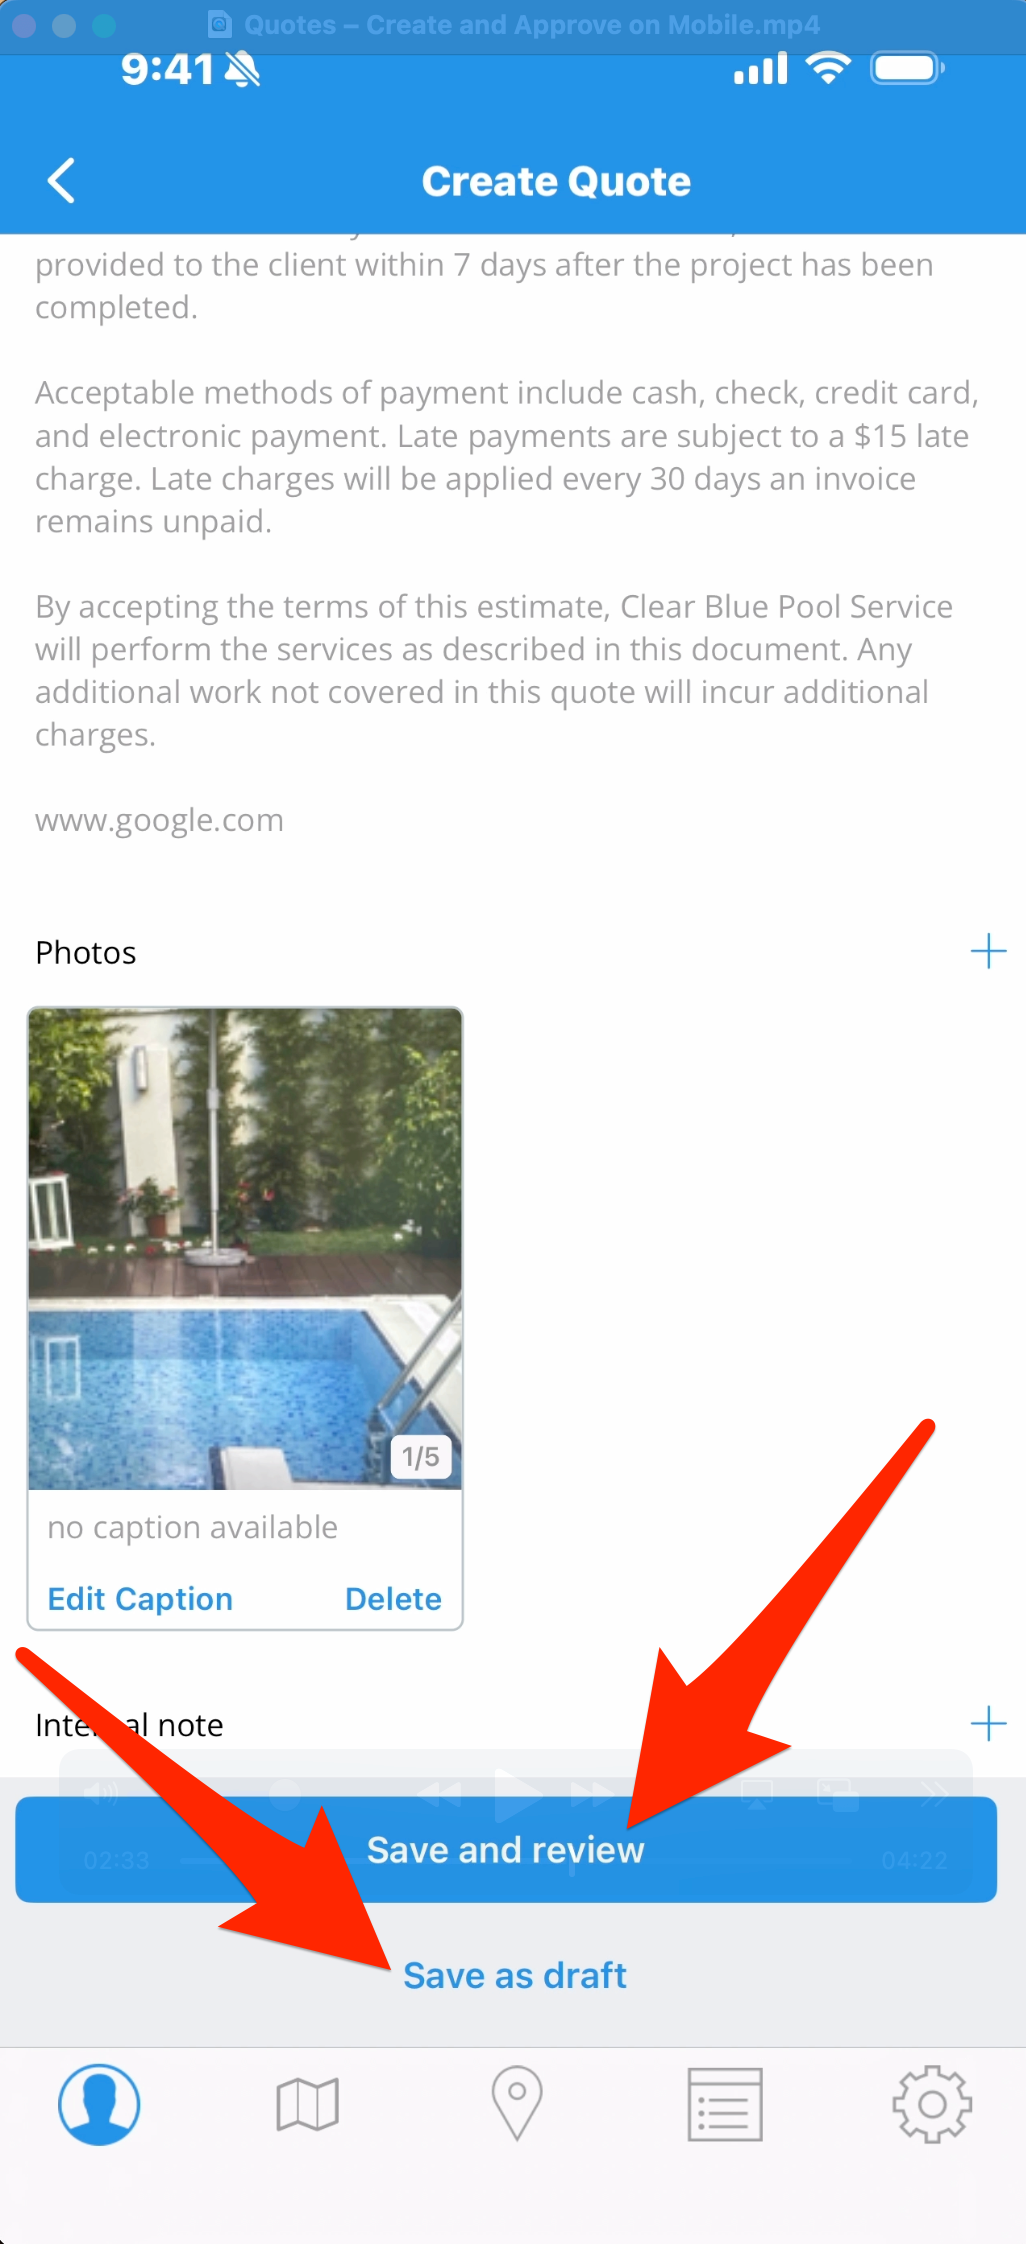
5. Tap the button next to photos and you’ll get a selector. This allows you to attach a photo live with your camera, or upload from your device photo library.
6. “Save as draft” is a good option for saving the quote even if you’re not quite ready to move forward. A draft can be edited before you move to the next steps. A draft will also upload to the cloud when your app syncs, so this draft could be managed on the website going forward, for instance if an admin takes over.
“Save and review” is a good option if you’re ready to move forward immediately. It will save the quote and take you directly to the approval screen.
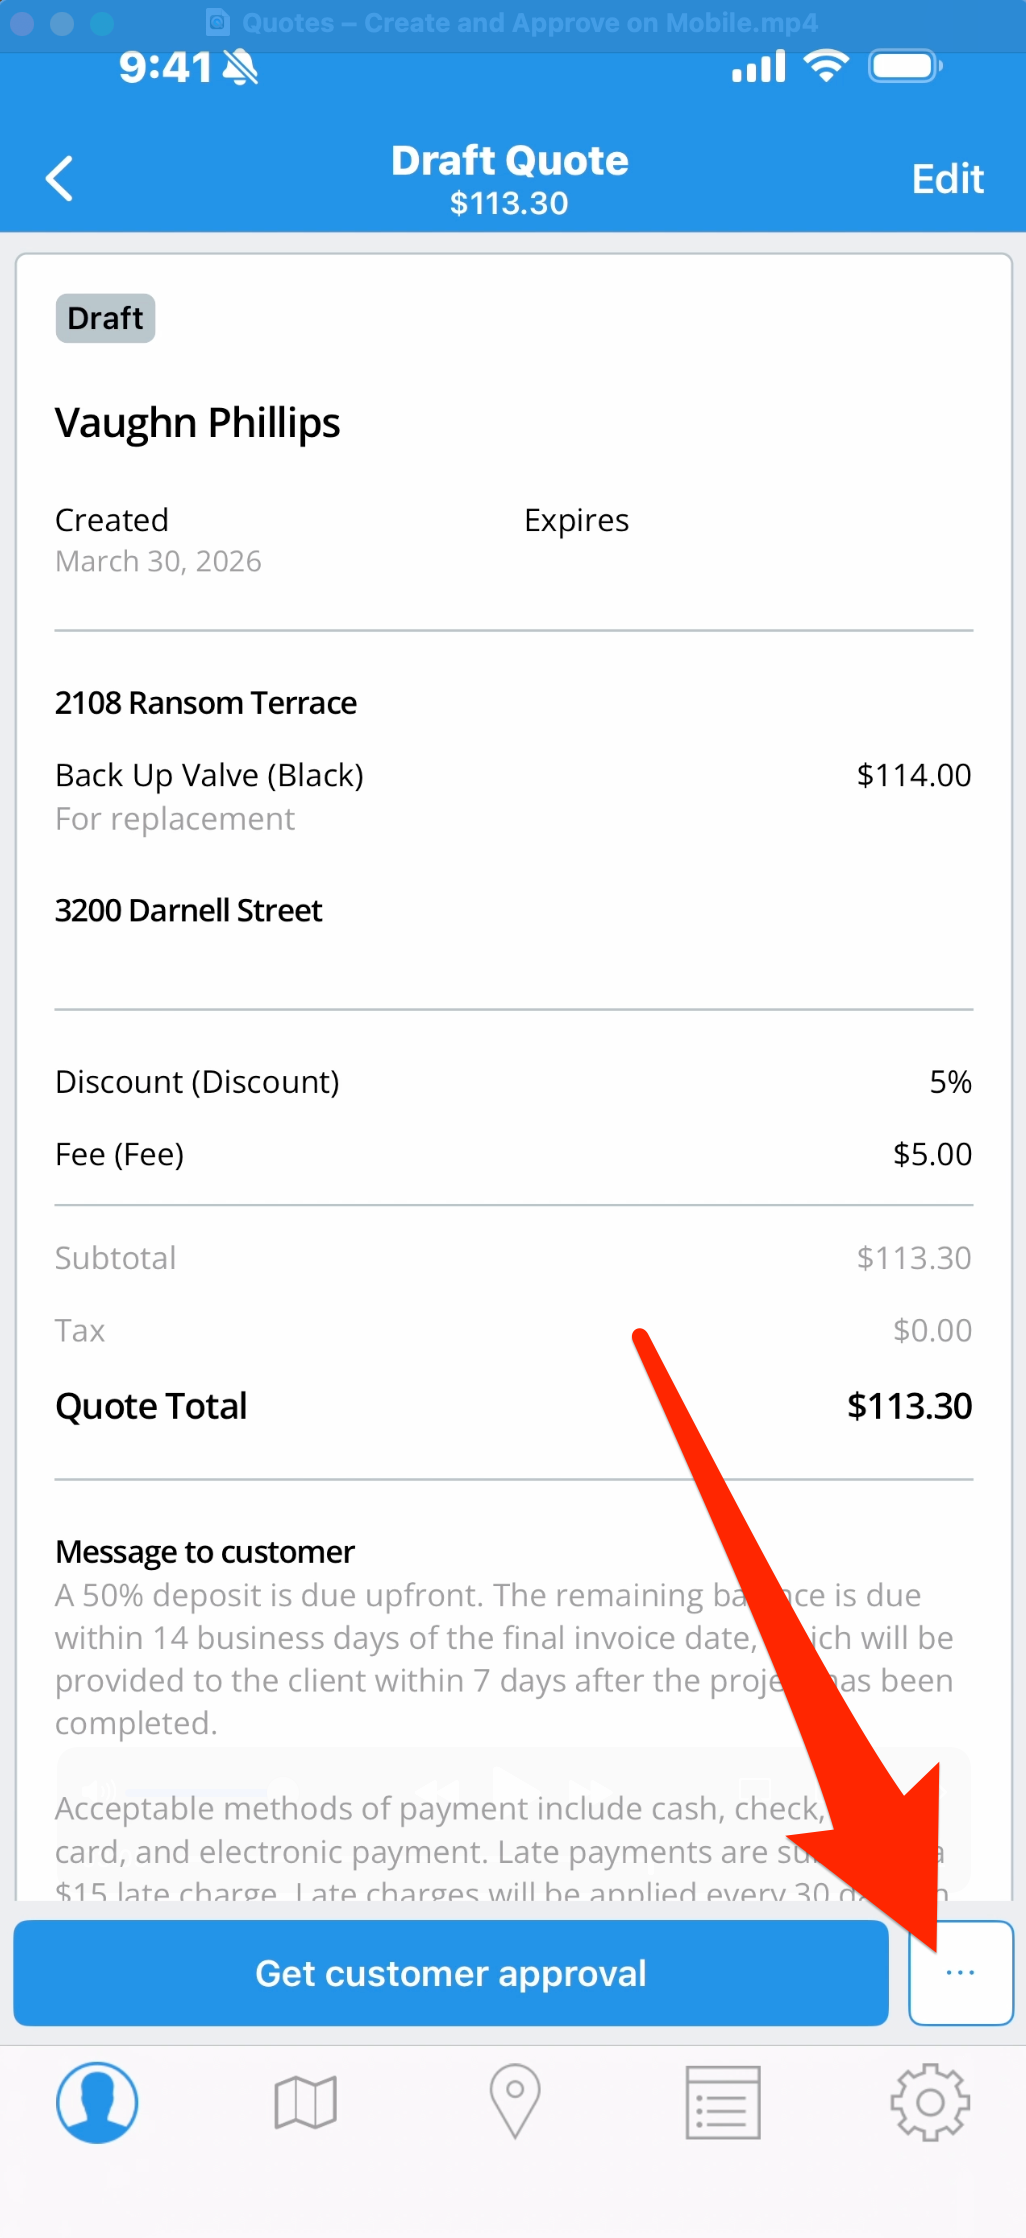
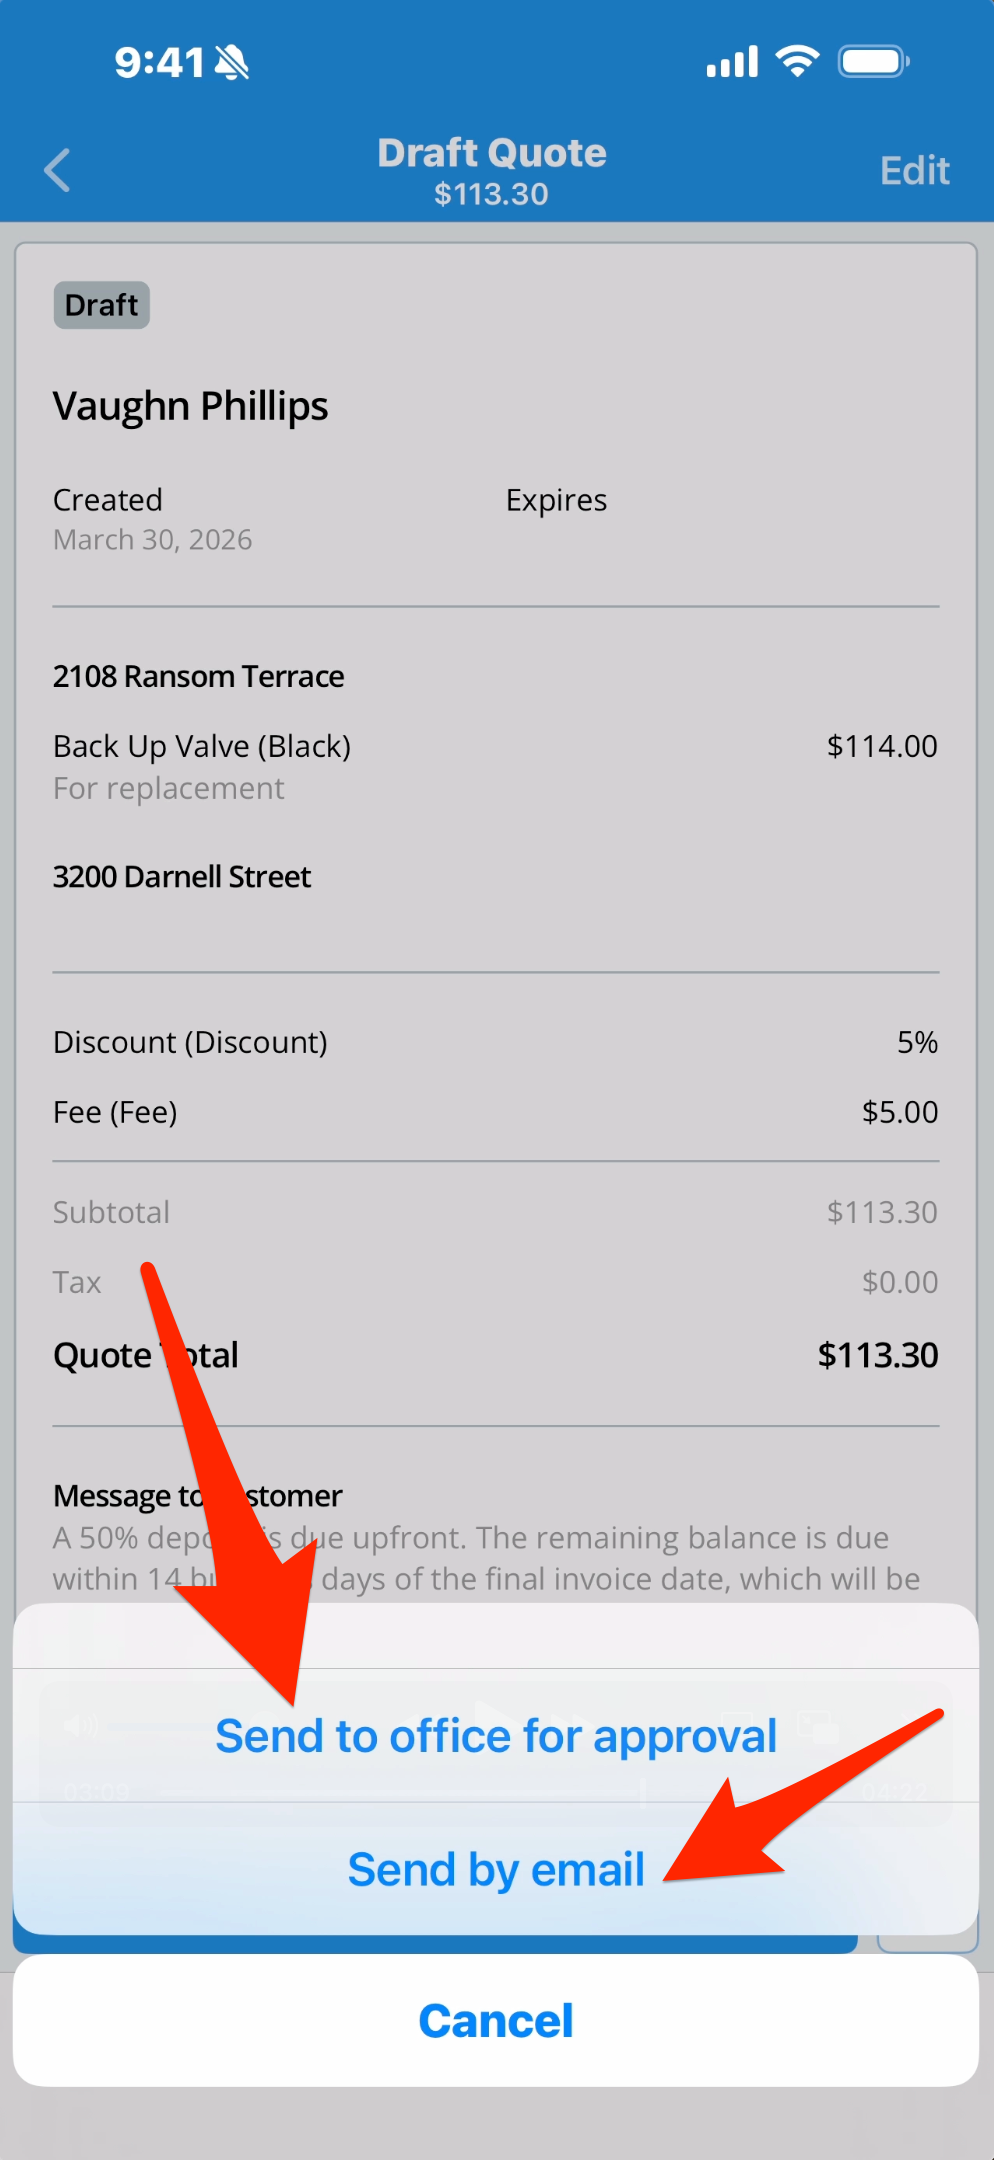
7. On the approval screen, tap the button with three dots and you’ll get a selector, which allows you to either send this quote to your office for approval, or email it to your customer for approval. We show you how quotes are managed on Skimmer’s website, and how customers provide email approval, in other tutorials.
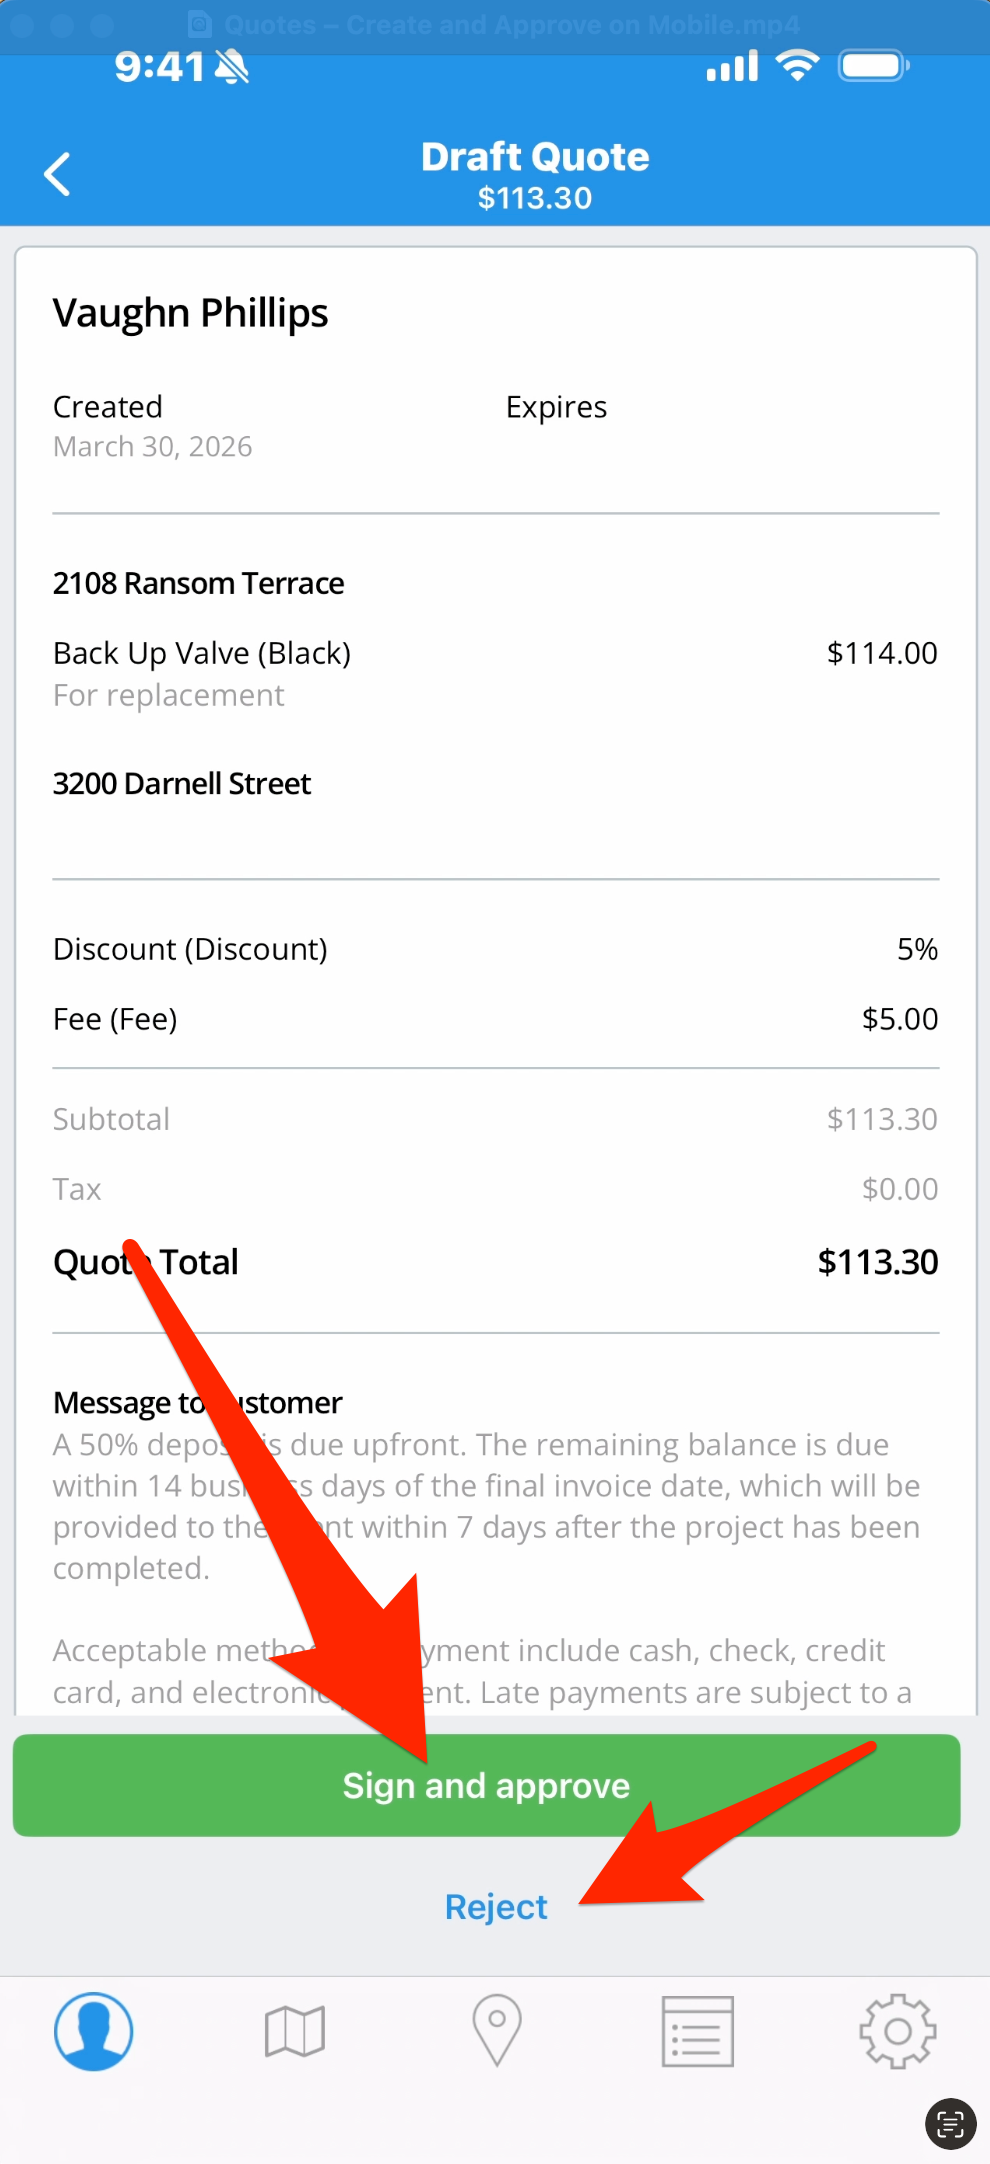
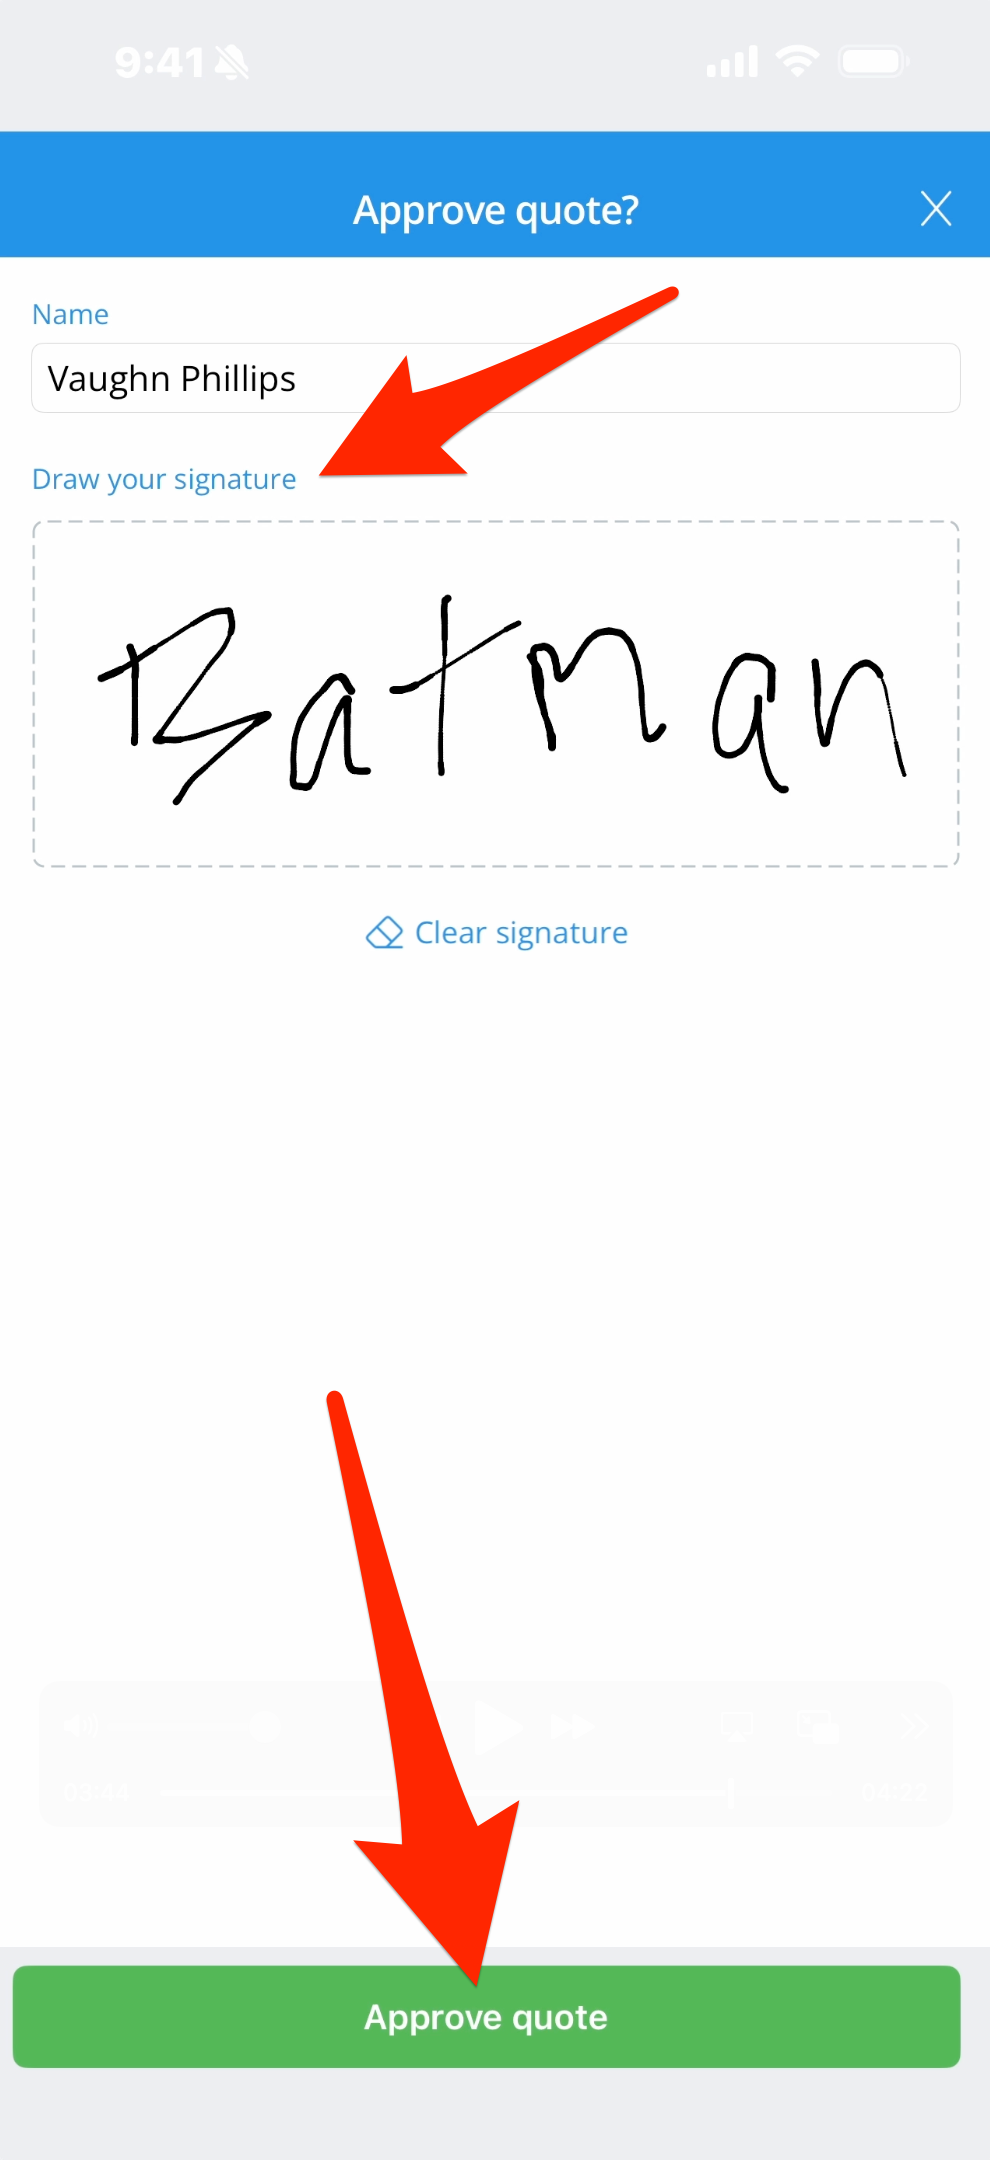
8. Tap “Get customer approval” and you’ll go to a screen where the customer can review the quote, and choose to Reject or Sign and Approve the quote. If they choose Sign and Approve, they’ll provide a digital signature and tap Approve Quote. Whatever’s done here will upload to the cloud, so office admins will see all photos and notes and approvals.
Only the rate, which is the customer-facing price, is visible. Cost is only visible on the website. You also cannot delete a quote on the app–that function is reserved for the website. Tags, quote duplication, and archived quotes are also website-only. On mobile, you can view the 5 most recent quotes per customer, which helps keep the app fast and responsive.